Accessing Workflow Reports
To access the new Workflow Reports, use the Menu Dropdown and select “Forms & Workflow.” Then, choose “Workflow Reports”.
.png "image(101).png")
When you select “Workflow Reports”, you will be presented with a menu showing Cash, Non-Cash, and Other Reports. Note that these Reports are in alphabetical order by section.
.png "image(127).png")
Select a report type from the list above to see the Workflow Reports screen below:

Filters
Before you run the report, you can filter by Date, Status, Fund, or Fund Type.
Date
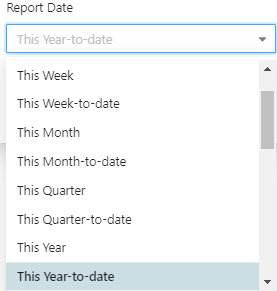
To filter by date, use the dropdown next to the Date Range.

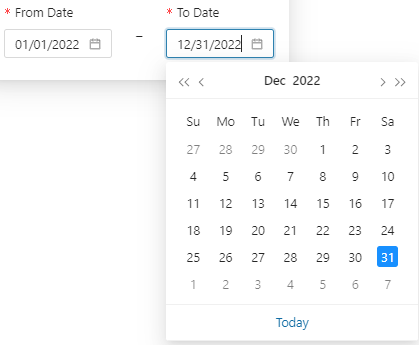
Then, you can use the preset date ranges or enter custom dates in the Date boxes:
You can also either use free type or the calendar to enter a custom date.
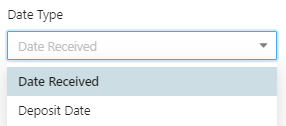
Depending on the Workflow, you can filter by “Date Type.” For this Report, the options are “Date Received” and “Deposit Date”:
Status
You can also choose to filter by Status. This will allow you to select a combination of all Statuses available for the transaction.
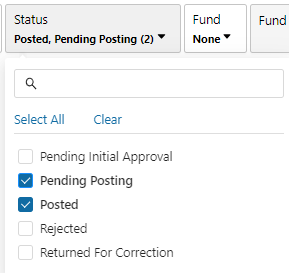
Use the “Select All” or “Clear” buttons to reset your selections.
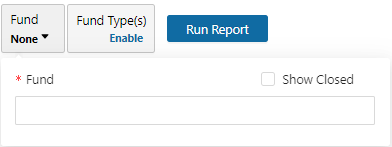
Fund
To create a Workflow Report for a specific Fund, use the search function to either search for the Fund name or Fund number.
You may have to enter multiple characters to begin seeing results.
.png "image(110).png")
Once your fund appears, click on it to filter the Workflow.
.png "image(111).png")
Note that the default setting is to only return open funds, but you can check the “Show Closed” box to show both open and closed funds.
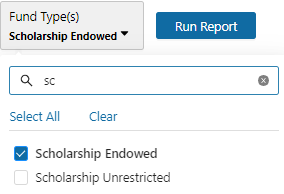
Fund Type
Use the dropdown to filter by Fund Type.
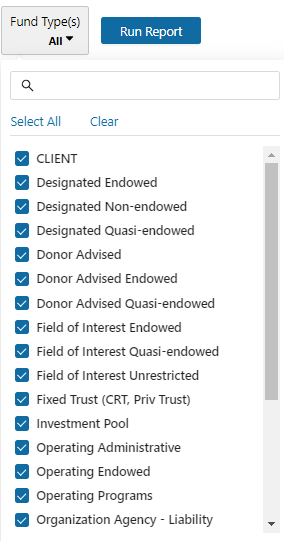
To select one Fund Type, use the “Clear” button and then search for the desired Fund Type. The search box will return all potential matches.
Creating Reports
Once you have applied all desired filters, run the report. For example, you could run the report for a specific fund, as demonstrated below.
.png "image(108).png")
Please note that Reports will only show a maximum of 500 transactions. If your report produces more than 500 transactions, export the Report to Excel.
.png "image(113).png")
To view the data in Excel, change the Excel sheet from “Header Information” to “Sheet1.”
.png "image(102).png")
Entries in Excel will be sorted by Status (Pending Initial Approval, Pending Posting, etc.). The Excel Report will display the number of transactions and Amount total for each Status.
.png "image(103).png")
Alternatively, you can add additional filters to shrink the number of transactions returned from your search and view all transactions on the screen. The easiest way to do so is to change the Date Range, but you can use any filter.
.png "image(114).png")
Editing Columns
Another new functionality of Workflow Reports v2 is the ability to edit the Columns displayed in the report. To do so, click the pen icon in the top right corner.
.png "image(121).png")
This will take you to the Editing Screen:
.png "image(115).png")
Click the dropdown on the left to view and change the columns on the screen. The first three columns, “ID,” “Status,” and “Next Status,” are unable to be removed or reordered, shown by the lock icon to the left of each name.
.png "image(116).png")
The list on the left shows all possible columns, with the eye icon denoting whether the column currently appears in the table. The list on the right shows all columns currently in the table, where the order going downwards is equivalent to the order in the table as read from left to right. To reorder how the columns appear on the report, drag the column name to your desired place.
For example, to put Date Effective next to Date Received, drag the Date Effective column upwards:
.png "image(120).png")
Then, your table will update so that the Date Received and Date Effective columns are next to each other:
.png "image(119).png")
You can also show or hide a column using either the eye icon or the X button. For example, to show Deposit Date, click the eye icon:
.png "image(123).png")
This will cause the Deposit Date column to appear both in the list of columns and the table itself:
.png "image(124).png")
.png "image(125).png")
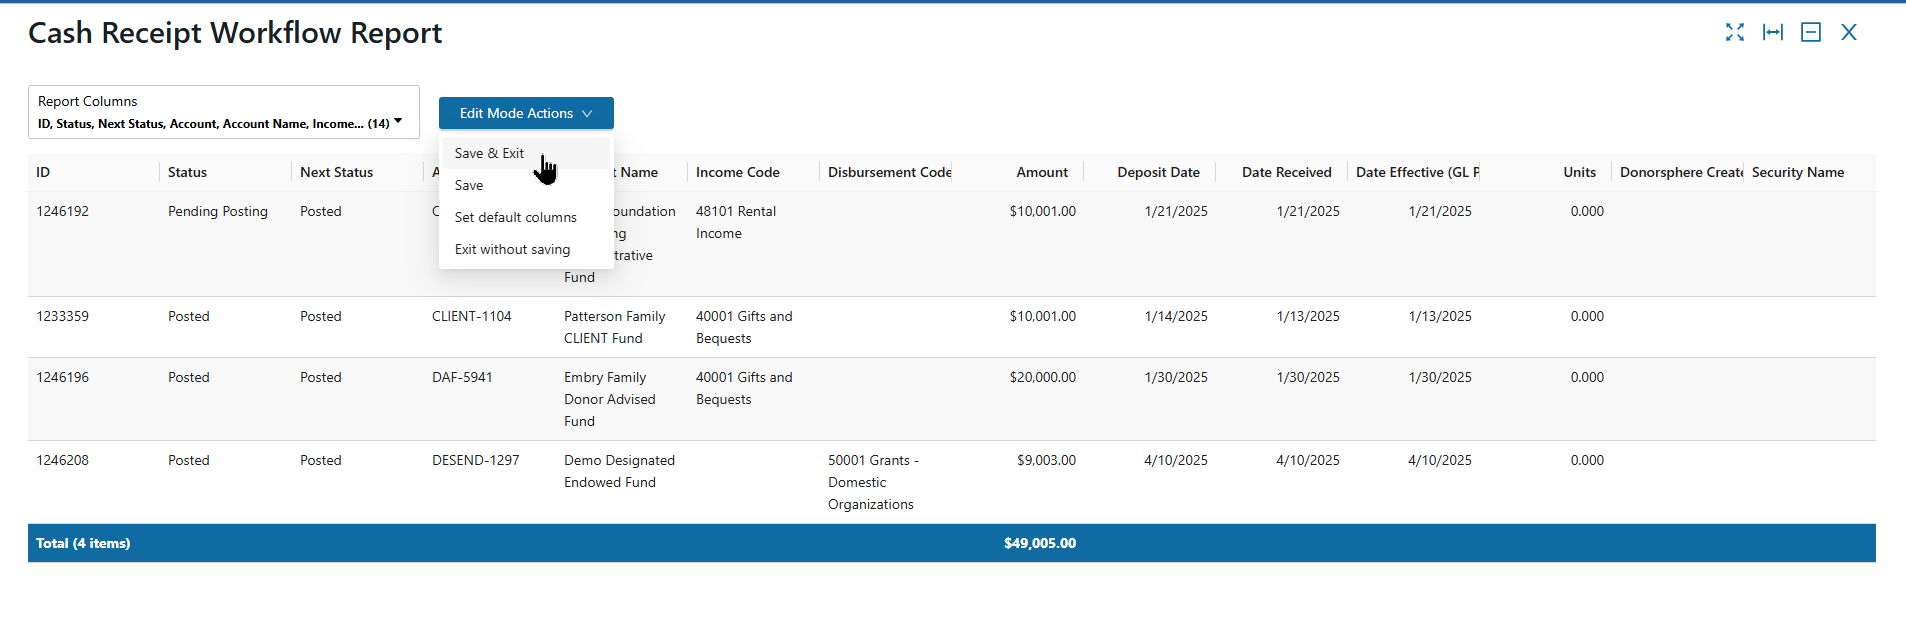
When you are finished selecting your columns, use the “Save and Exit” button to save your column setup and exit the Edit mode.
You can use the “Save” button to simply save your column setup but NOT exit the Edit mode.
You can also use the “Set Default Columns” button to revert to the original/default table.