Scheduling a Disbursement
There are two components to a recurring transaction. The Schedule that defines the timing and length of the occurrences and the second is the underlying template form that is used to create the disbursement when the next occurrence is due. The template holds all the details of the actual transaction.
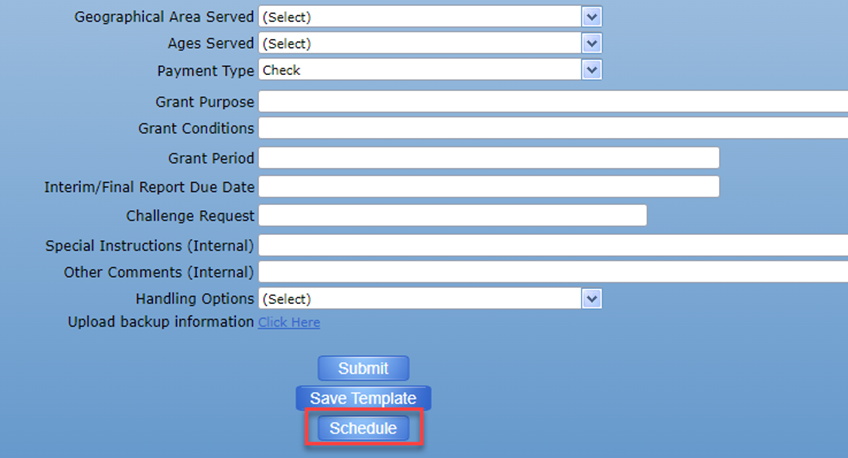
To schedule a recurring disbursement, also known as a Scheduled Remittance, complete the Disbursement Request form and click the Schedule button:
Complete the Schedule details and hit Forward for Approval:
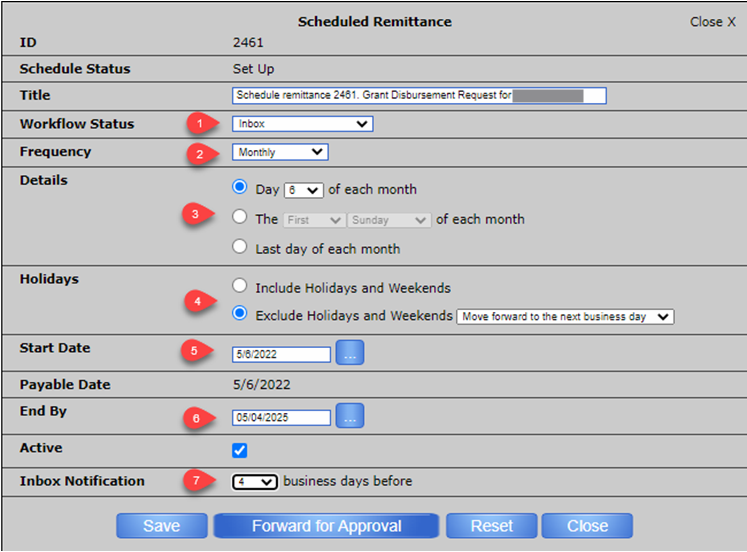
1. Workflow Status: The specific point of the approval process in which the workflow will automatically be placed once the User clicks “Forward for Approval”. Below is an example of how the different levels will need to interact with a schedule:
- Inbox – A notification of the workflow will flow directly into the data entry User’s Inbox to be forwarded for approval. This is the best option as it will have the disbursement go tough the full approval process like any other disbursement.
- Pending Posting – Workflow will flow automatically to the approver’s Inbox.
- Posted – Workflow will automatically be posted.
2. Frequency – Once, Month, Quarterly, Semi-Annual, Yearly
3. Details – Day of the Month for the Transaction to process
4. Holidays – How to handle Weekends and Holidays
5. Start Date – Start of the Schedule
6. End By – When you would like the Schedule to End. If the Schedule is marked as Inactive, it will no longer create transactions as well.
7. Inbox Notification – This setting relates to the Workflow Status of “Inbox”. It determines the number of days before the next scheduled transactions that a notification should be in the inbox.
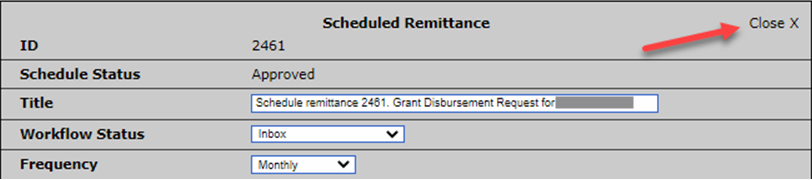
Approving Schedules
Depending on the selected Workflow Status, the schedule will move through the same approval process as a workflow. When the Schedule Status is in “Set Up”, click the “Forward for Approval” button to move the schedule to the next approval level. The Schedule Status must be in “Approved” status to run. NOTE: If a Workflow status of “Inbox” has been selected, the Schedule will be automatically approved once saved.
Editing Schedules
To edit an existing schedule, go to Forms & Workflow > My Schedules. This will show all existing schedules on the System.
Click on the schedule name to edit. Please note, if you select “Active: No” this will disable the schedule and will stop it from running on future dates payable.
Then edit the details on the template, close the Schedule box. To go back to the schedule box or see change history, use the dropdown at the top right-hand current of the screen.