New - Generating Statements
- 27 Aug 2025
- 3 Minutes to read
- Print
- DarkLight
New - Generating Statements
- Updated on 27 Aug 2025
- 3 Minutes to read
- Print
- DarkLight
Article summary
Did you find this summary helpful?
Thank you for your feedback!
In order to generate statements on FoundationHub, use the following steps.
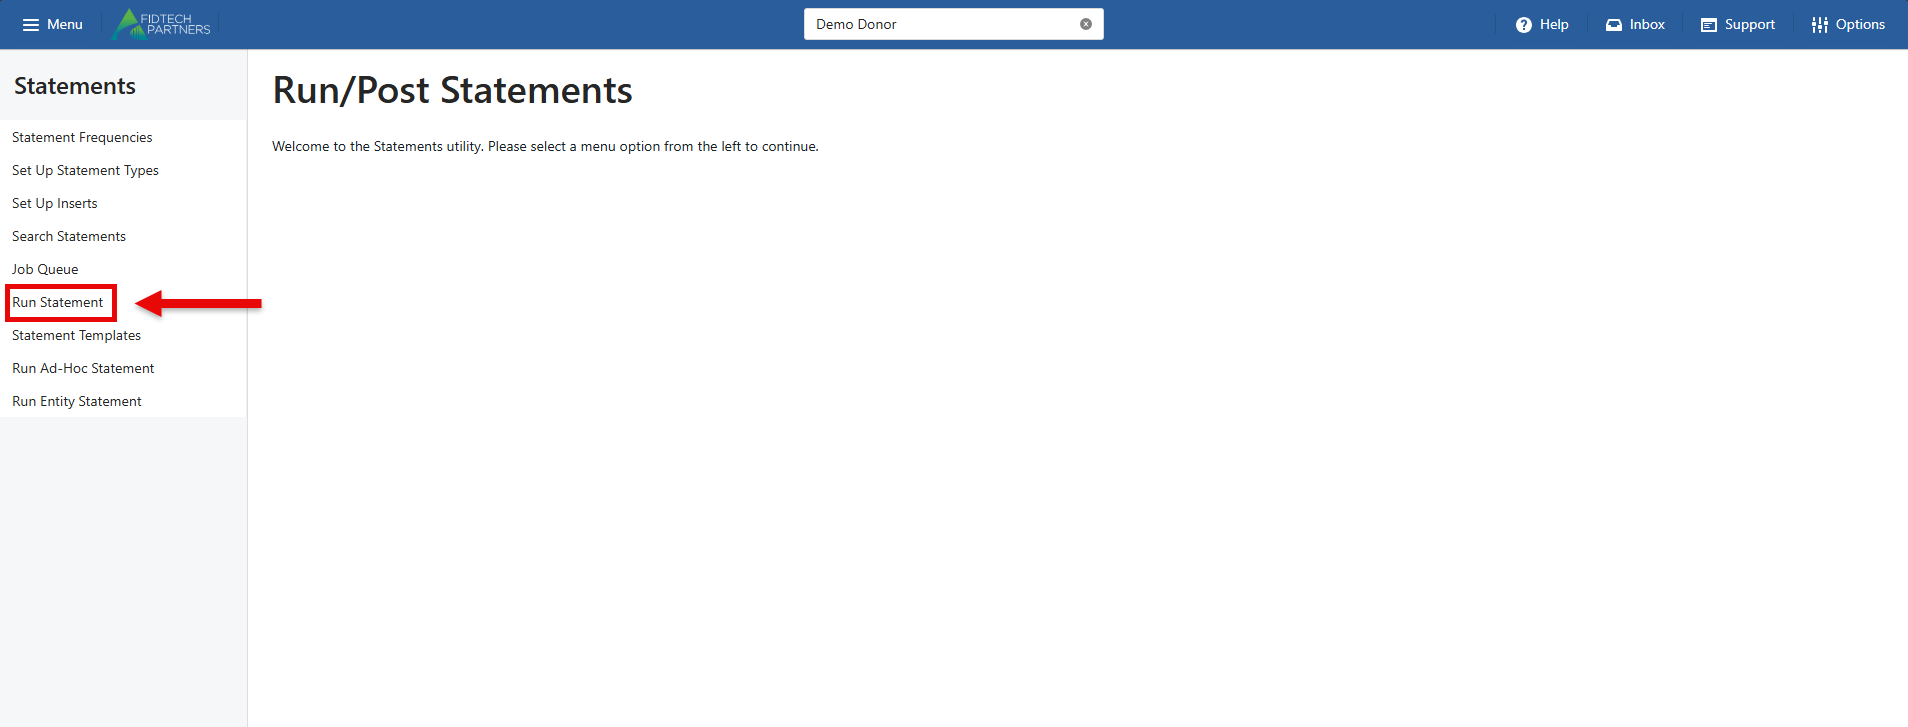
Go to Utilities & Administration in the Menu and select Statements.

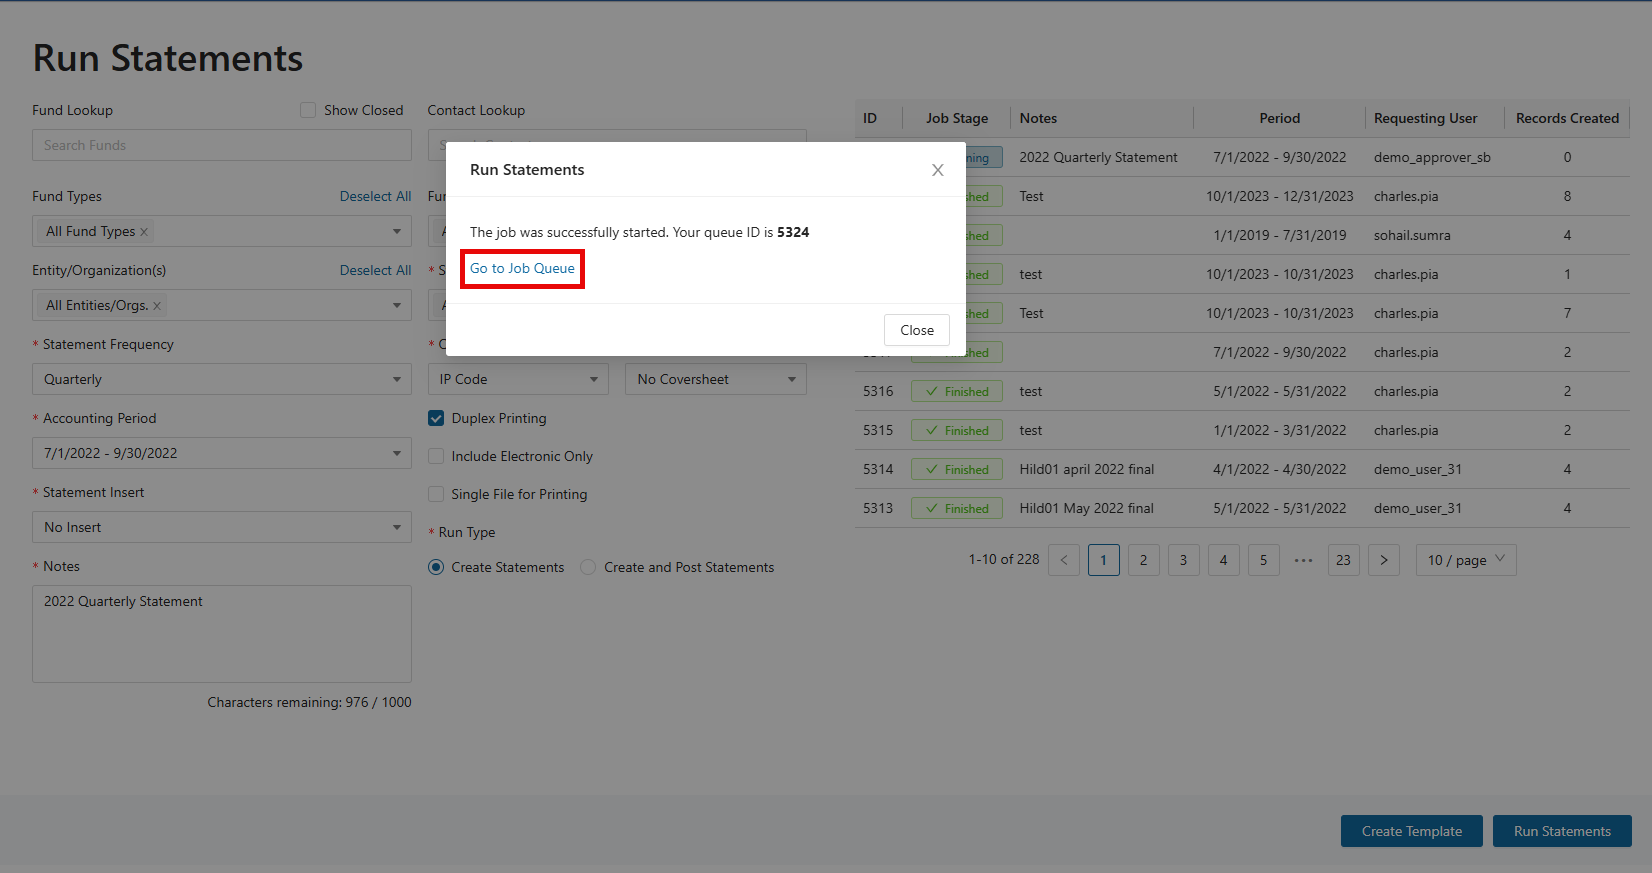
Next, select “Run Statement” and a new screen will populate.
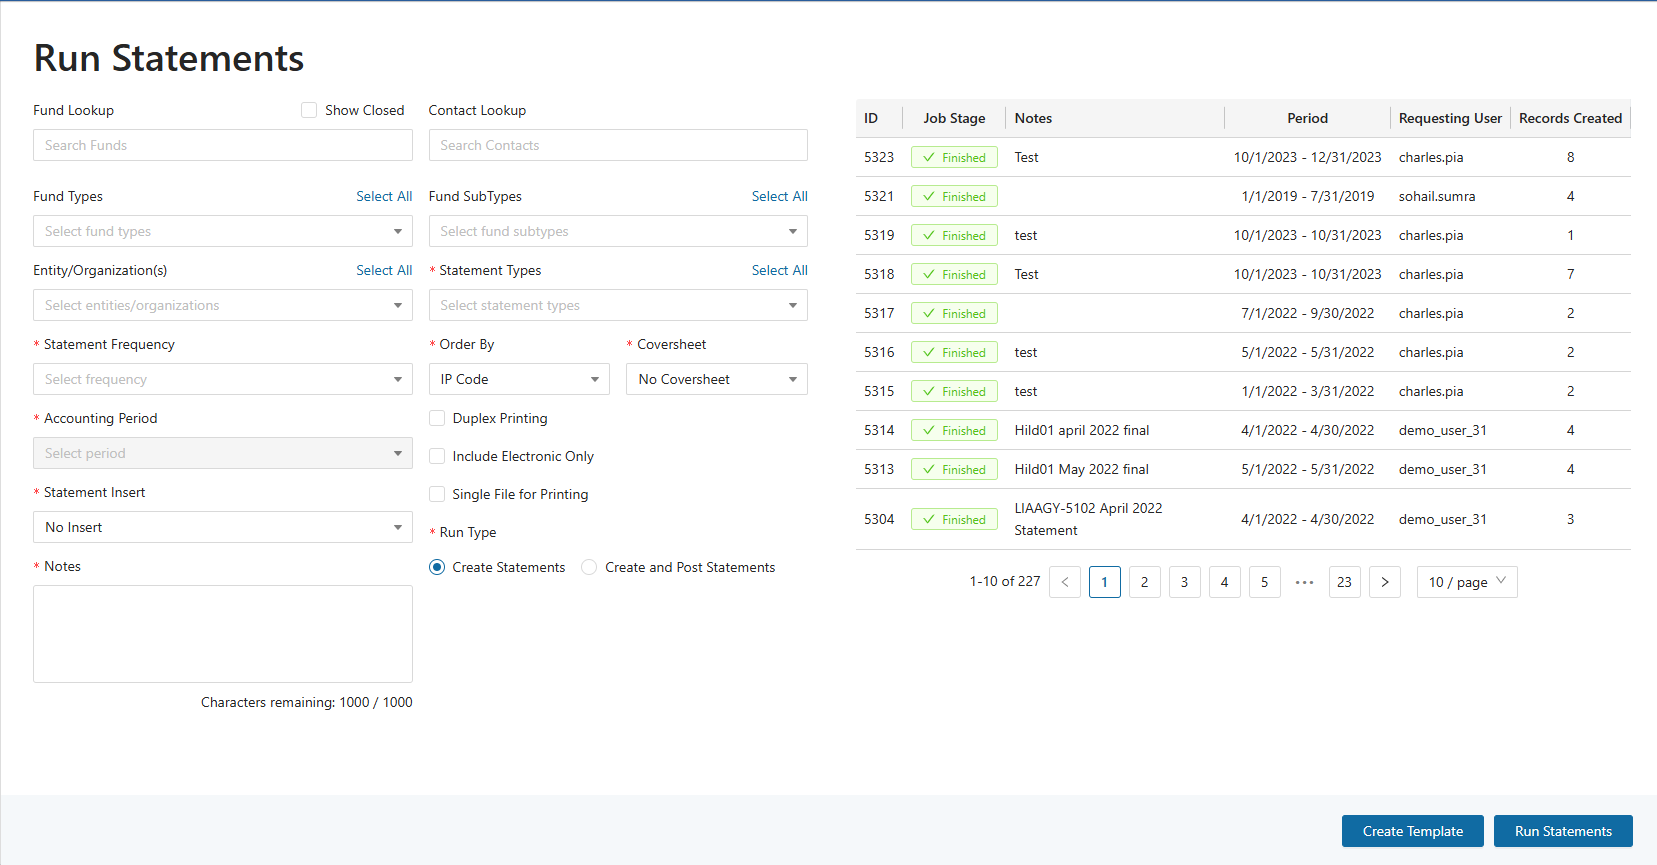
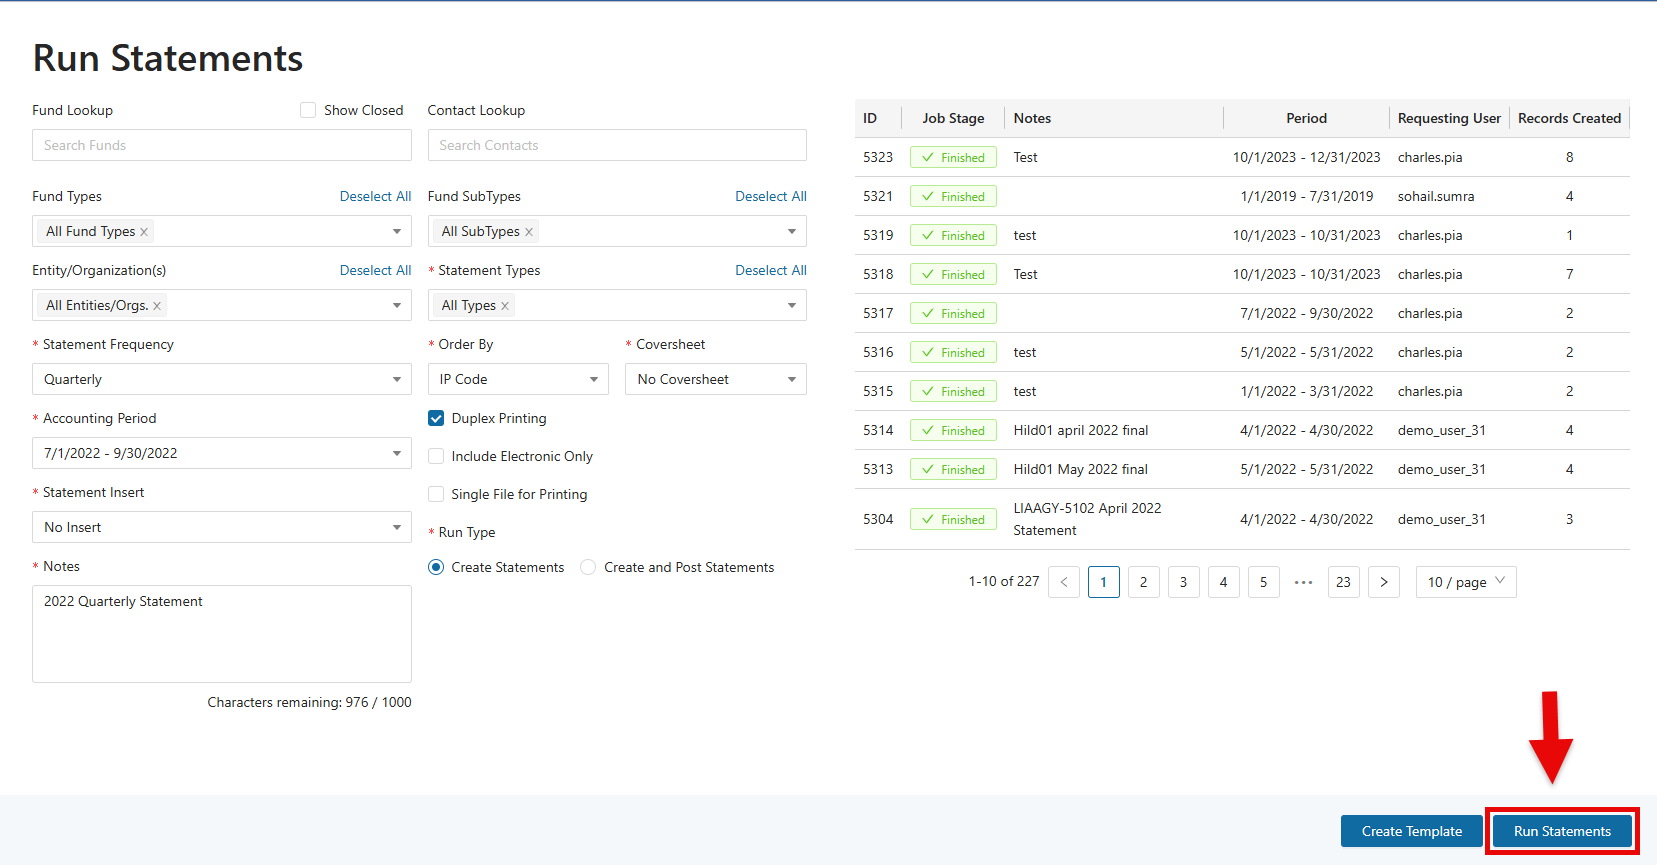
The sections shown in the image above are explained as follows:
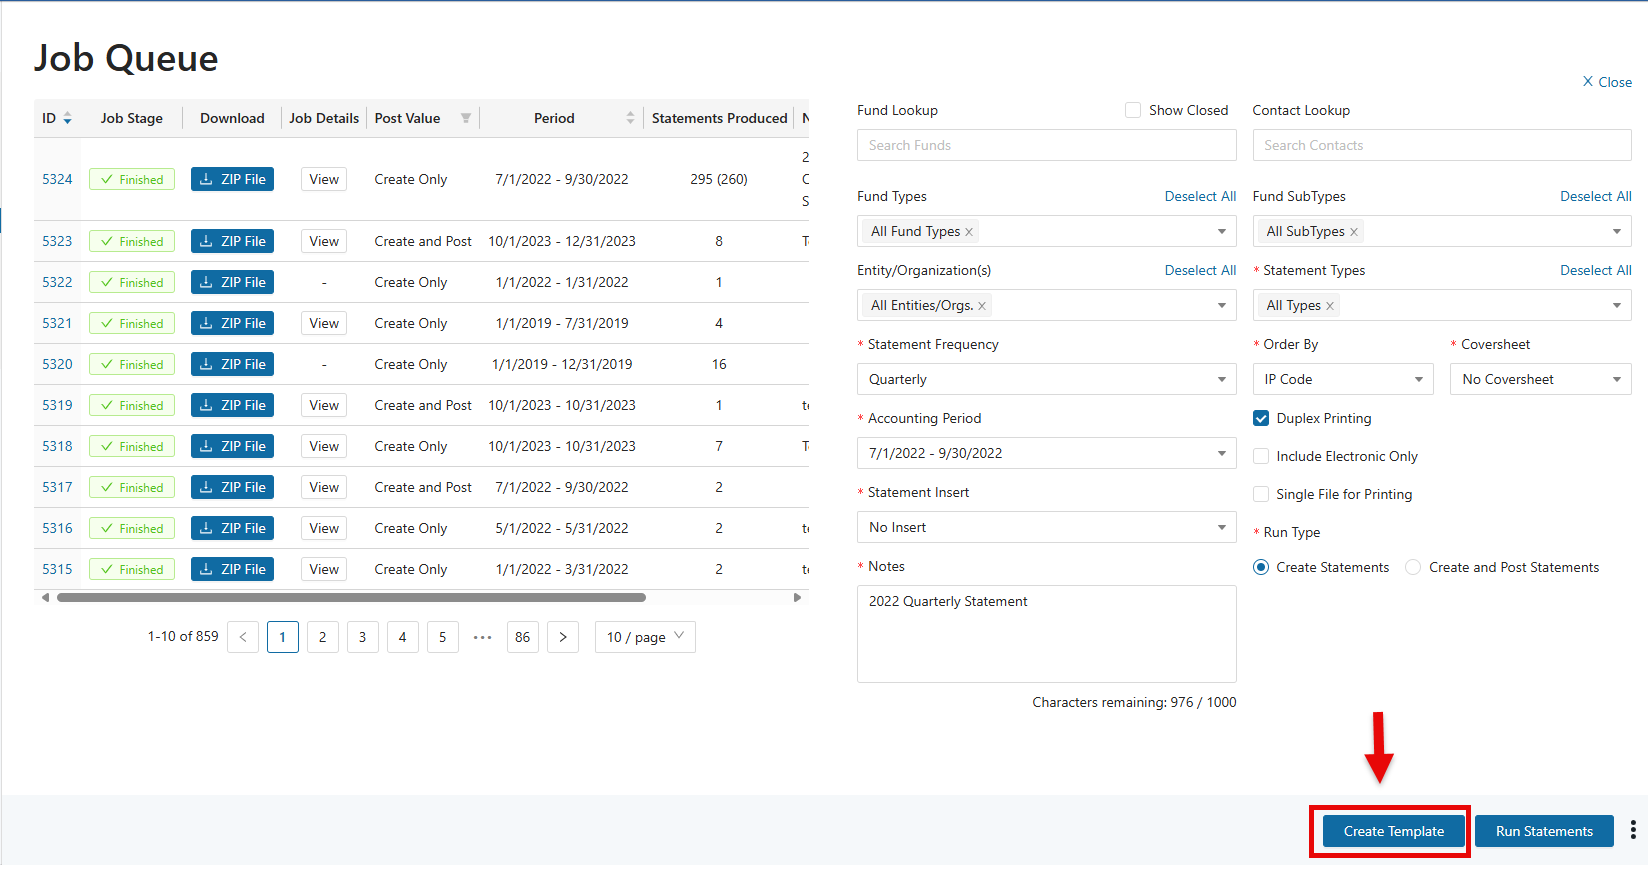
Fund Lookup – Type in a key word to search for and select the fund(s) for which the statement job will be run.
Contact Lookup – Type in a key word to search for and select the contact(s) for which the statement job will be run.
Fund Types – Click on the dropdown menu to select the Fund Types for which the statement job will be run.
Fund SubTypes - Click on the dropdown menu to select the Fund SubTypes for which the statement job will be run.
Entity/Organization(s) – Click on the dropdown menu to select the Entity/Organization(s) for which the statement job will be run.
Statement Types – Click on the dropdown menu to select the Statement Types for which the statement job will be run.
Statement Frequency – Click on the dropdown menu to select the frequency.
Order By – Click on the dropdown menu to select the sort order that the files will be generated in.
Cover Sheet – Click on the dropdown menu to select the appropriate cover sheet or “No Coversheet”.
Accounting Period - Click on the dropdown menu to select the period of time for which the statement job will be run.
Statement Insert – Click on the dropdown menu to select the appropriate statement insert or “No Insert”.
Duplex Printing – This will set the file up to print on both sides of the paper when the statements are printed.
Include Electronic Only – This will include Interested Parties who have “Electronic Only” links to Funds.
Single File for Printing – Will generate the entire statement job (batch) as a single PDF file. If not checked each statement in the batch will have its own PDF file.
Notes – A text field for adding internal comments about the statement job (batch). These notes are for reference only and will not appear on any individual statements. They exist solely within the job record for administrative purposes.
Run Type – Select “Create Statements” to generate the statements only for review or printing, select Create/Post to post the statements to the System and to DonorSphere.
After entering the above parameters, select ‘Run Statements’ at the bottom of the screen.
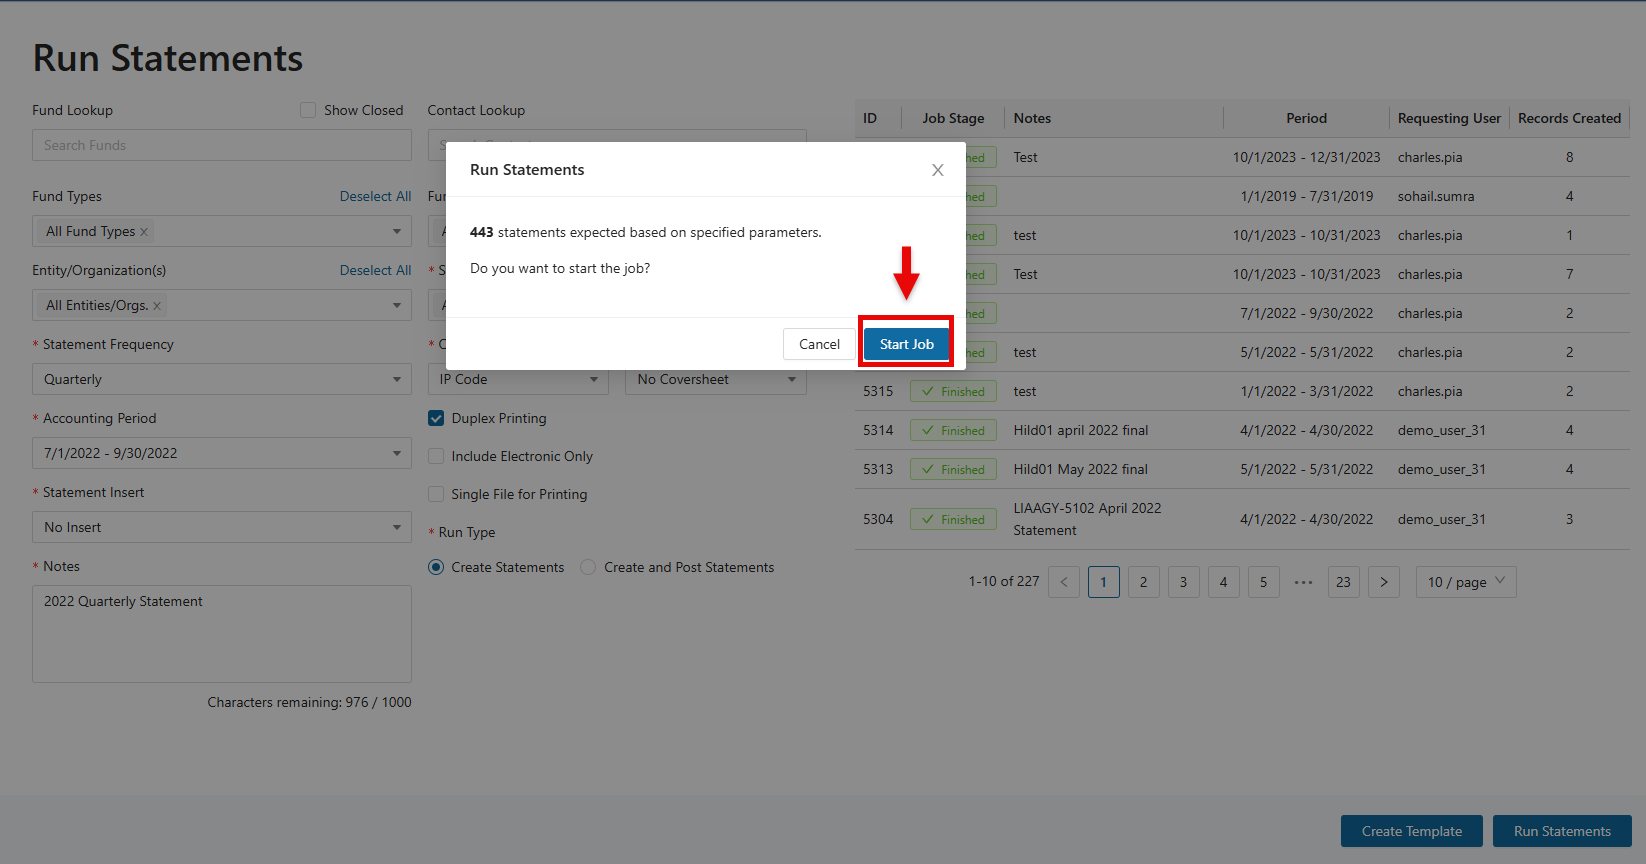
A prompt will appear indicating the anticipated number of statements that will be generated. To initiate the statement job, select ‘Start Job’.
To see the progress of the statement job, click on “Go to Job Queue”. The Job Queue will show the progress of the statement job and is where the statement files can be downloaded after the job is complete.
In the Job Queue, hovering over “Finished” will display the details for the completed statement job.
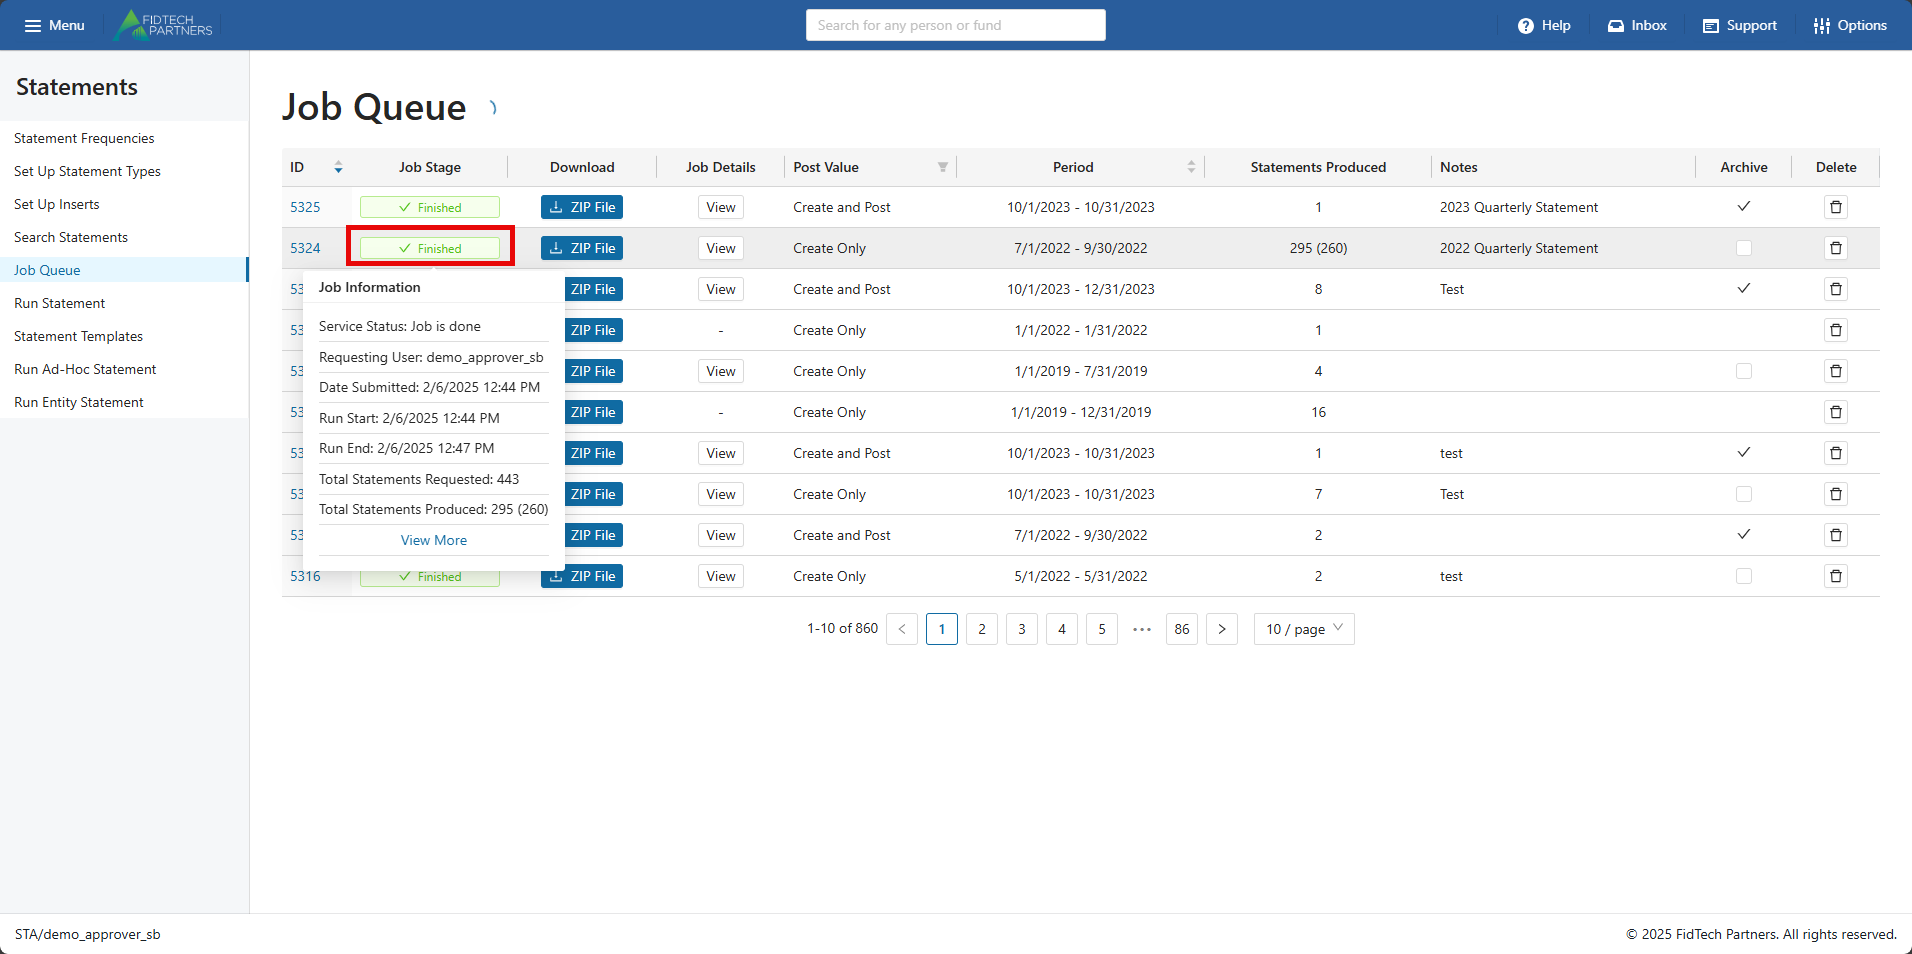
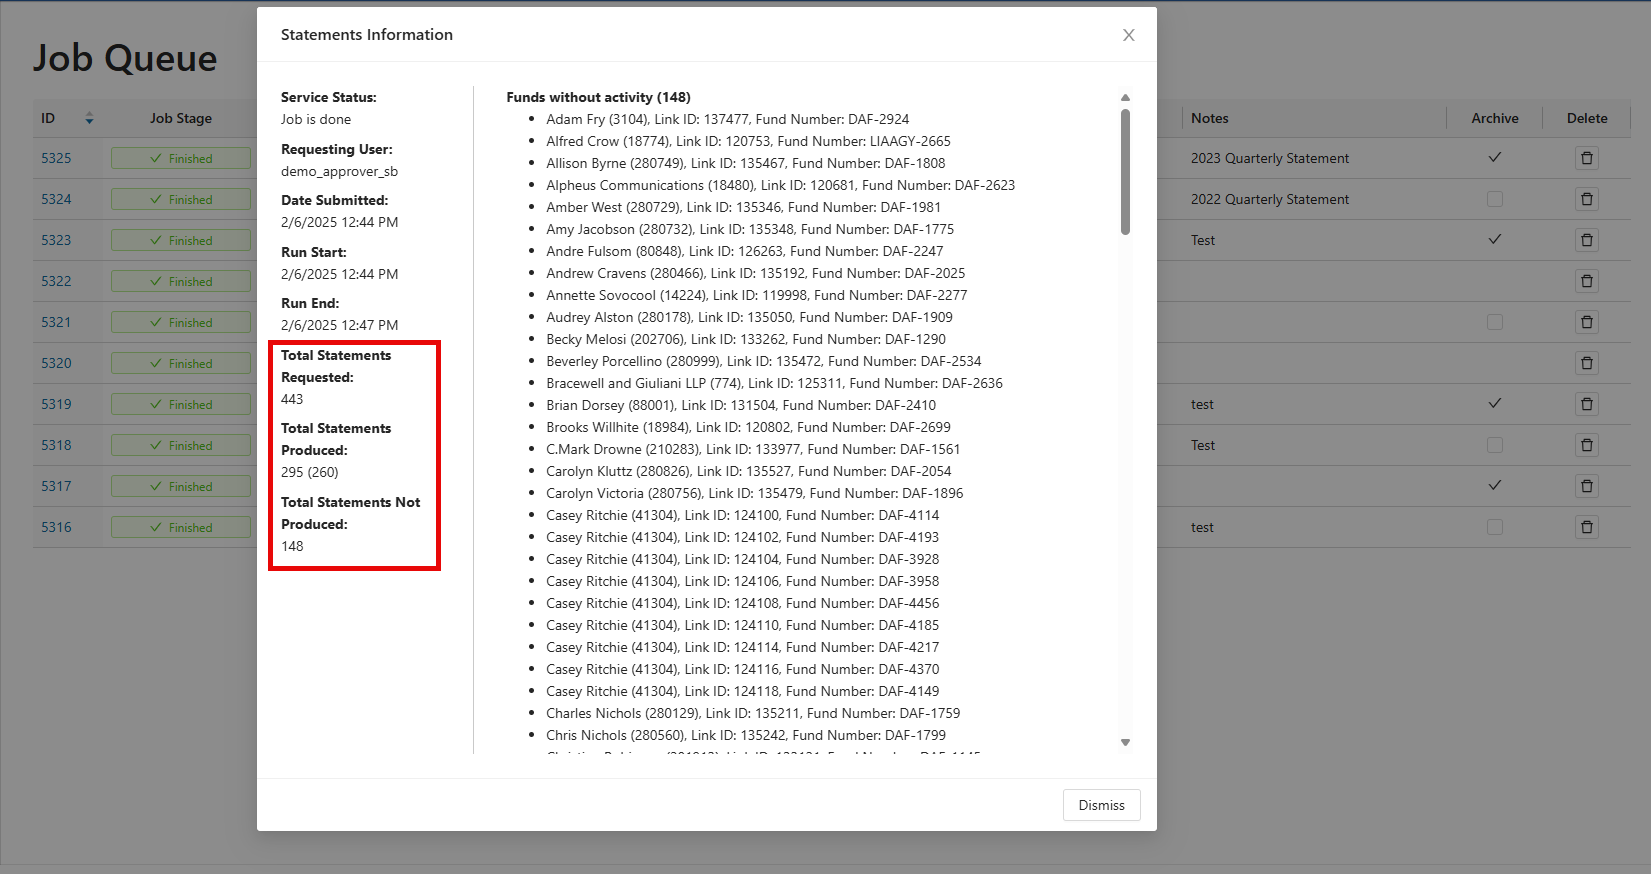
Clicking “View More” will open up the ‘Statements Information’ section. This section provides additional information on the following:
Service Status: Status of the statement job
Requesting User: The user that ran the statement job
Date Submitted: The timestamp of when the job was requested
Run Start: When the statement service process began processing the statement job
Run End: When the statement job was completed
Total Statements Requested: Initial expectation of statements to be generated from the job parameters
Total Statements Produced: The total number of statements generated after the system reviewed and validated activity. Please note the number in () refers to the amount of PDF files generated. These numbers differ if there is a consolidated or combined statement for an Interested Party. Only one file will generate, even if they have multiple links
Total Statements Not Produced: This is the number of statements not generated after the statement service reviews and validates the activity for those accounts.
If available, an explanation is included for statements that were not generated - In the example below, the 148 funds did not produce a statement because they had no activities.
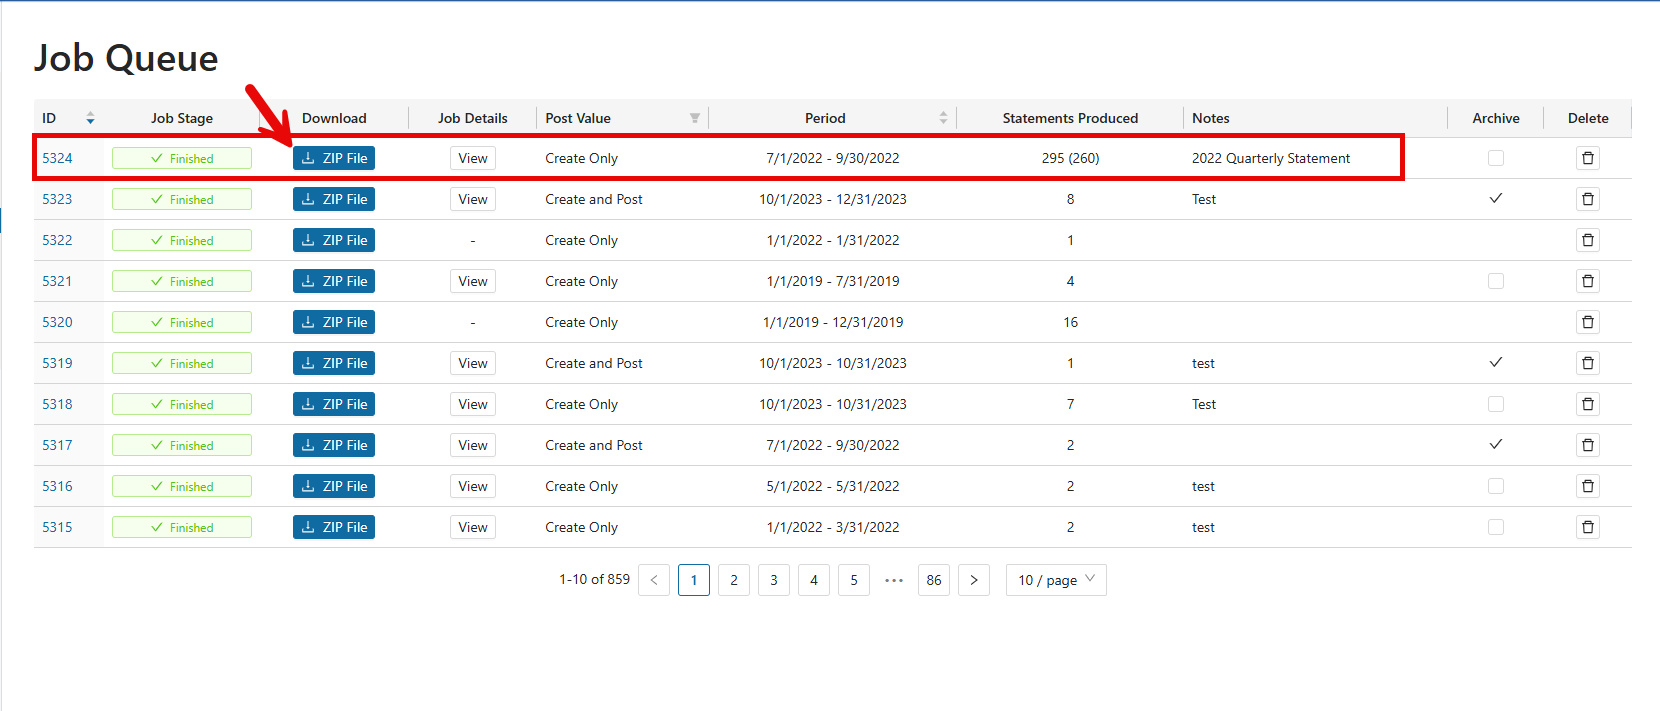
When the statement generation process is complete, it will consolidate any PDFs generated into a single ZIP File. To download these files, click on the “Zip File” button of the statement job.
Re-running Statement Jobs
Statement jobs can be re-run by clicking on the “View” button and then clicking on “Run Statements”.

Creating Templates
Templates define preset settings for a statement job, making it easier to run statements consistently.
Using a template can save time and ensure consistency for statement jobs that are run regularly with the same parameters.
To create a template for the statement job, click on “Create Template”.
Type the name of the template and click “Save New Template”.
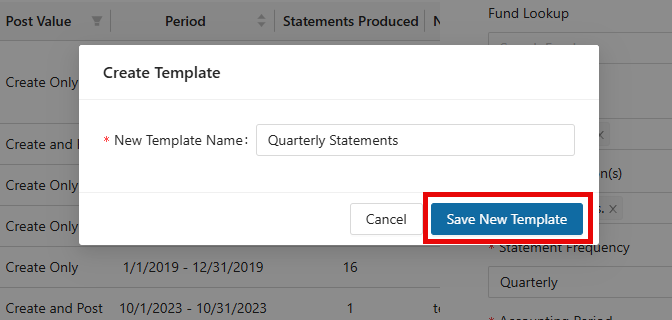
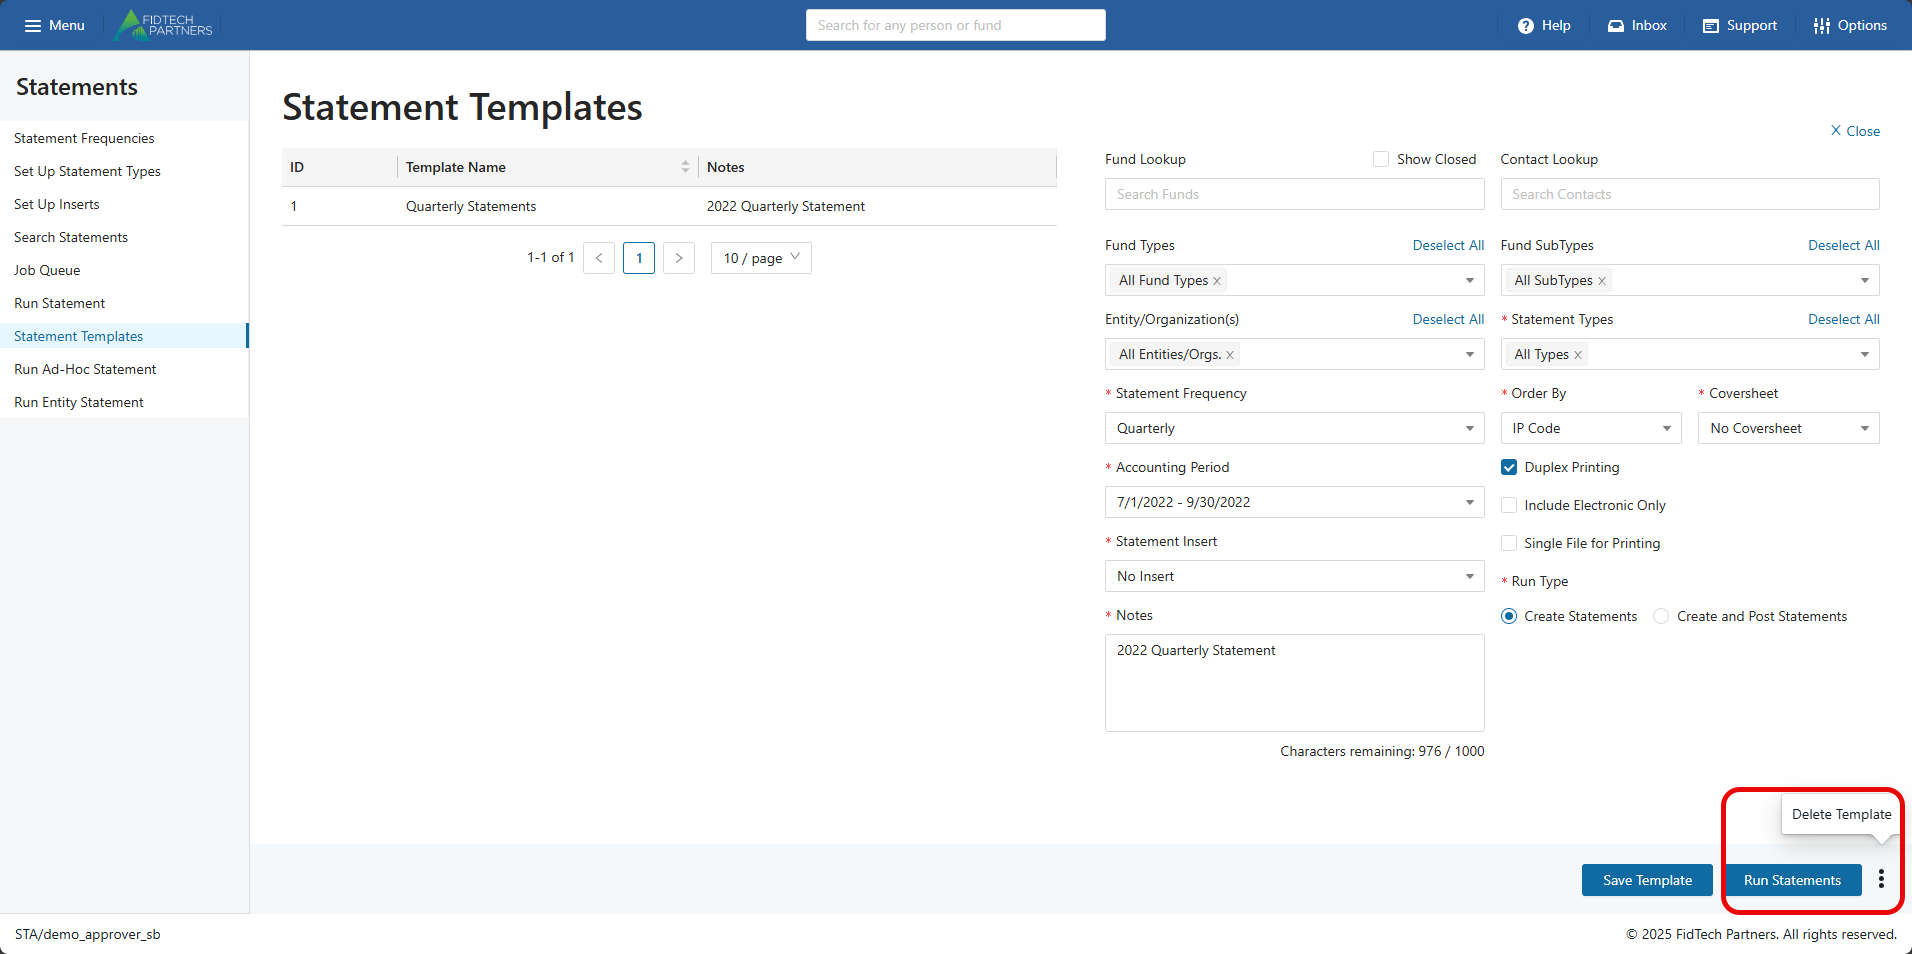
The saved template can be found in the Statement Templates section.
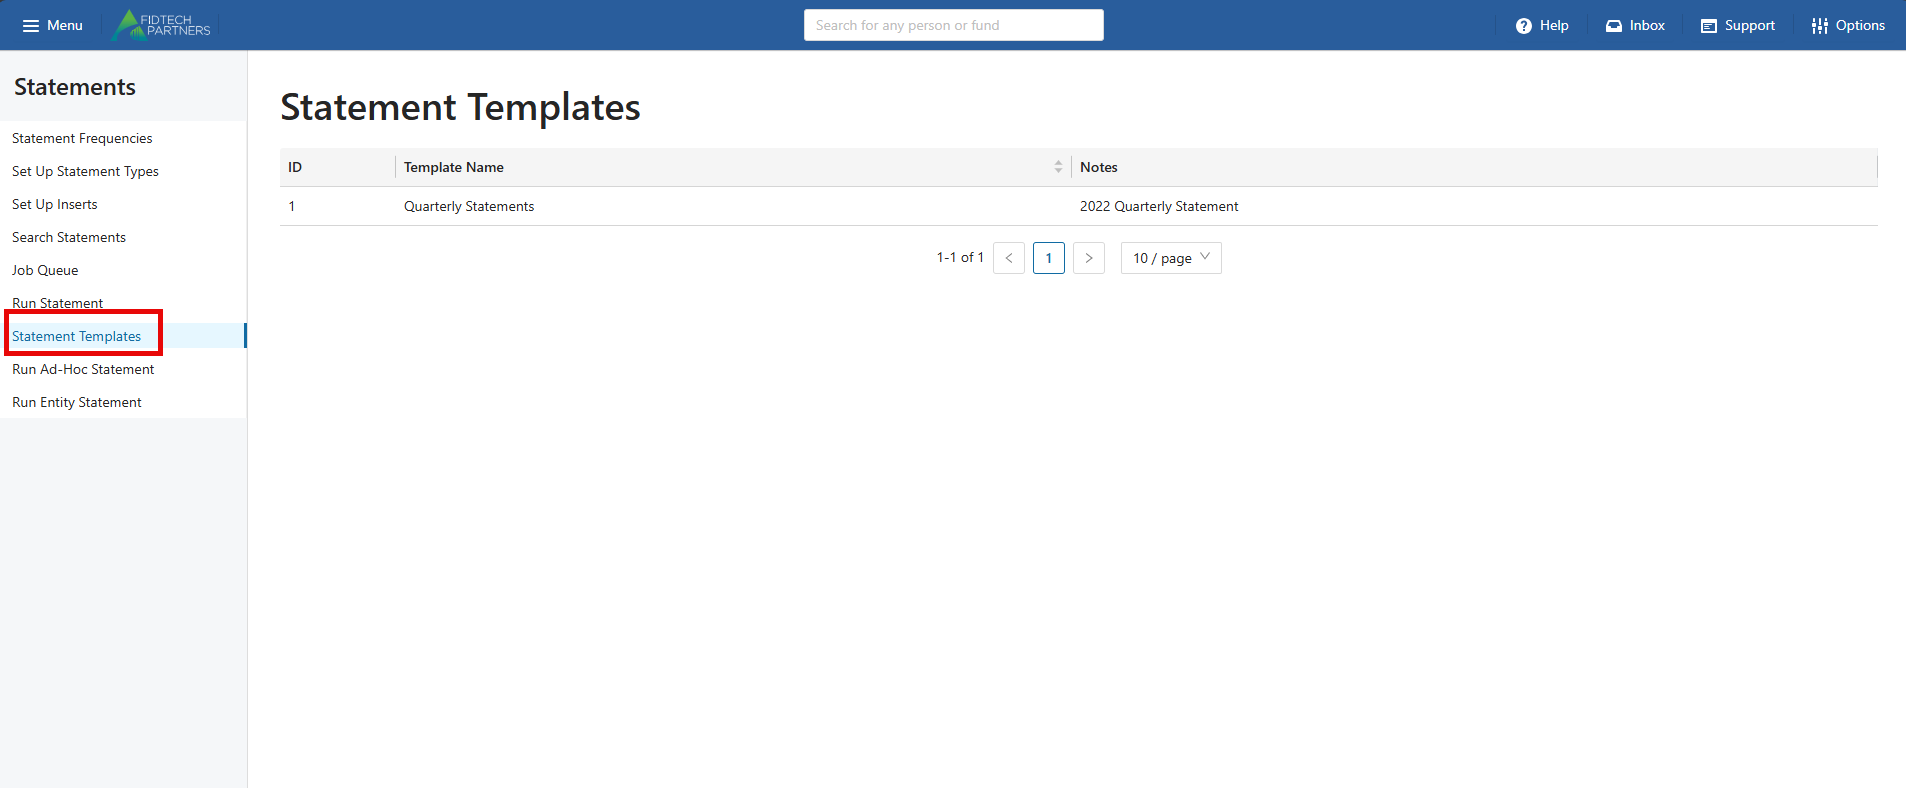
The options to Run Statements or Delete Template are available once the template is selected.
Was this article helpful?