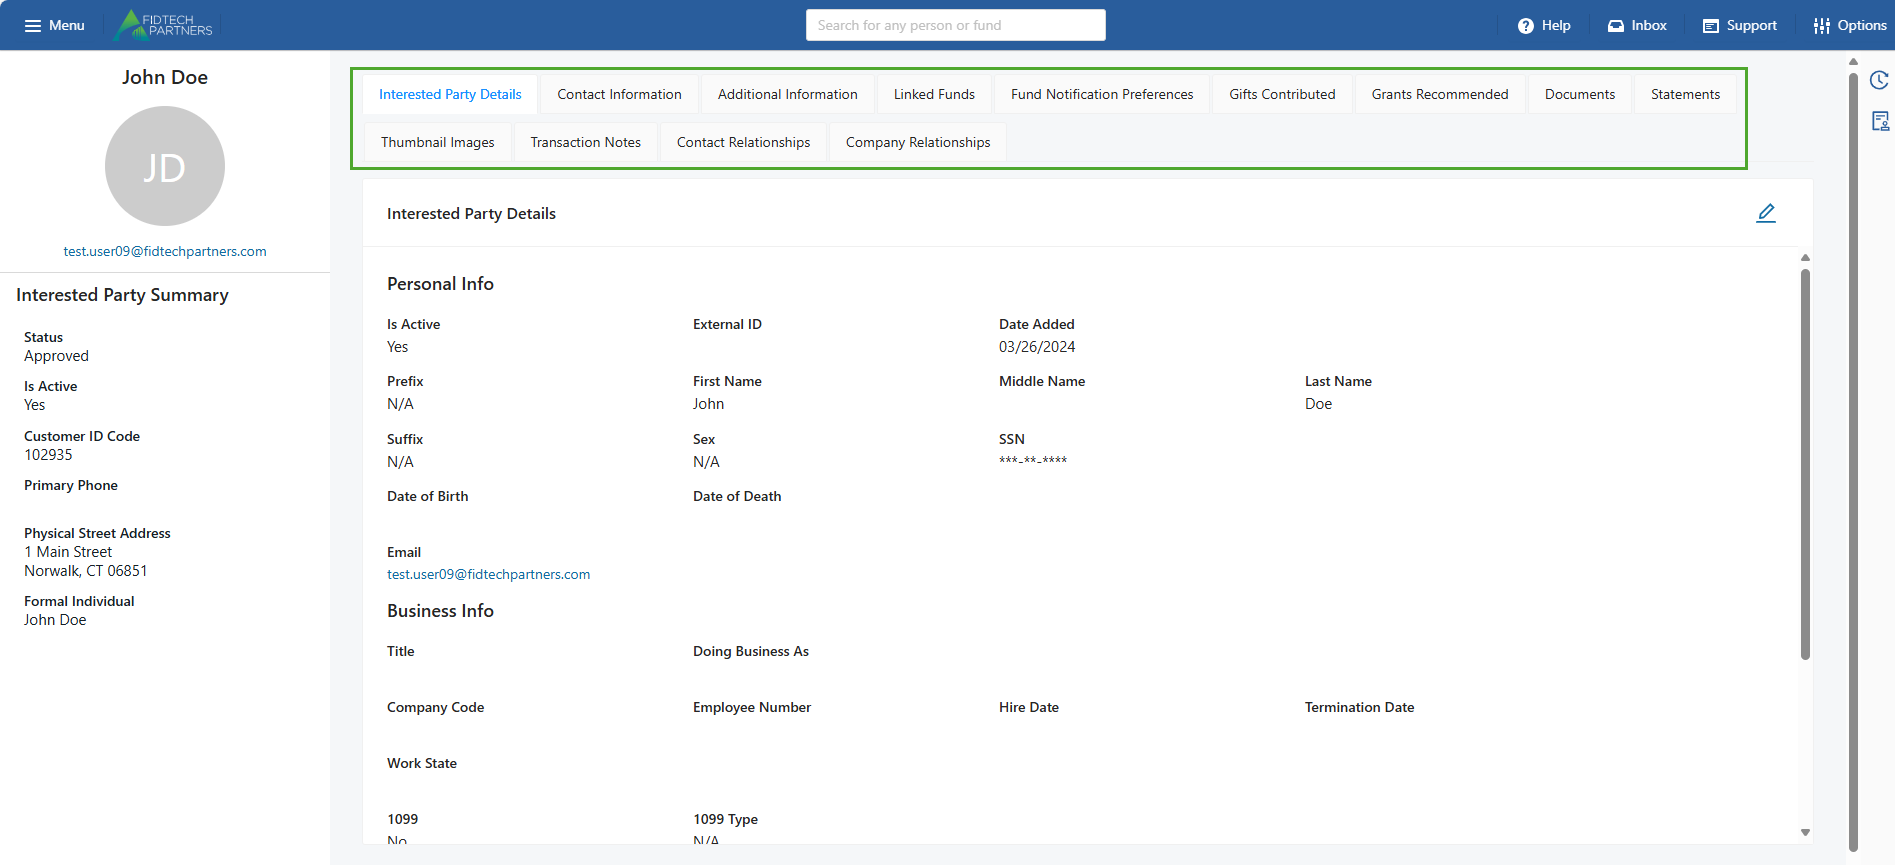
All the Contact Profiles’ (Grantees, Interested Parties and Vendors) sections & fields can be modified using the App Manager. This allows you to rename/reorder specific sections, fields in specific Forms and create custom sections/fields as needed.
Note: The changes made using these functionalities affect all Users / Roles. So, they should only be managed by your system administrator or a FidTech personnel.
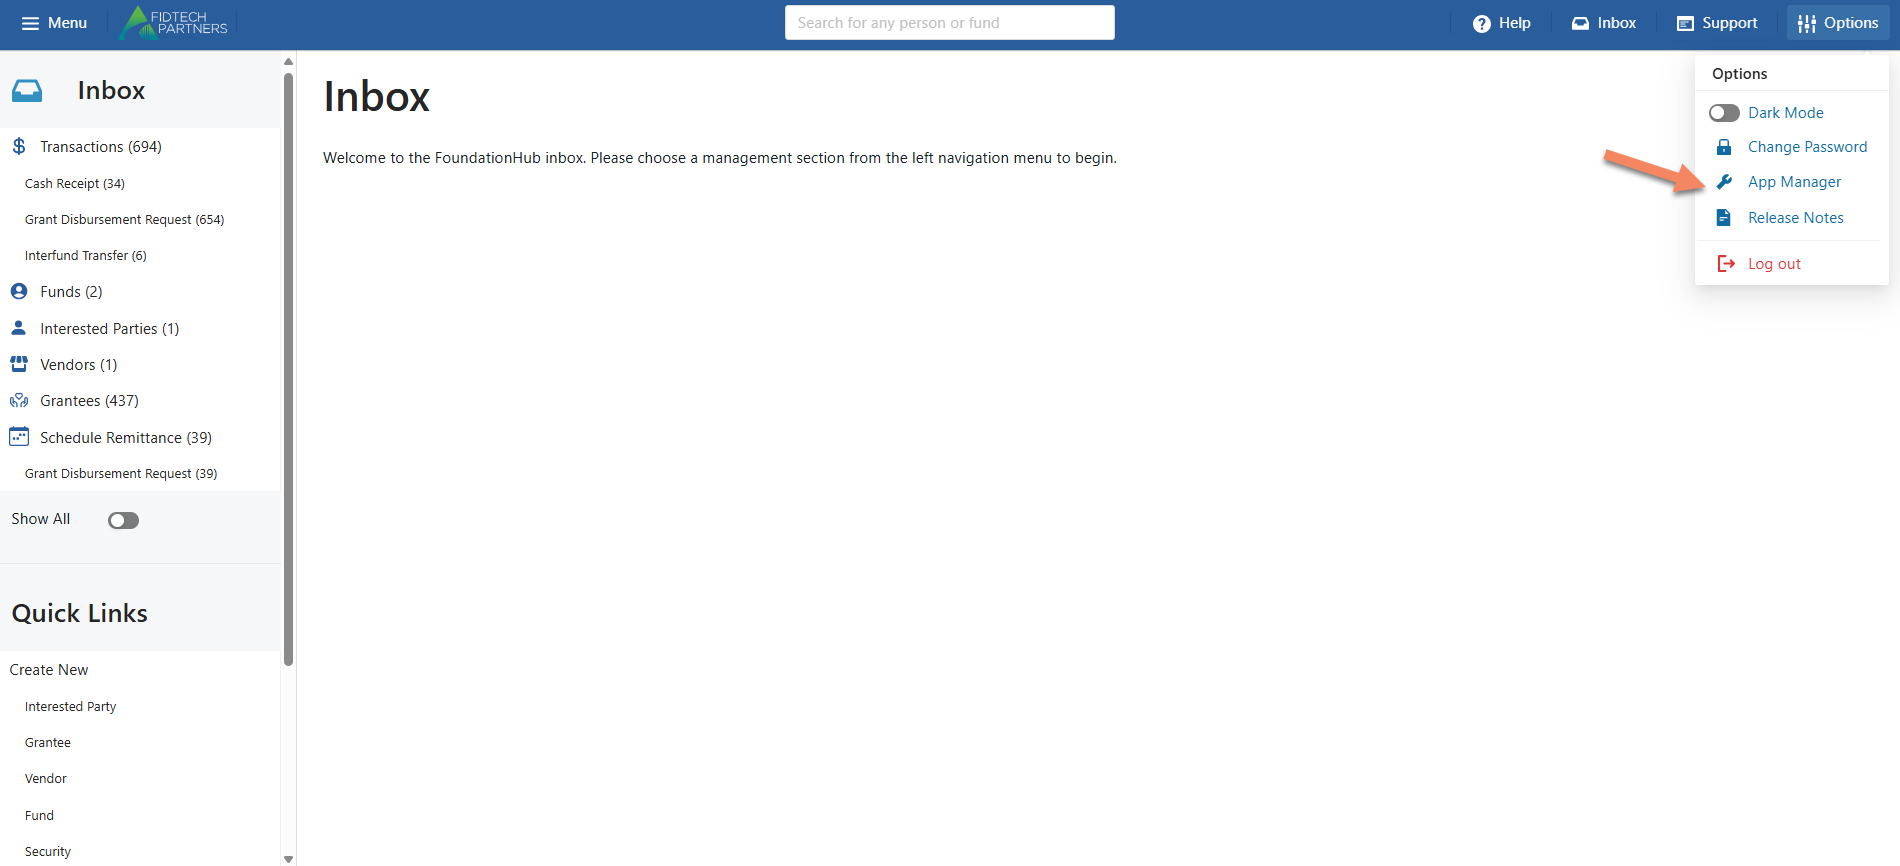
To access the App Manager, on the top-right corner, click on Options > App Manager.
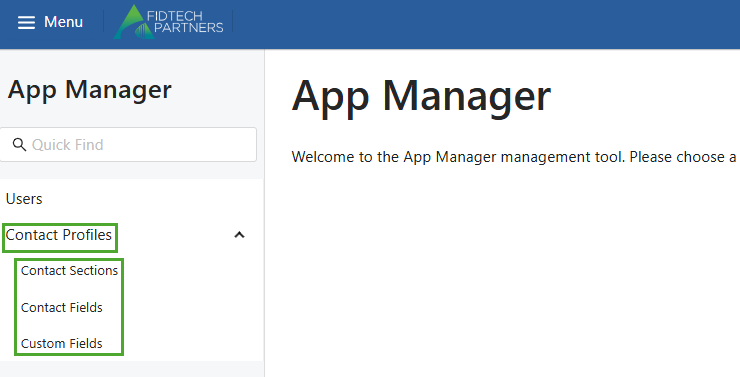
In the App Manager page’s left pane, under Contact Profiles, there exists Contact Sections, Contact Fields and Custom Fields.
Contact Sections
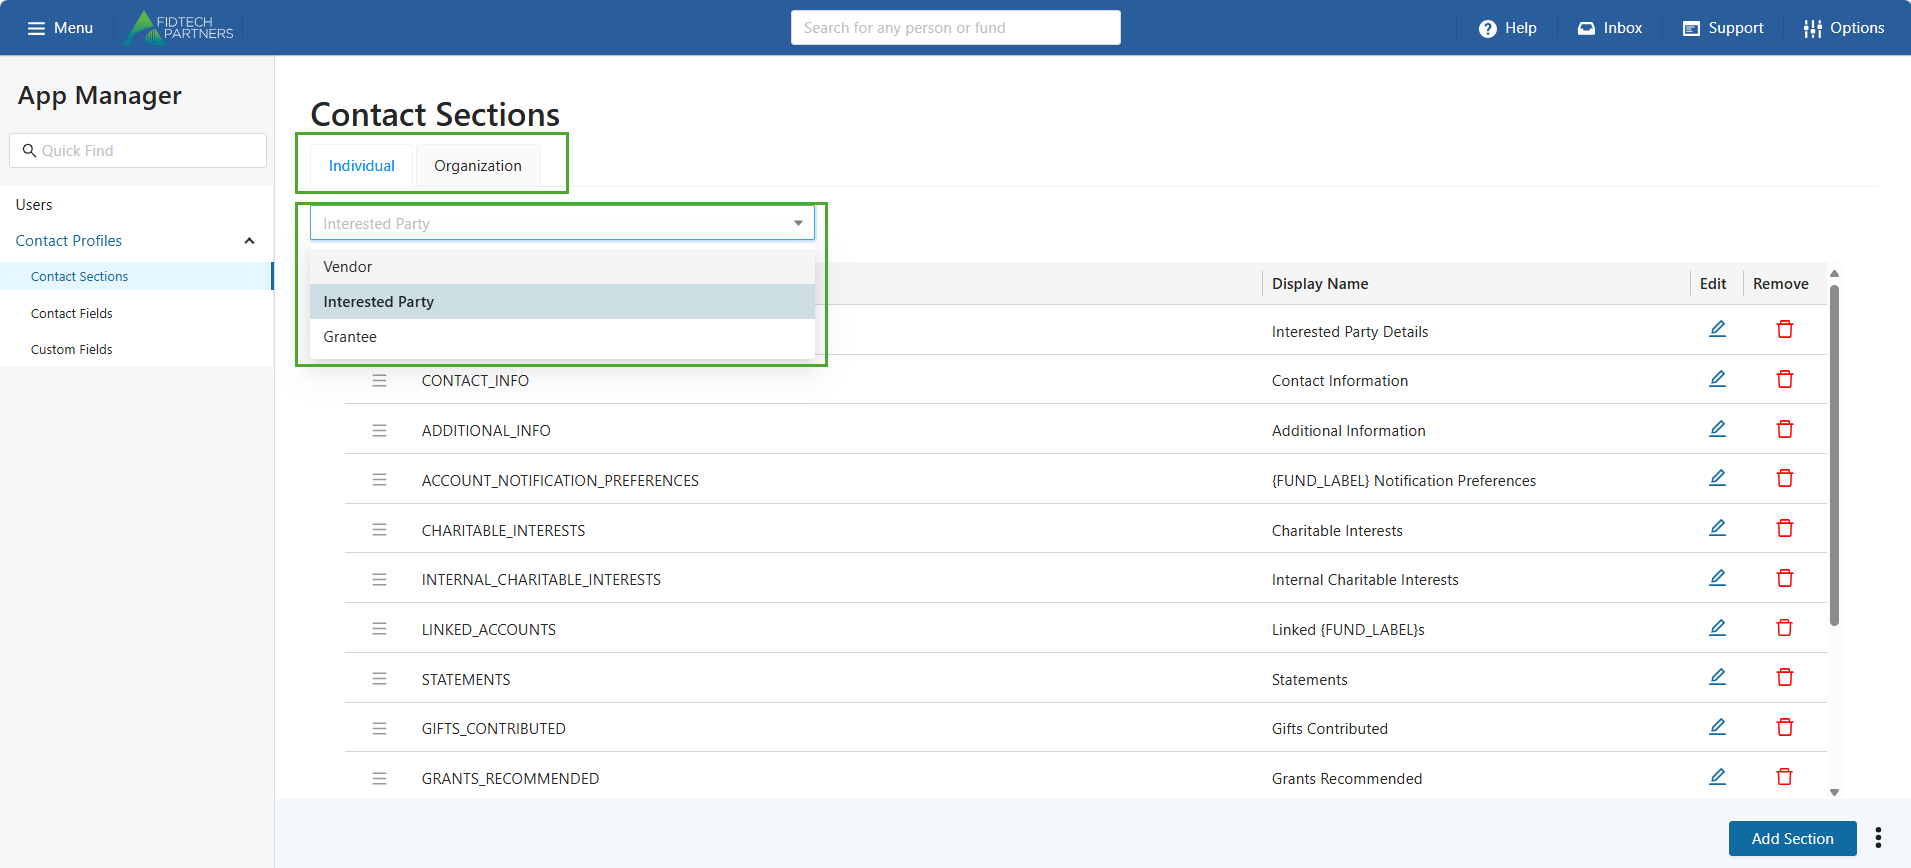
Using this tab, you can add a new Section or edit a currently existing one for both Individual and Organization type contact profiles.
Select the Contact Profile and the Profile Type:
Use the dropdown field to choose the contact profile you want to edit: Grantee, Interested Party, or Vendor.
Click on the Individual or Organization tab to specify the type of contact profile you want to edit for the above selected category.
After performing the above selections, you can do the following actions:
a. Add a new Section:
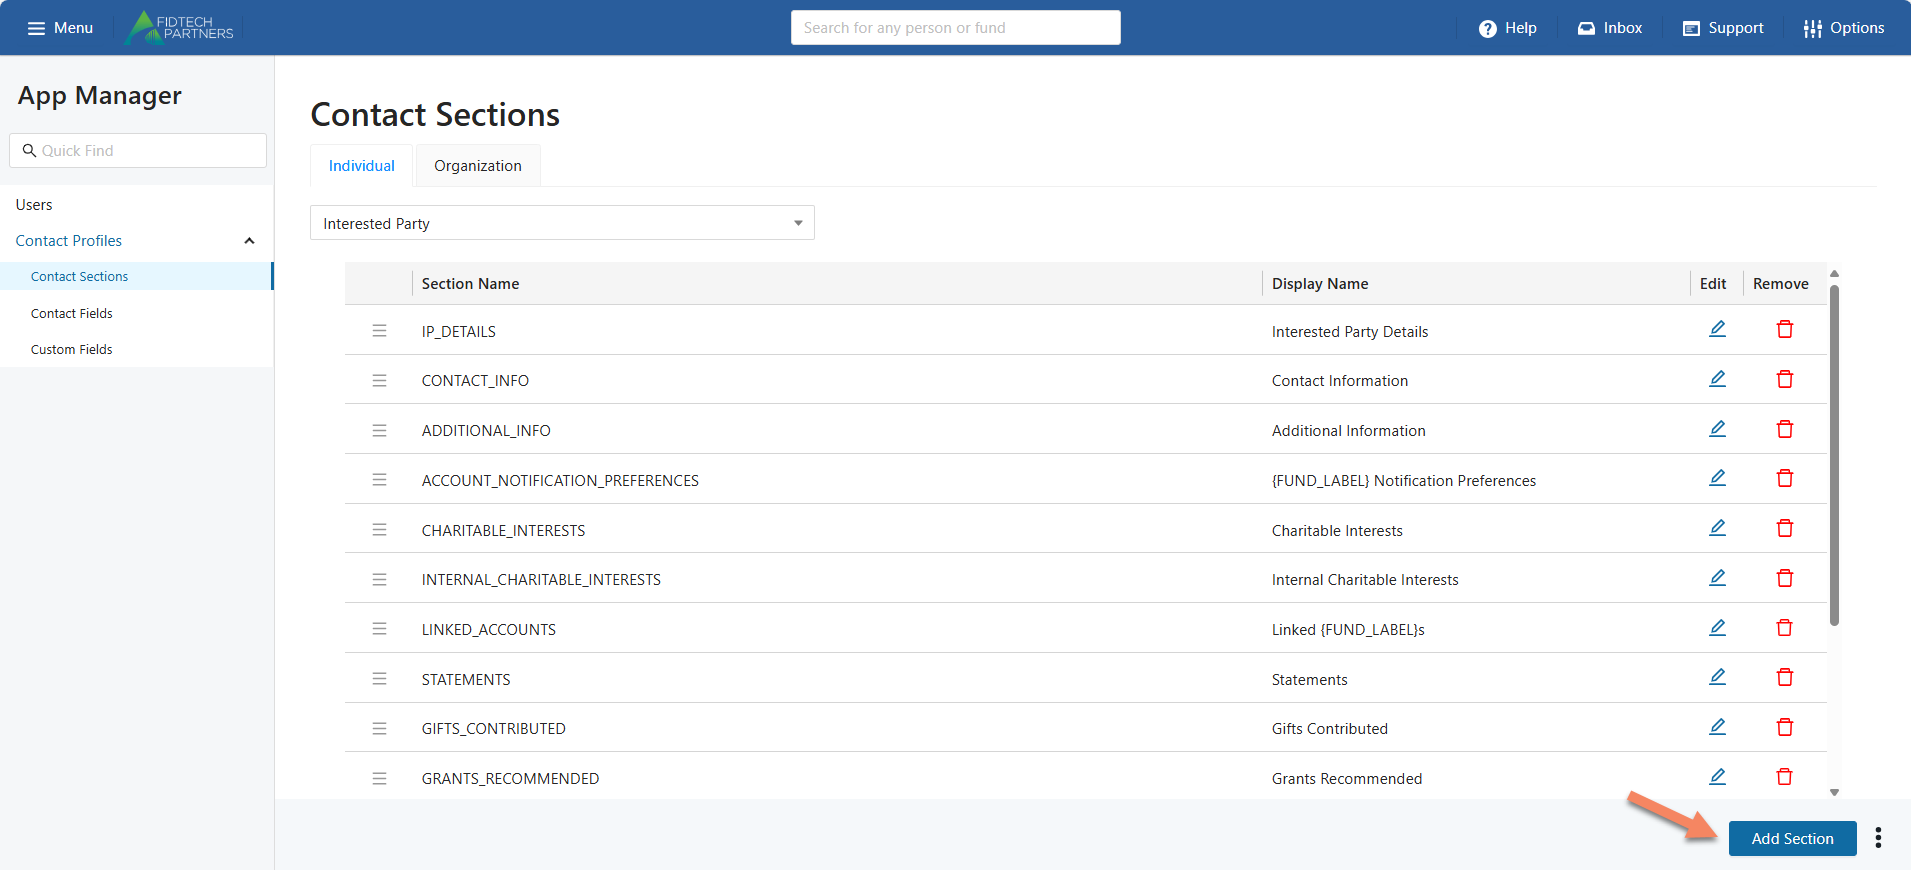
A new section can be added to the contact profile by clicking the “Add Section” button on the bottom-right corner of the page.
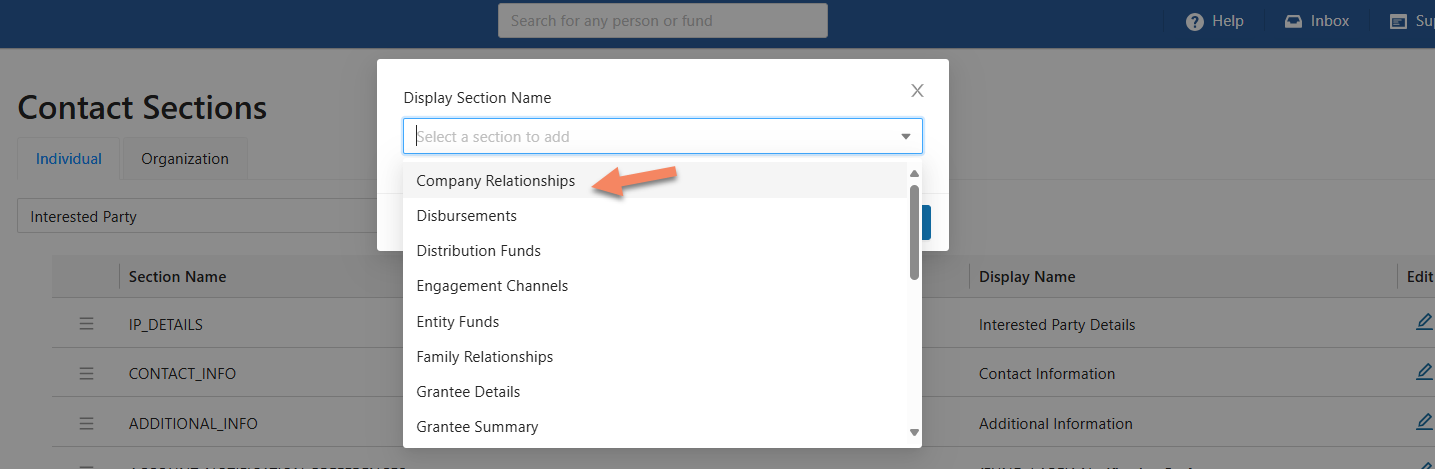
Clicking this button opens a dialog box using which you can select from a list of available sections that you can add.

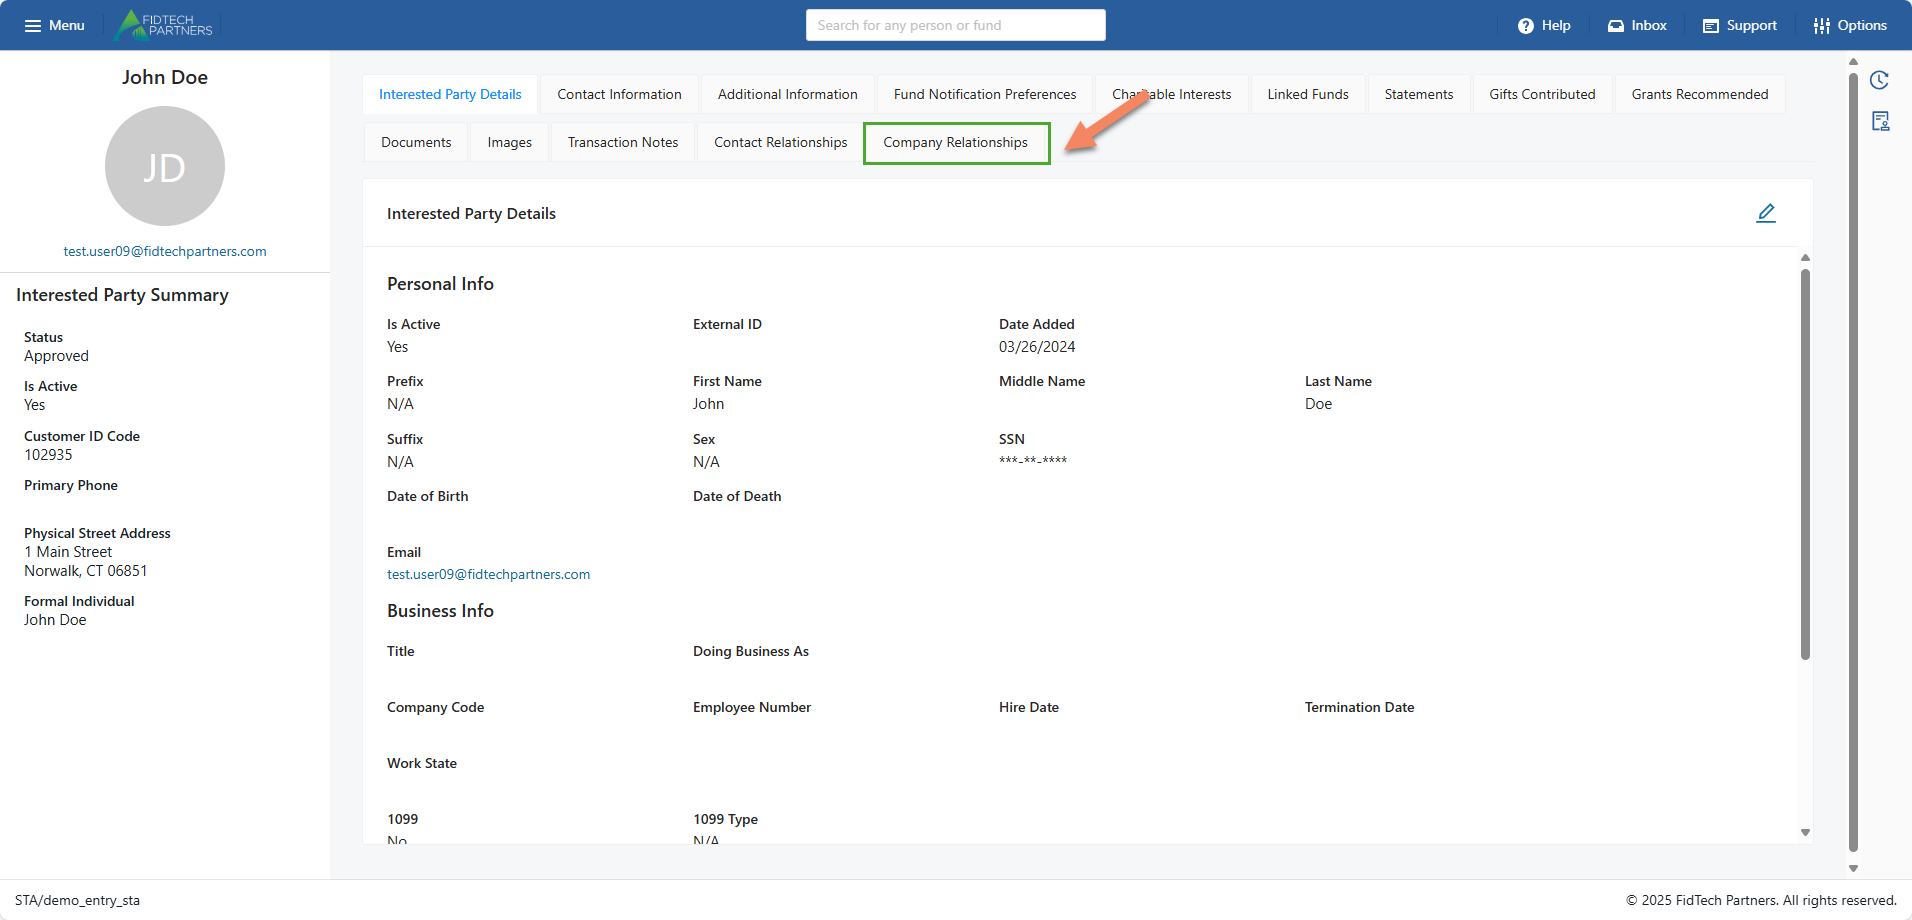
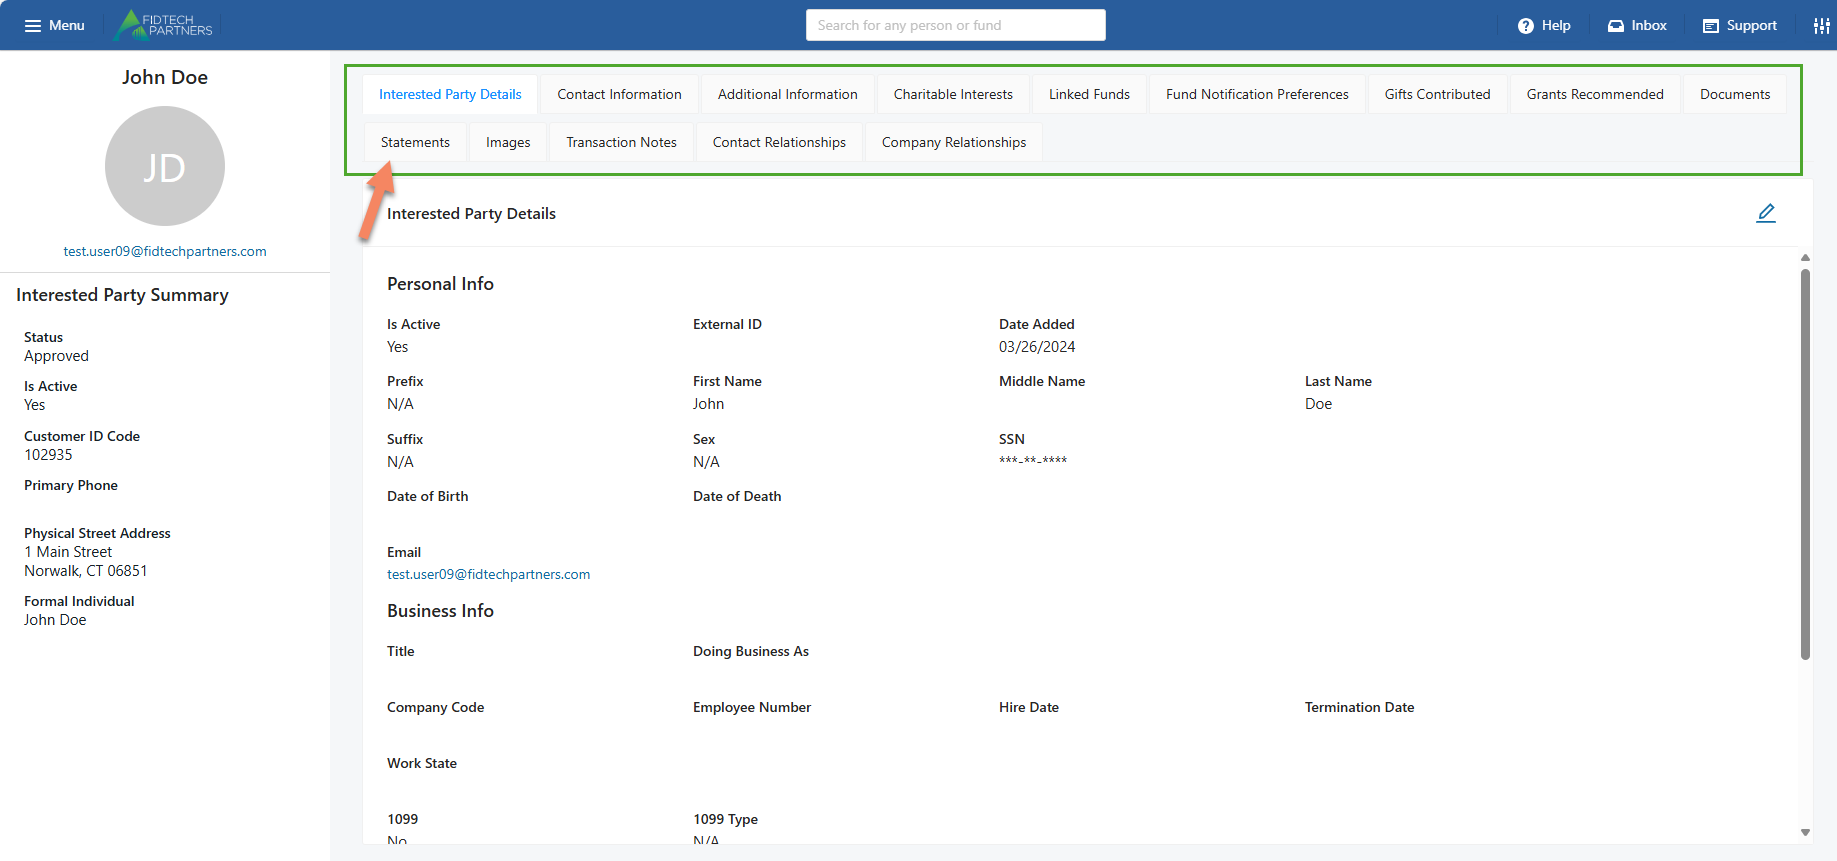
After clicking the “Save” button, if you navigate to the Contact Profile type that you edited, you can see the new section.
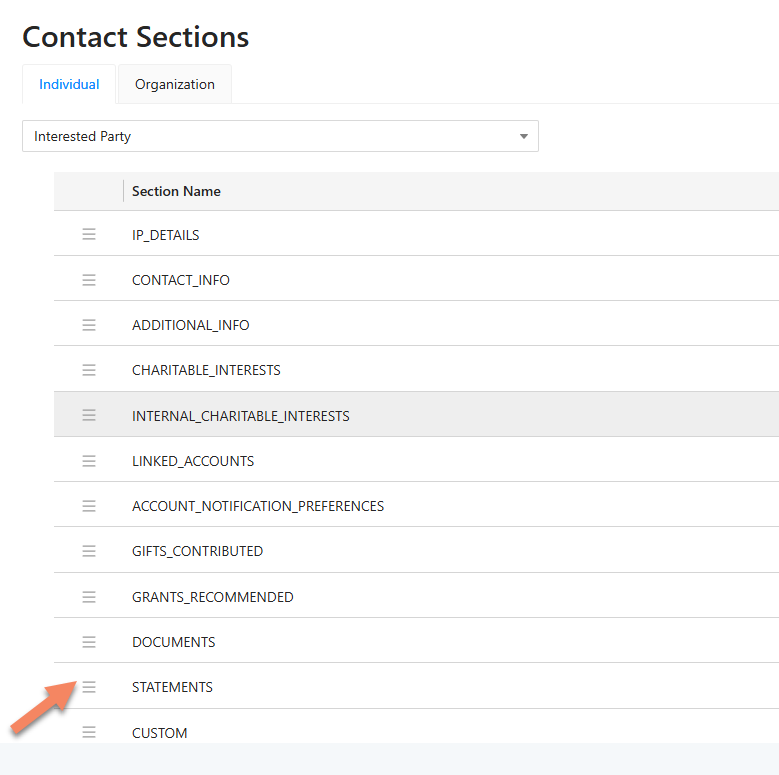
b. Reorder the Sections:
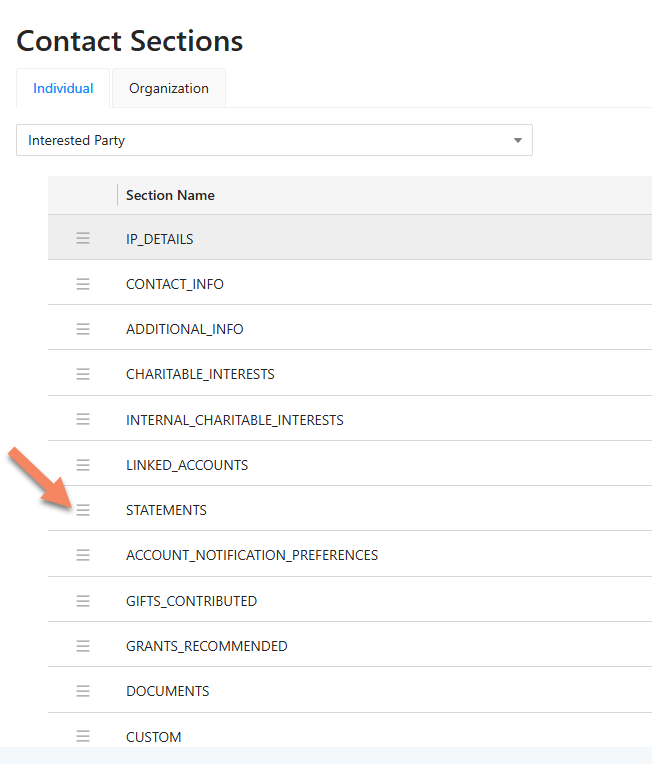
The order of the section can be modified by hovering on the hamburger-icon for each section in the listing and using the drag and drop to reorder them as needed.
After clicking the “Save Section Order” button, if you navigate to the Contact Profile type that you edited, you can see that the sections have been reordered.
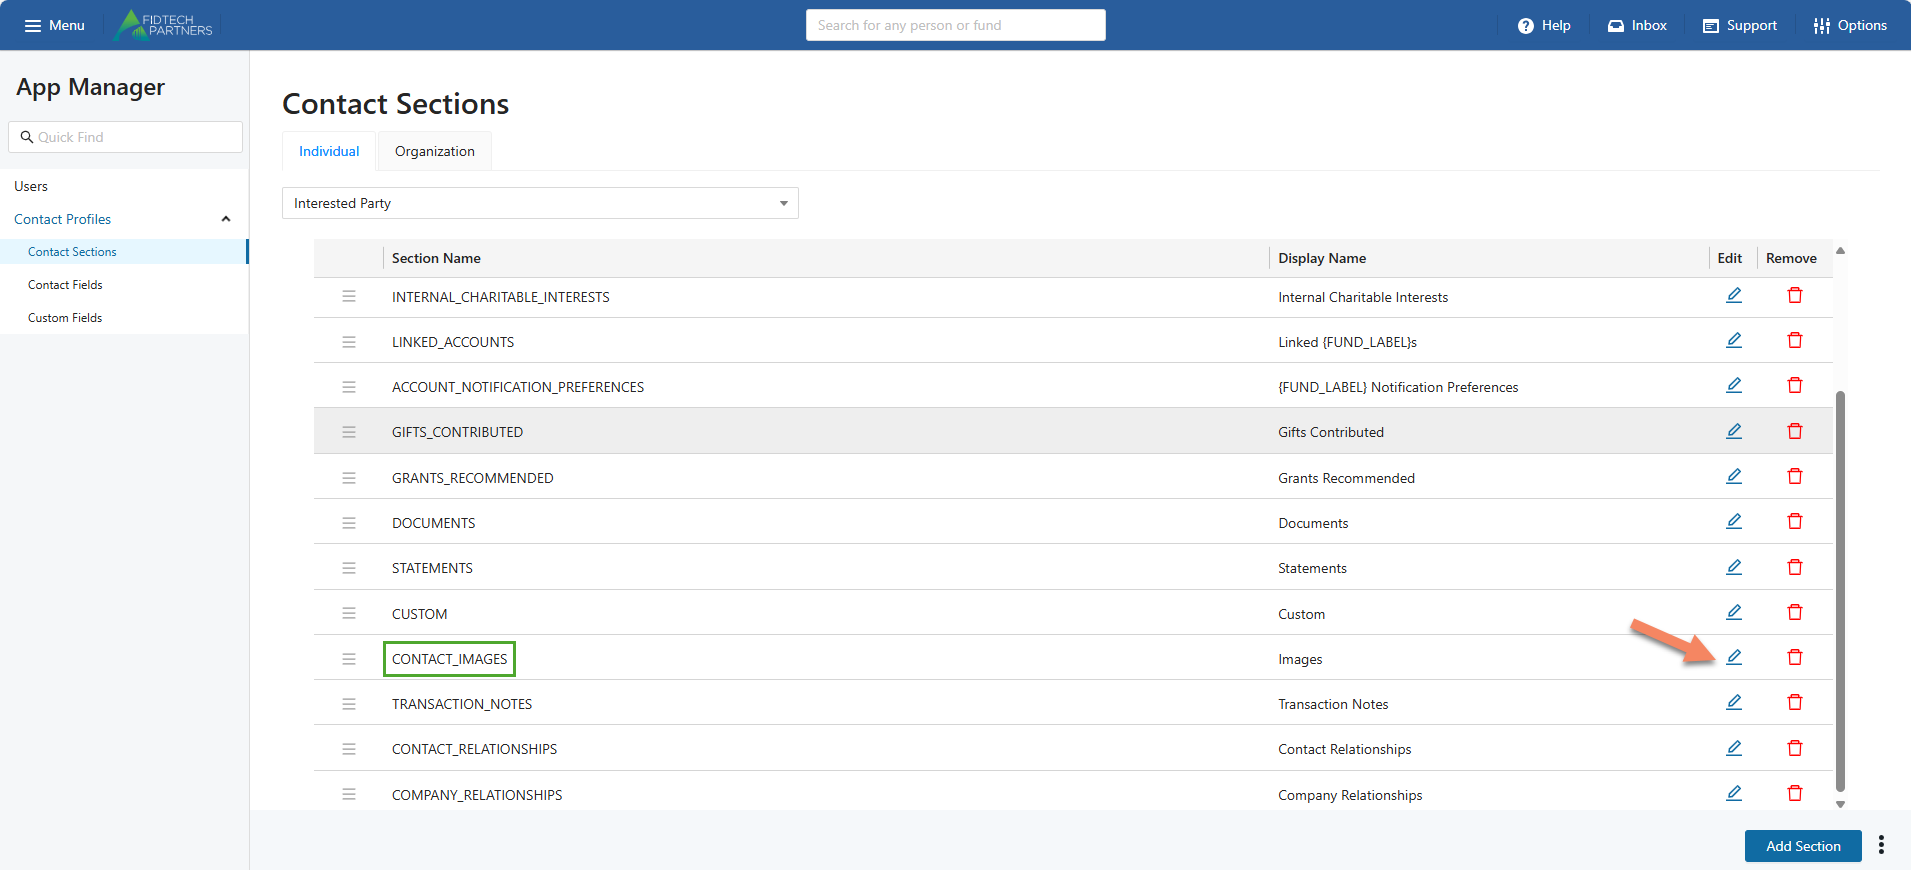
c. Rename a Section:
The display name of a section can be changed using the pencil icon for that particular section in the listing.
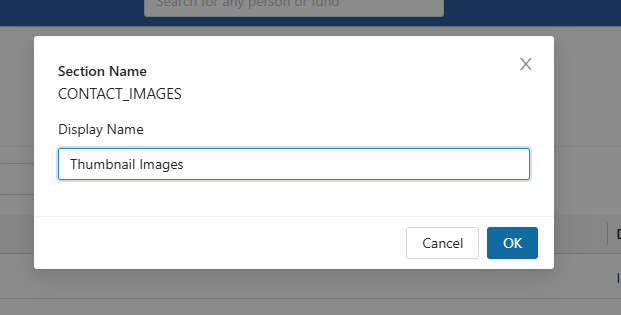
Clicking on it opens a dialog box where you can rename the section.
After clicking the “Save Section Order” button, if you navigate to the Contact Profile type that you edited, you can see that the section has been renamed.

d. Remove a Section:
A section can be removed from the contact profile’s page using the Trash icon for that particular section in the listing. Clicking on it opens a dialog box which asks for final confirmation before removal. Removing a section only removes the section from view but does not delete any previously existing data.
.png)
After clicking the “Save” button, if you navigate to the Contact Profile type that you edited, you can see that the section has been removed. If you remove a section, you can always add it back later.
Contact Fields
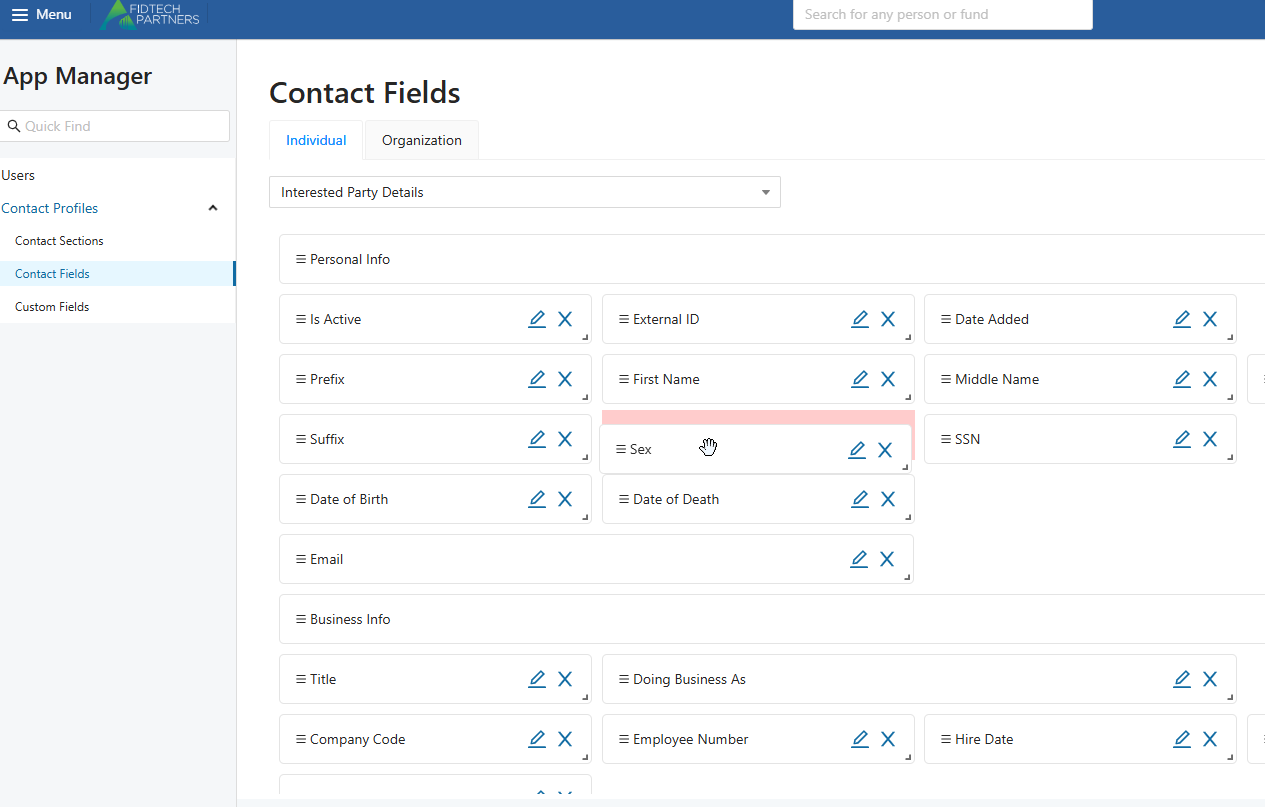
Using this tab, you can add a new field or edit a currently existing one for both Individual and Organization type Sections.
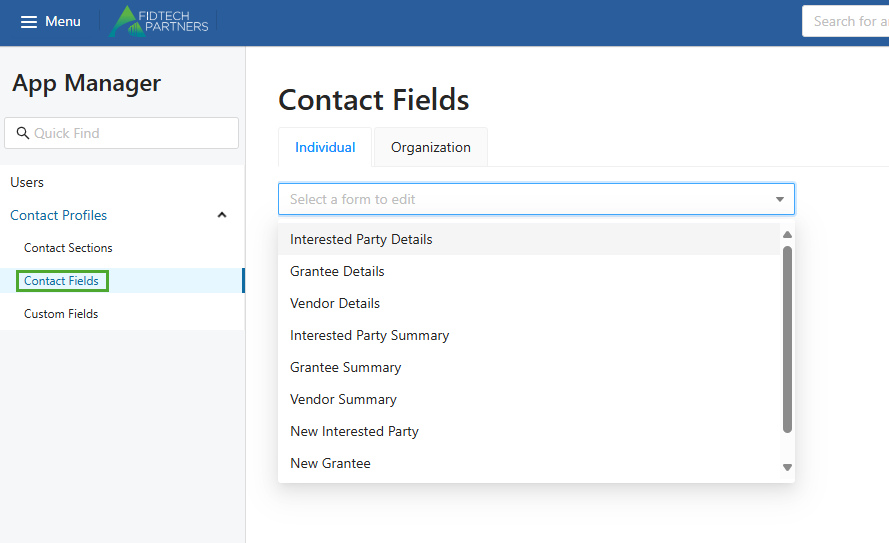
Select the Contact Profile and the Profile Type:
Use the dropdown field to choose the contact profile you want to edit: Grantee, Interested Party, or Vendor.
Click on the Individual or Organization tab to specify the type of contact profile you want to edit for the above selected category.
.png)
After performing the above selections, you can do the following actions:
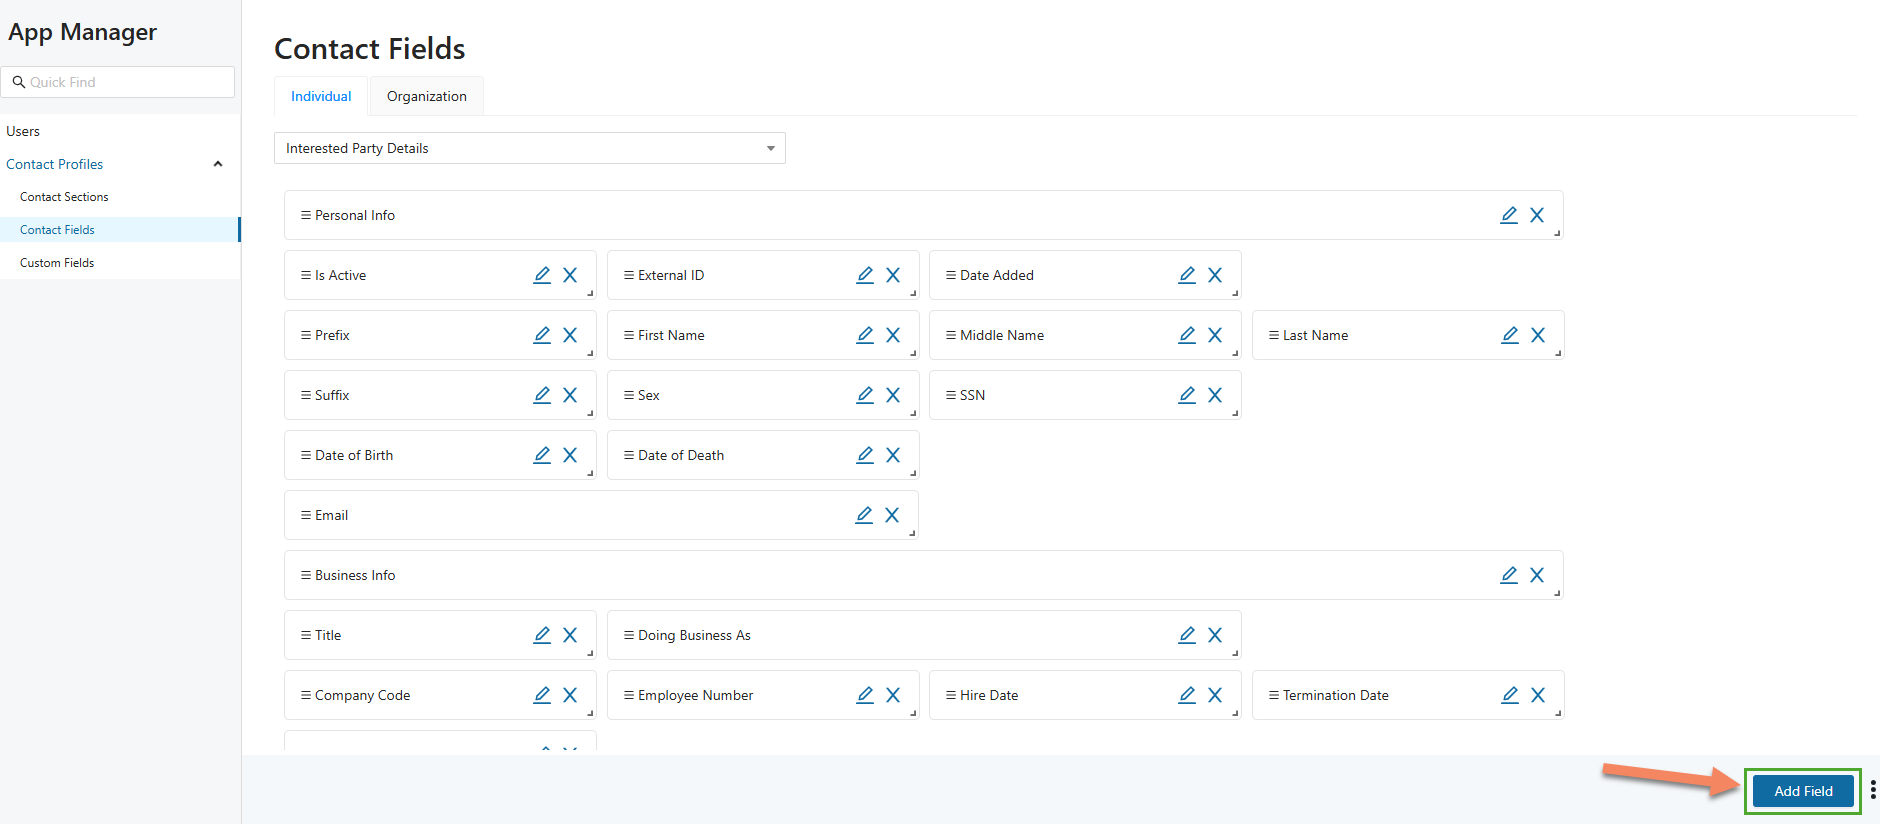
a. Add a new Field:
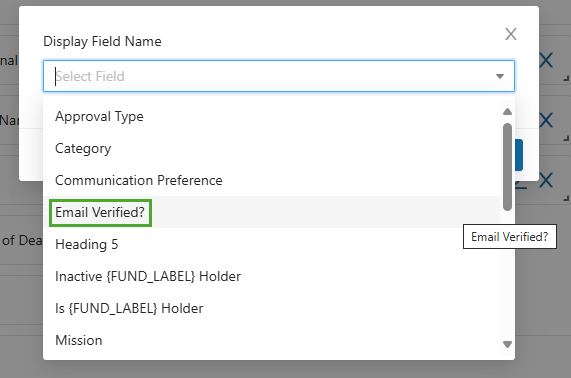
A new Field can be added to the section by clicking the “Add Field” button on the bottom-right corner. Clicking this button opens a dialog box using which you can select from a list of available fields.
.png)
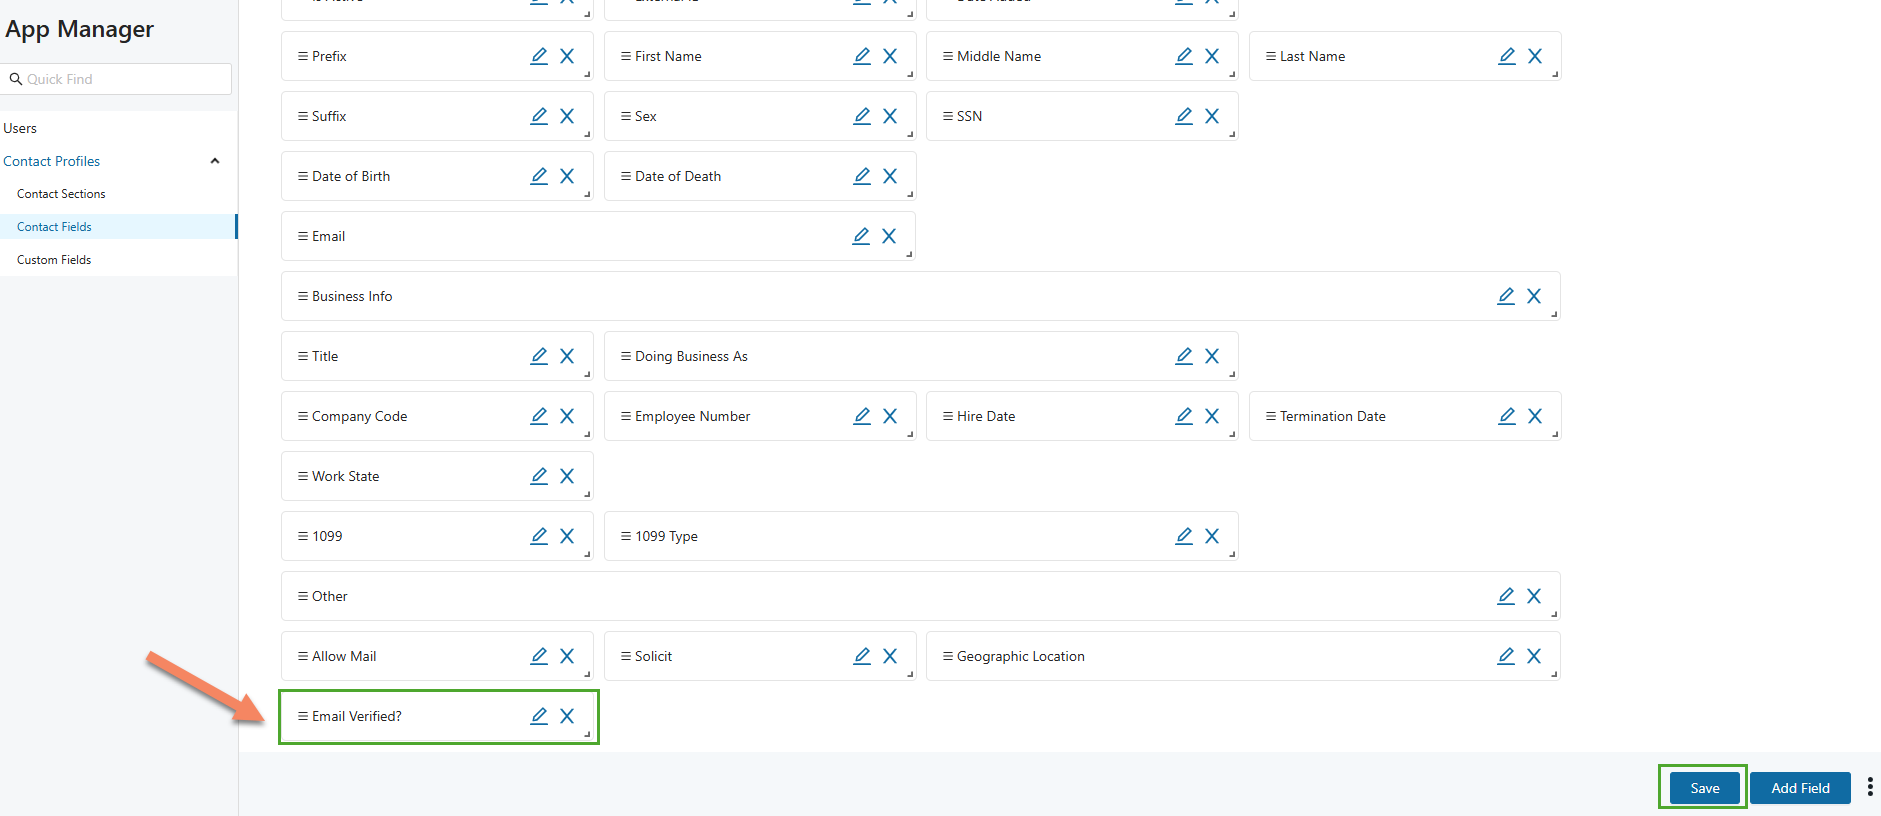
After clicking the “Save” button, if you navigate to the Contact Profile type that you edited, you can see that the new field has been added.
b. Reorder the Fields:
The order of the fields on the section can be modified by hovering over the field and using drag and drop to reorder them as needed.
After clicking the “Save” button, if you navigate to the Contact Profile type that you edited, you can see that the fields have been reordered.

c. Rename a Field and Add/Remove Field Functionalities:
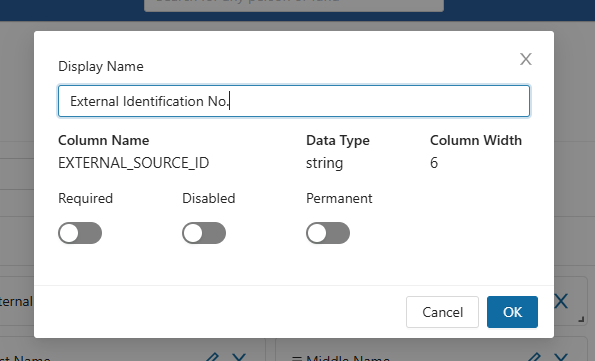
The display name of a field can be changed using the pencil icon for that particular field on the listing.
Clicking on it opens a dialog box where you can rename the field or make it Required, Disabled or Permanent.
.png)
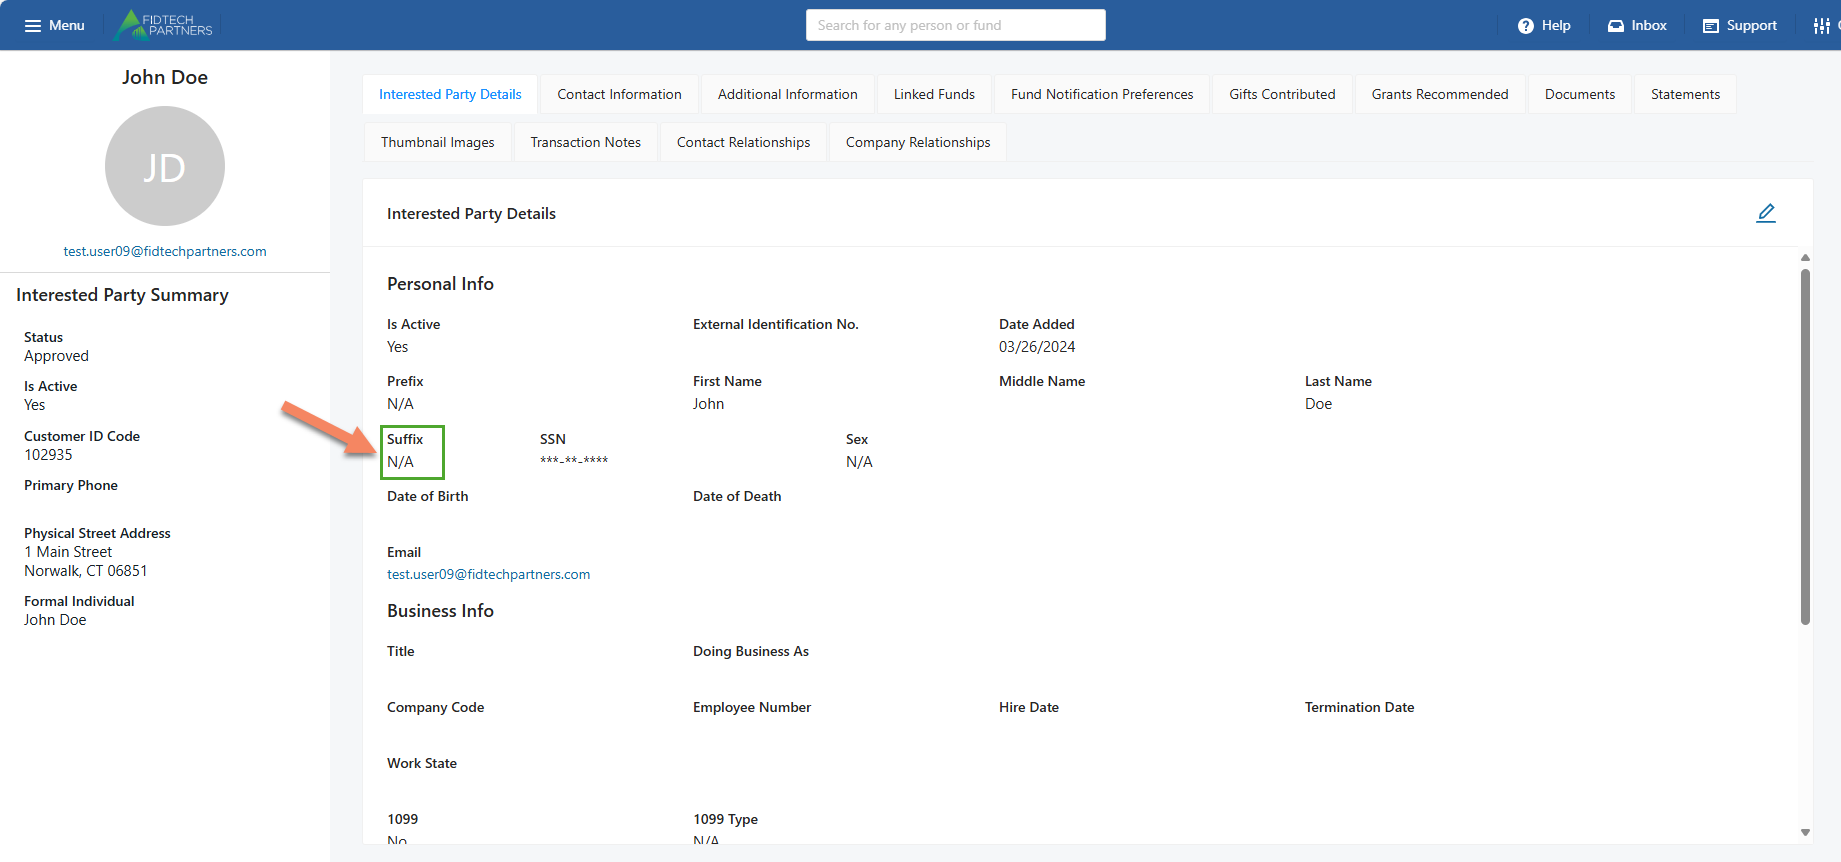
After clicking the “Save” button, if you navigate to the Contact Profile type that you edited, you can see that the fields have been edited.

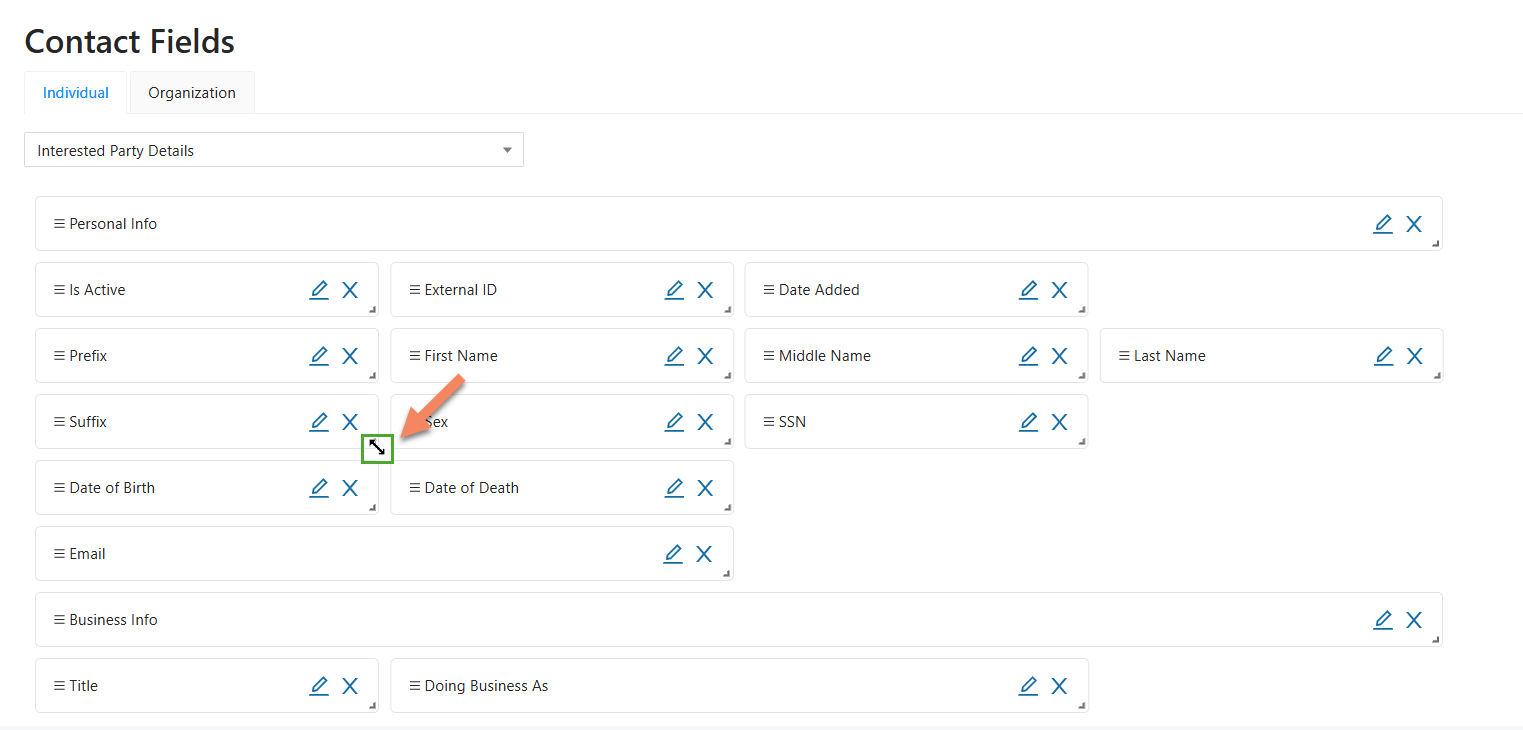
d. Expand/Reduce the Field’s size:
The field’s size on a section can be expanded or reduced using the small arrow button on the bottom right for each field. Clicking on it allows you to drag and expand/reduce its size as needed.
After clicking the “Save” button, if you navigate to the Contact Profile type that you edited, you can see that the field has been resized.
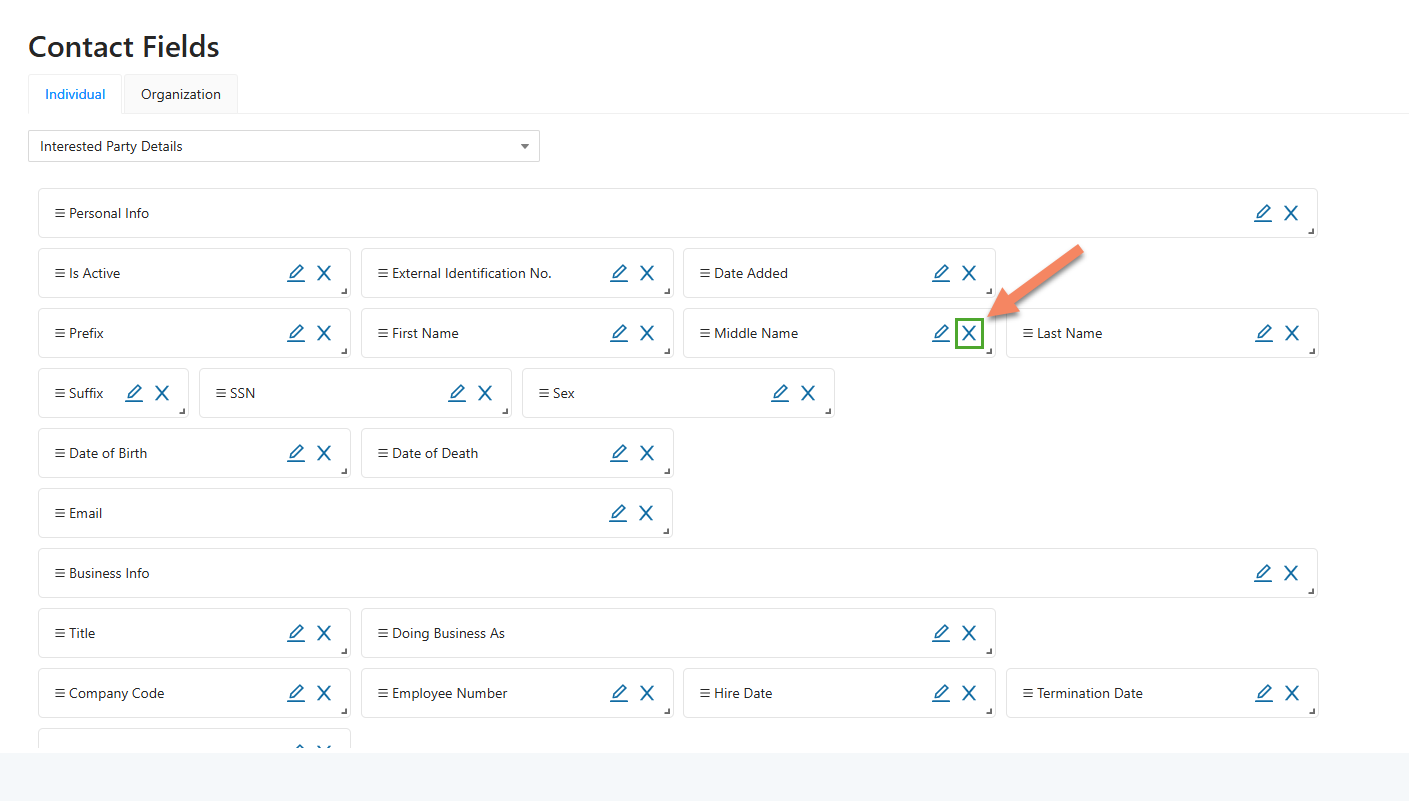
e. Remove a Field:
A field can be removed from the section using the X icon for that particular field in the listing. Clicking on it simply removes the field from the Form. If you remove a Field, you can always add it back later.
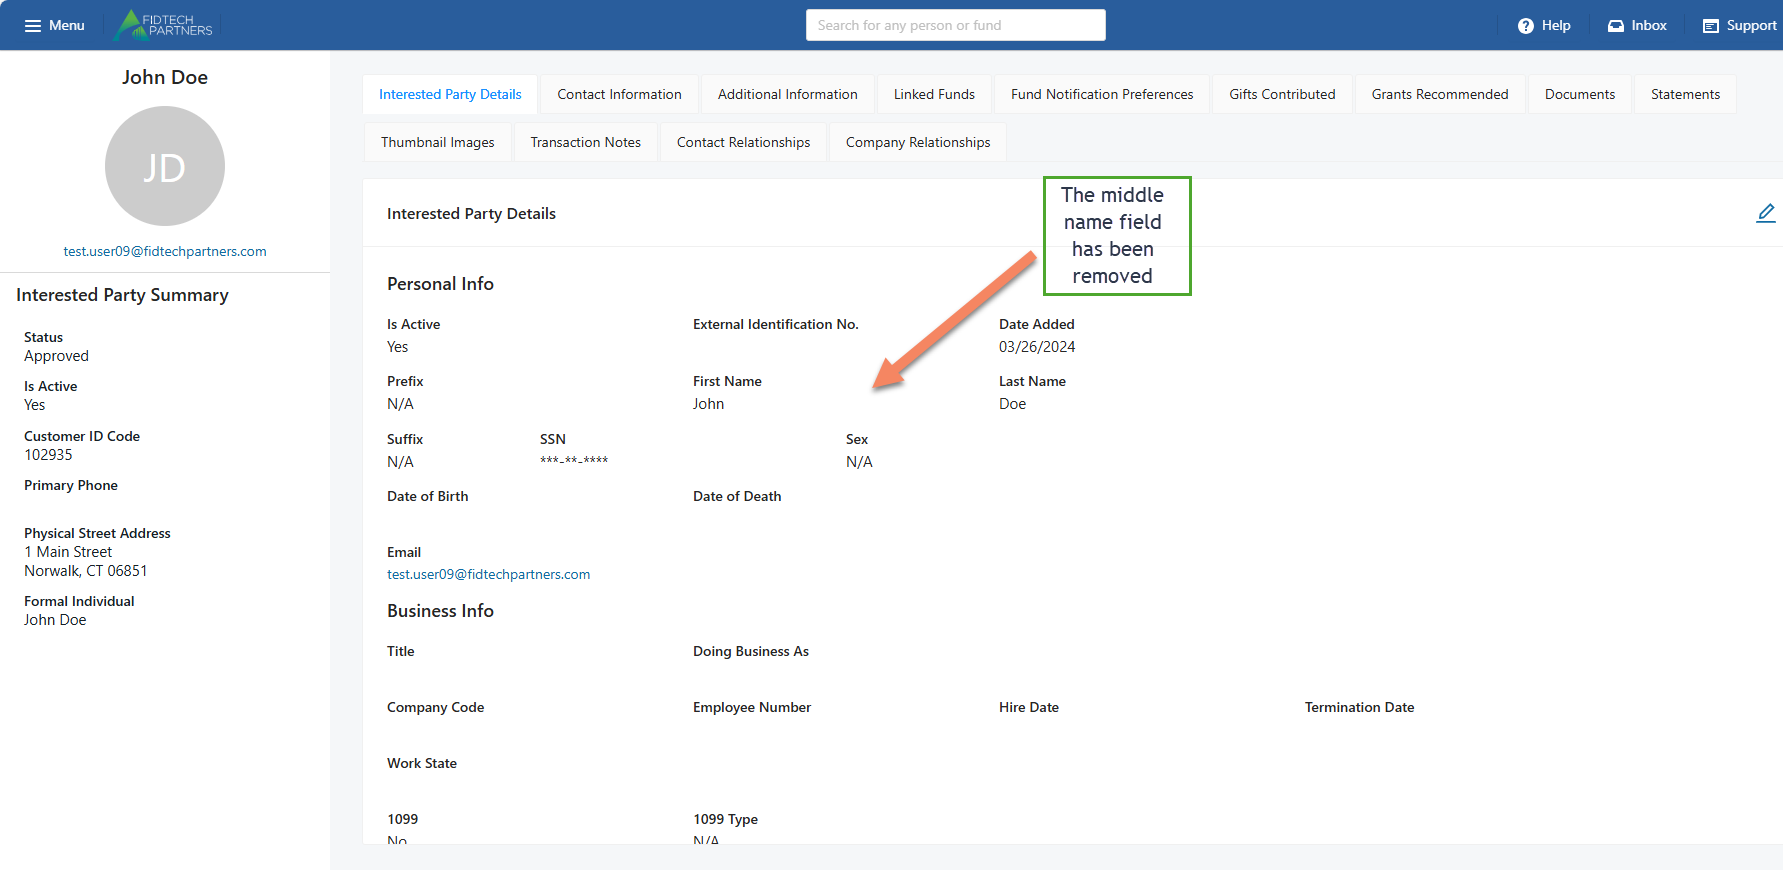
After clicking the “Save” button, if you navigate to the Contact Profile type that you edited, you can see that the field has been removed.
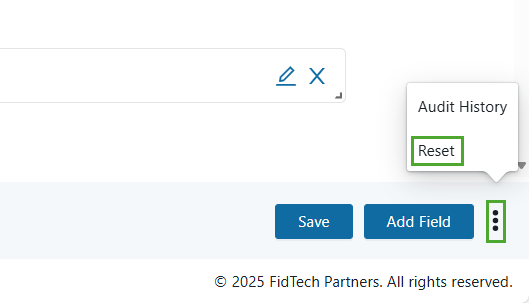
f. Reset any Changes:
Any changes made by following the processes above can be reset by clicking on the vertical ellipsis icon on the bottom-right corner of the page, and then clicking the “Reset“ button. You can also view the Audit History of the fields.
Note: Reset can only be performed if you haven’t clicked the “Save” button that appears after making any changes to the Form.
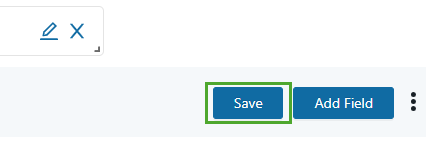
Click on “Save” to save your changes.
Custom Fields
Using this tab will allow you to create and manage custom fields.

Data types that are supported for these fields are:
Boolean: This is a toggle field.
Date: This is a date field and will include a date picker / calendar.
Int: This is a number field.
Money: This is a numeric field formatted as currency.
String: This is a free text field. This field type also includes options to make the field a single-select dropdown as well as a multi-select dropdown.
Text: This is also a free text field, but this field type should include a minimum of two rows on the screen and will expand as you type text that exceeds the original two rows.
The actions available here are:
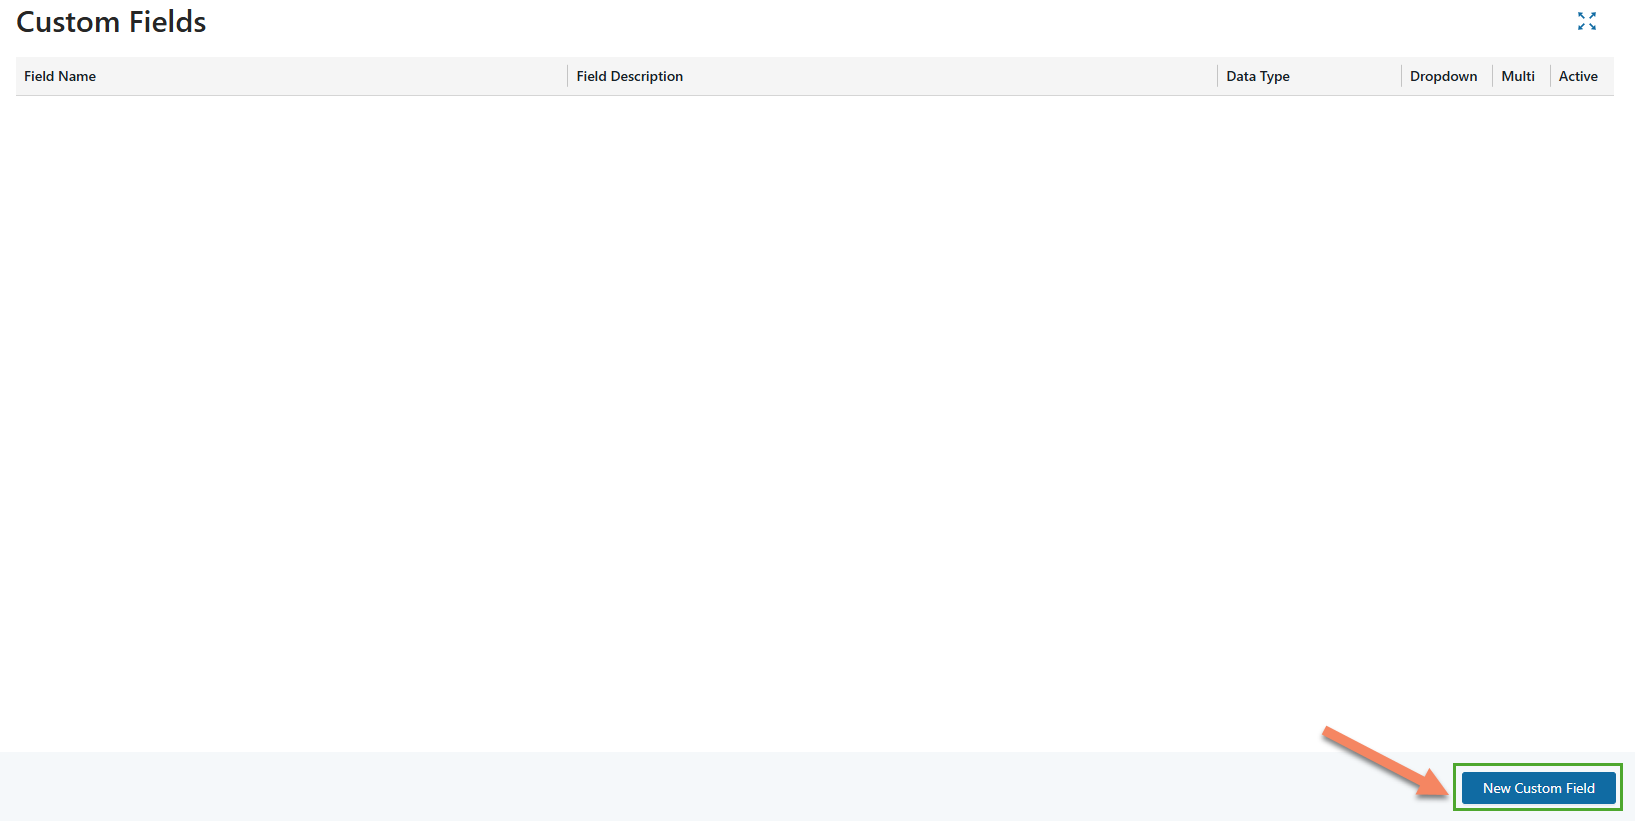
Add a new Custom Field:
A new custom field can be added by clicking the “New Custom Field” button on the bottom-right corner. Clicking this button gives you options to enter the field’s details, select its Data Type, and make it active/inactive.
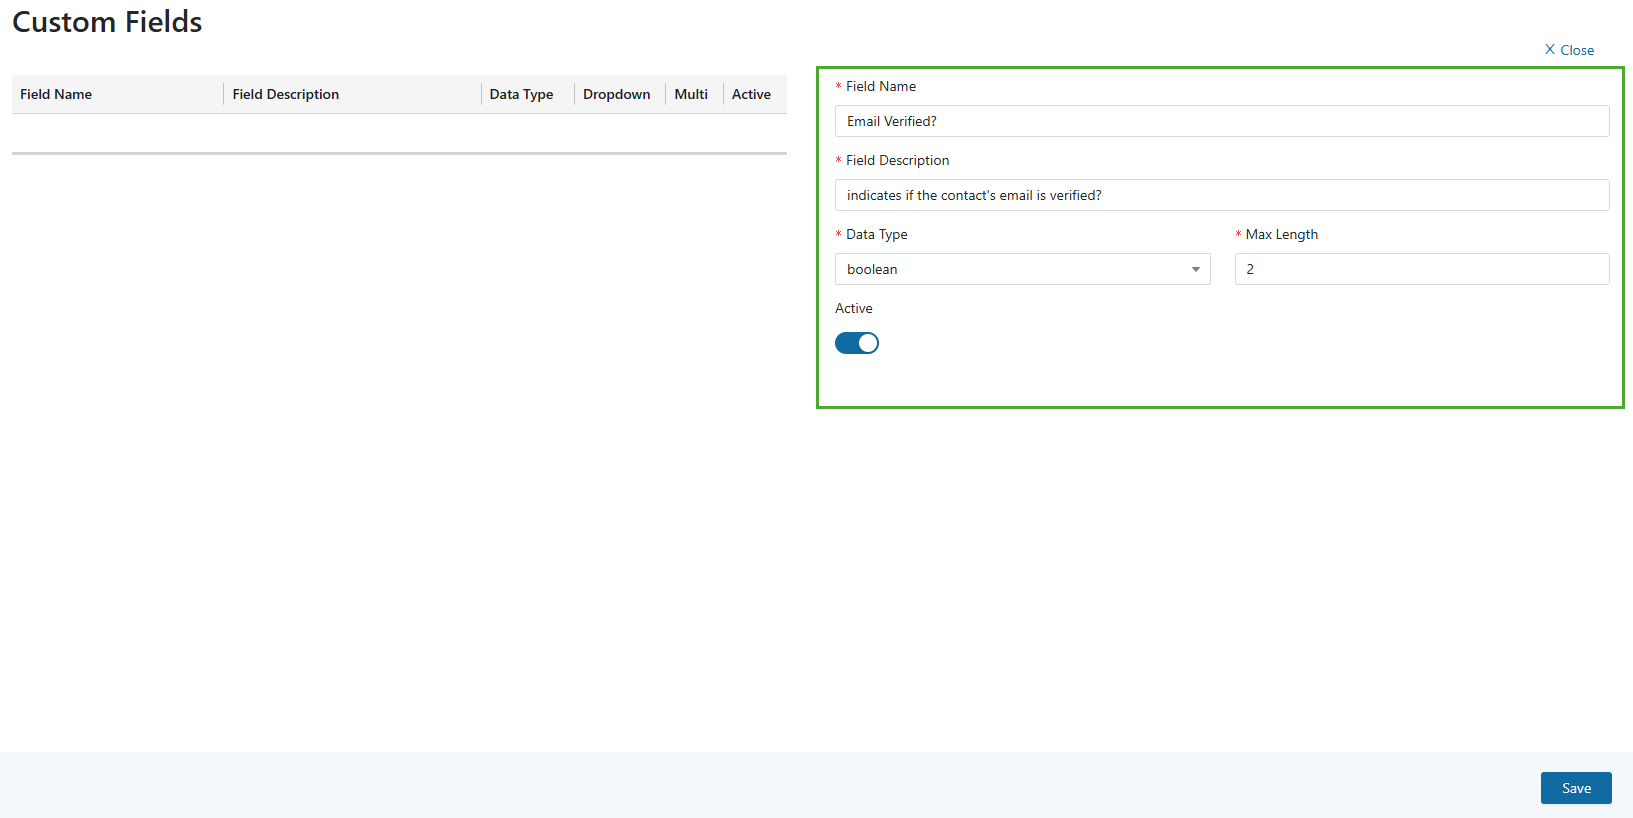
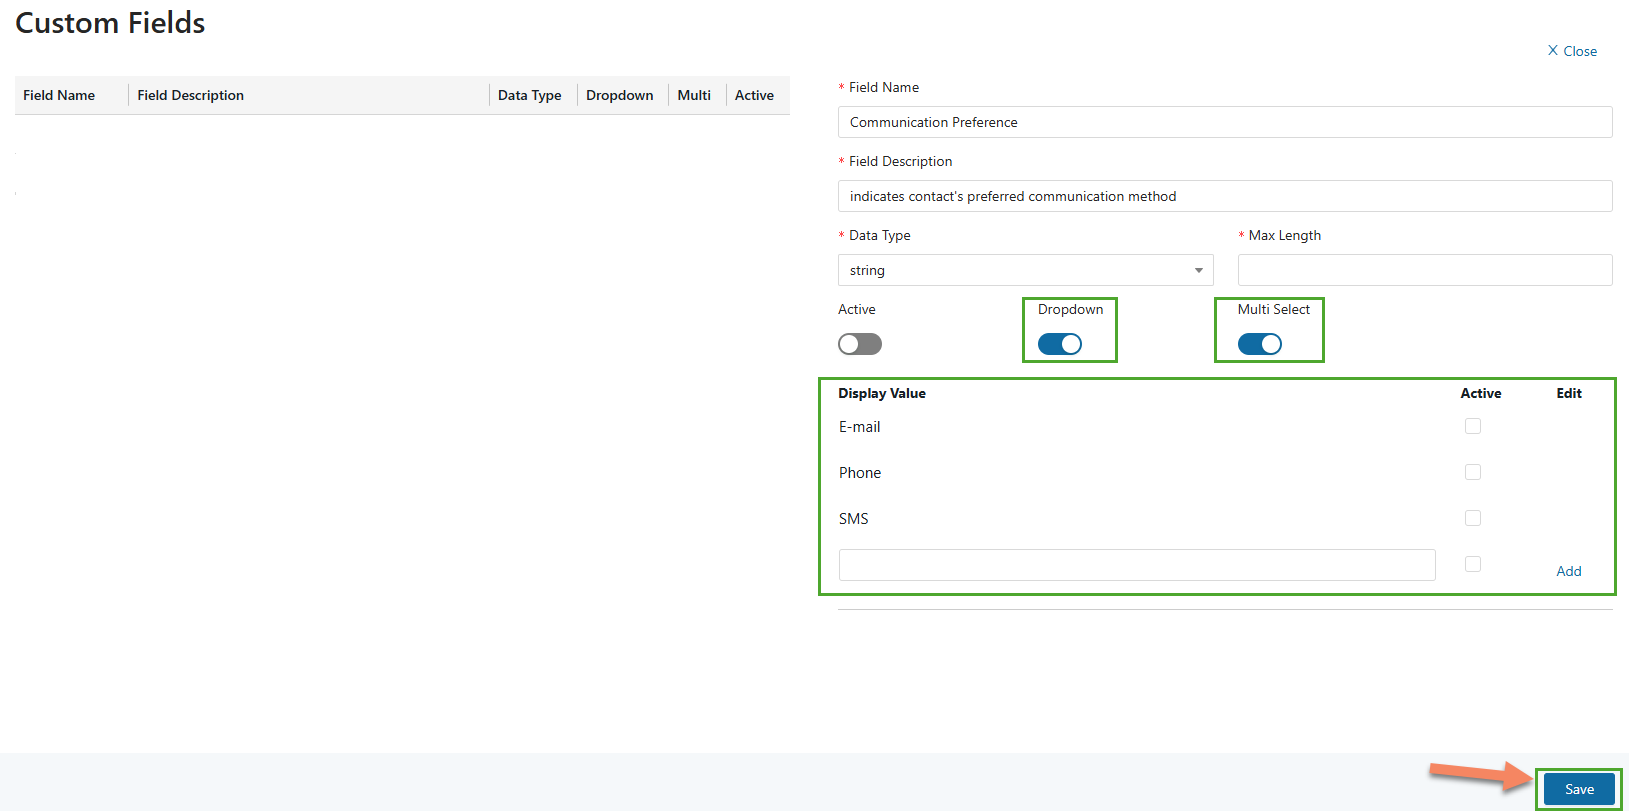
If the field has Data Type as ‘string’, then it gives you additional options to make the field a Dropdown as well as making the dropdown a multi-select.
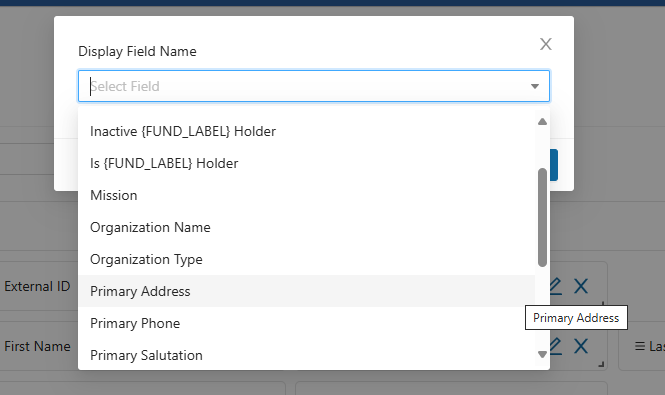
If you make the field a dropdown, Display Value field becomes available to enter the values for the dropdown and make those values active/inactive.
After ensuring all the fields are Active, click “Save” to save the custom field, after which it should appear on the Custom Fields table.
Note: If you mark the field as required, the field must be populated when editing the profile or the user will receive an error.
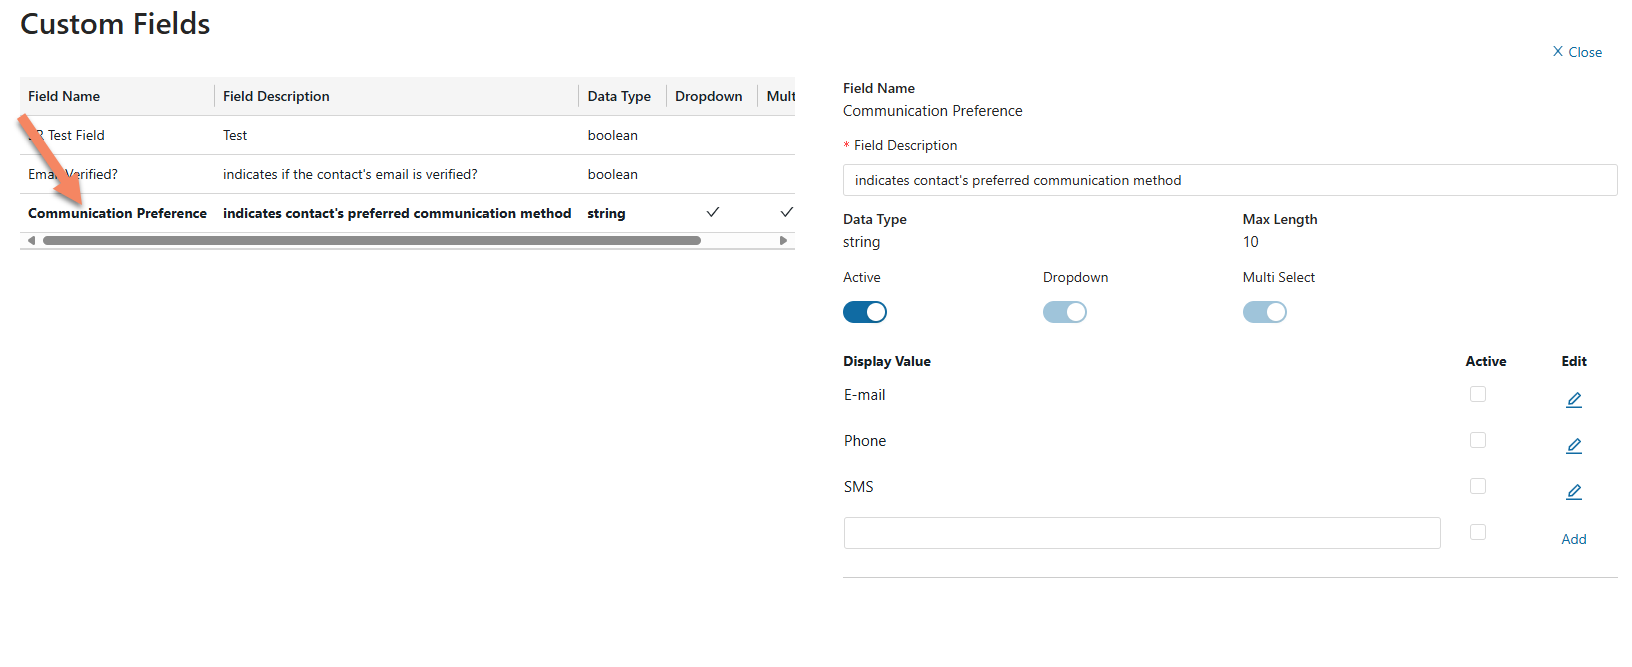
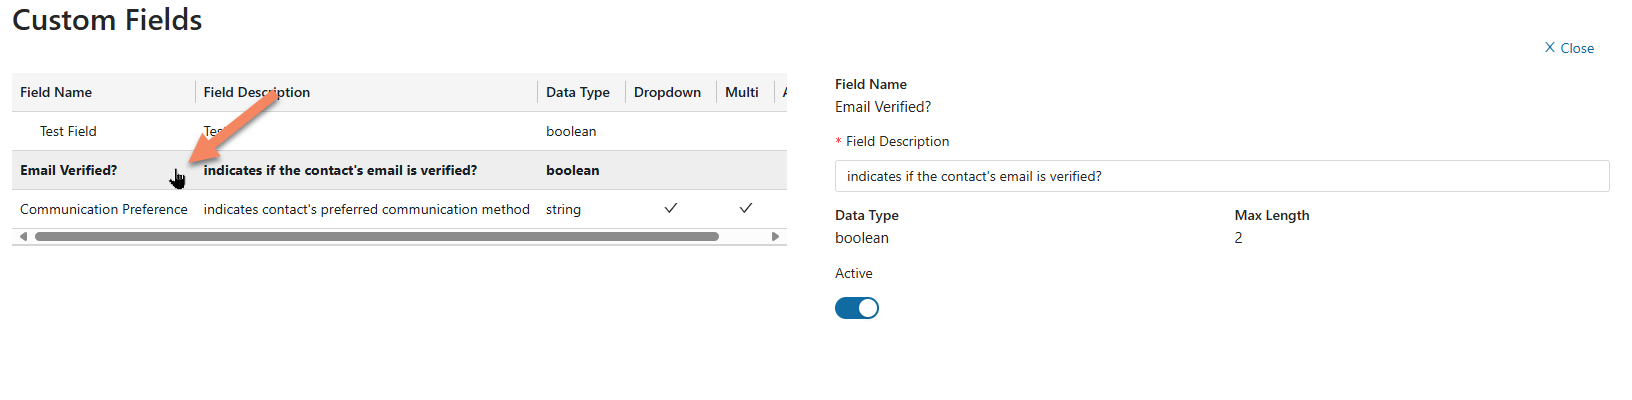
Edit a Custom Field:
To edit a custom field, click on the custom field that you want to edit from the table. Clicking on it gives you the options to edit the Field Description and make it active/inactive or more options depending on the field type.
Click “Save” to save any changes made to the custom field.
Add Custom Fields to a Contact Profile:
Custom fields can be added to any of the Contact Profile’s Sections as well as their Summary side pane.
To add the new fields to a profile, select “Contact Fields” from the left-hand pane and choose the section that you would like to add the fields to.
A new Field can be added to the Section by clicking the “Add Field” button on the bottom-right corner. Clicking this button opens a dialog box using which you can select your custom field from a list of available fields.
The selected custom field should appear on the bottom of the Section.
Click “Save” to save the newly added custom field to the Section.
The custom fields can be moved anywhere you like within the section by simply hovering over them and using the drag and drop feature.
You can also add a header field and separate your custom fields from the other fields in the section.
Simply, click the “Add Field” button and select field ‘Heading 5’.
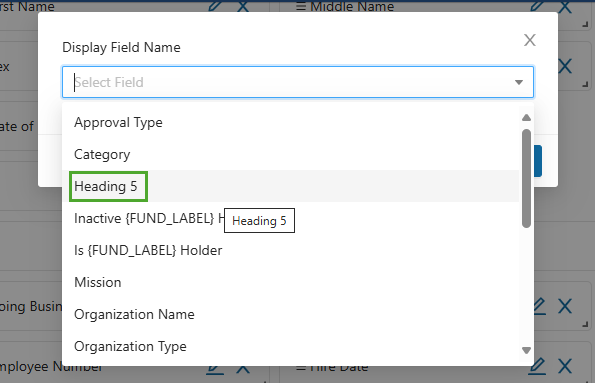
Use the drag and drop feature to place the field where needed and the pencil icon on the field to change its name.
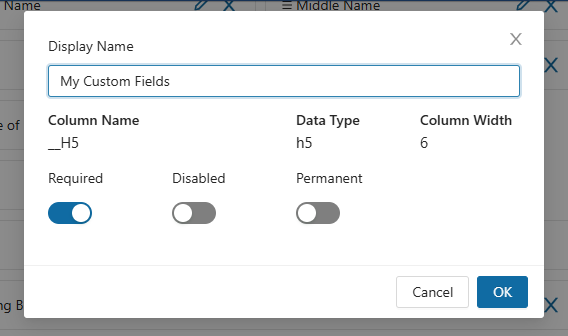
Drag and drop the heading field where needed to create a separation between fields.
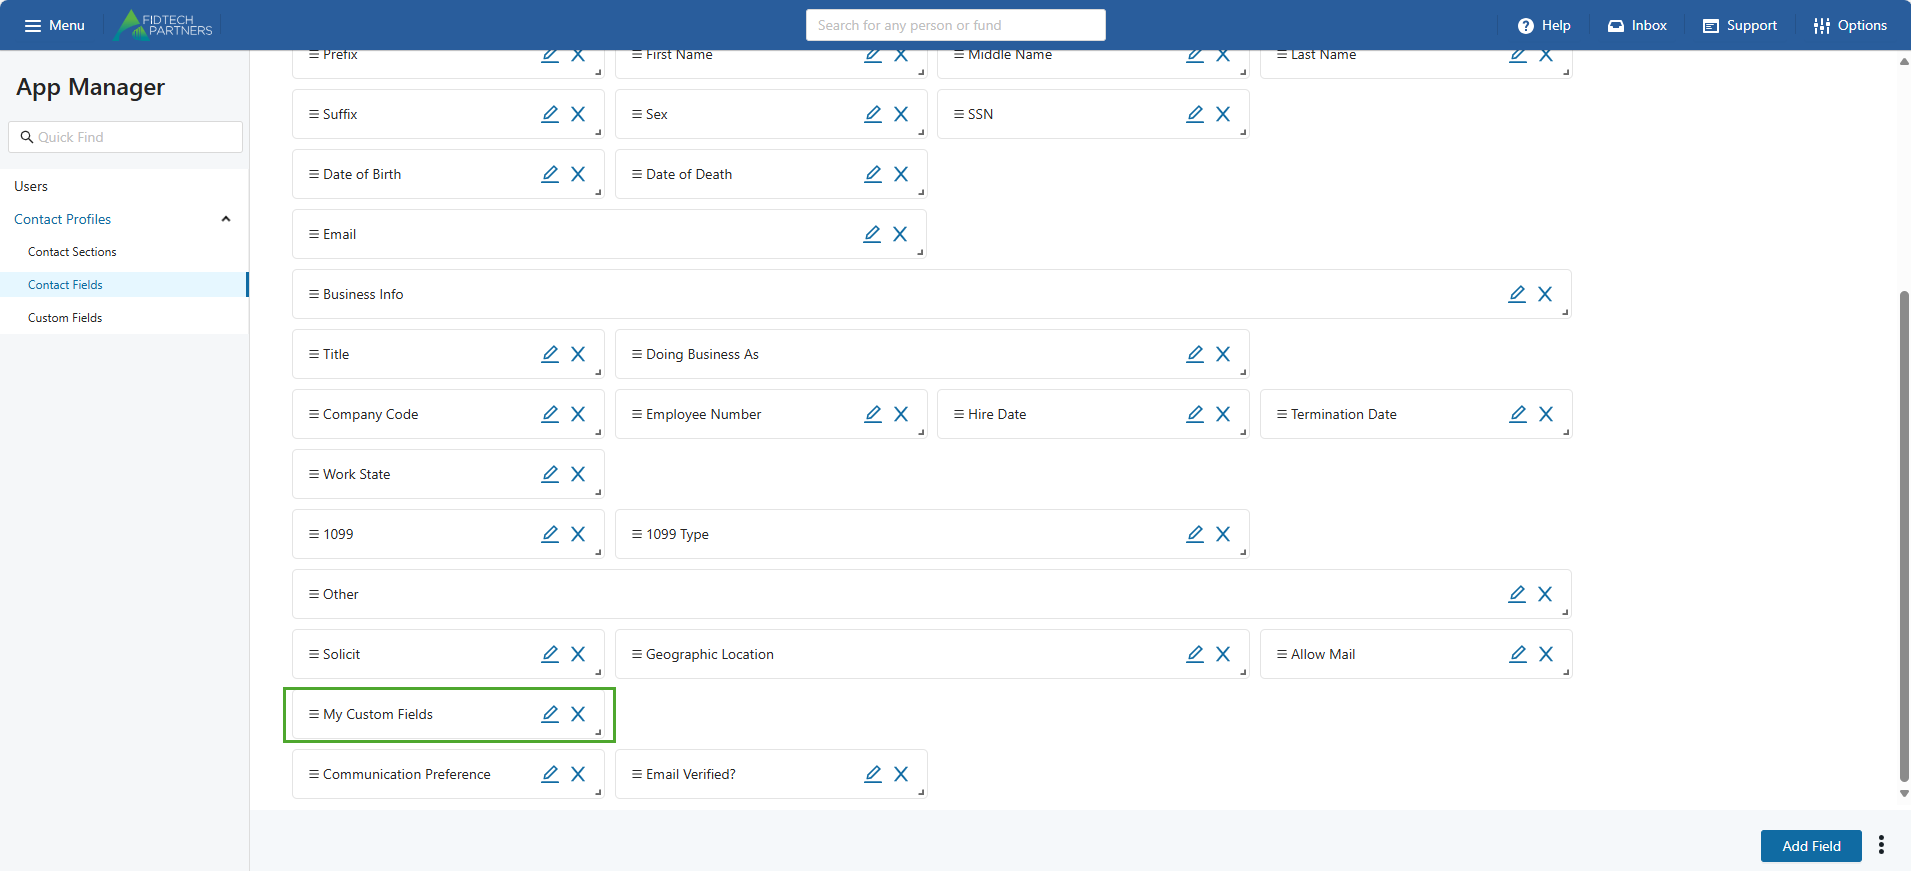
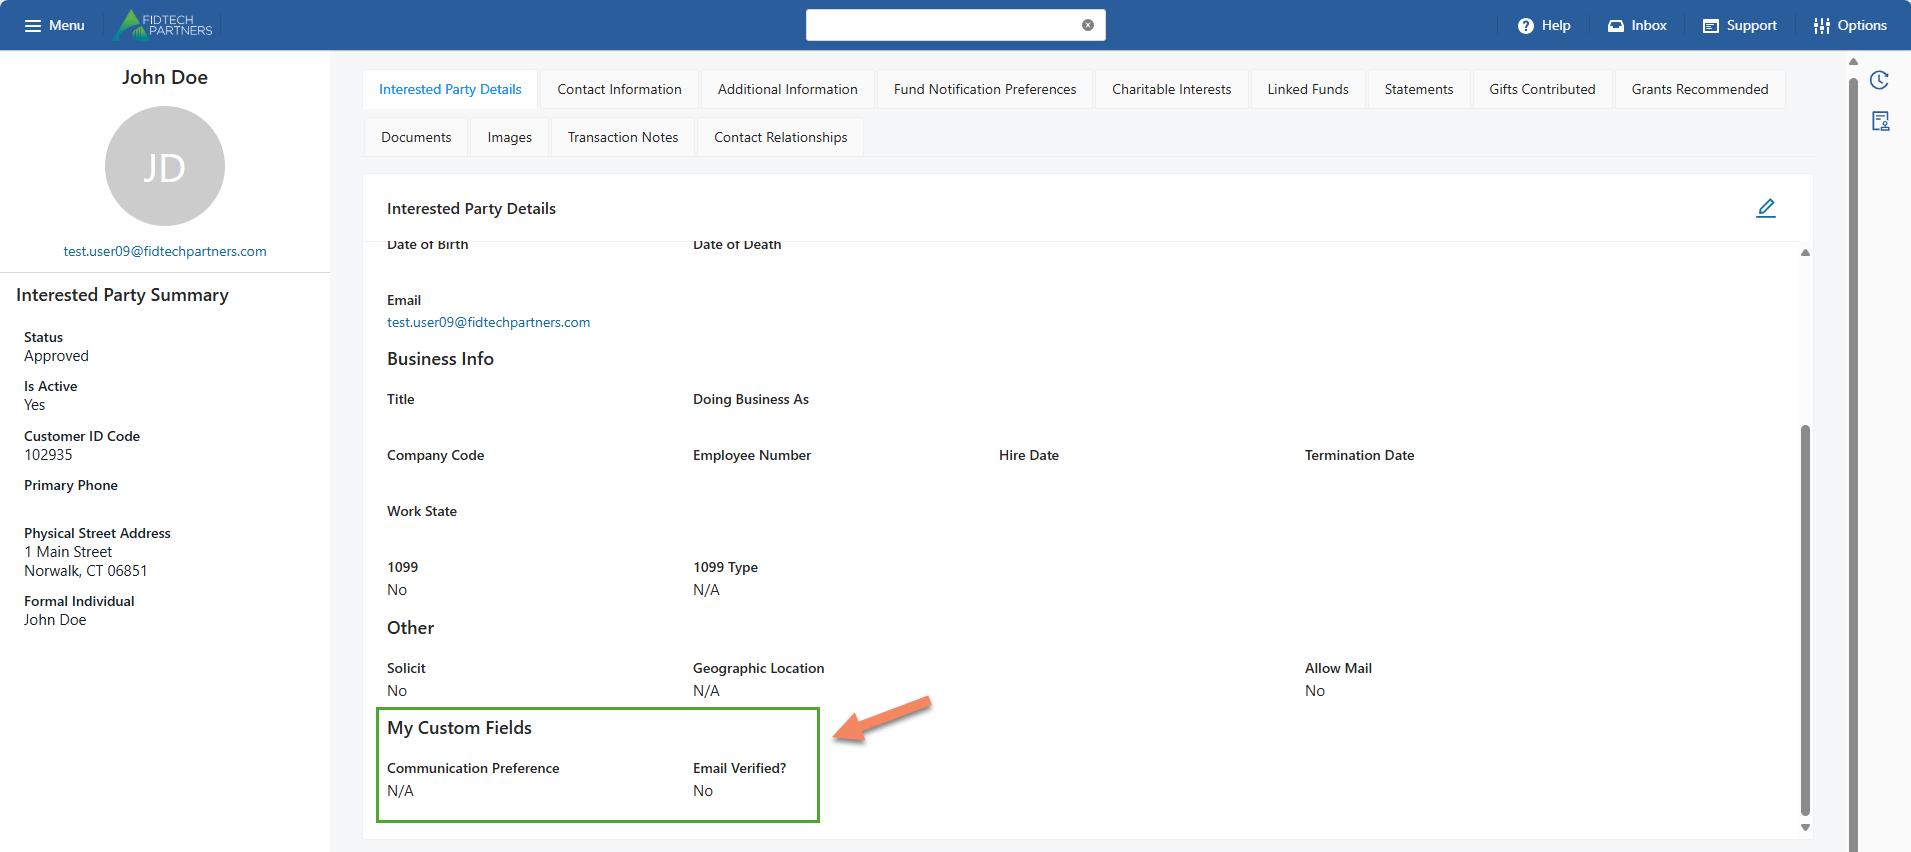
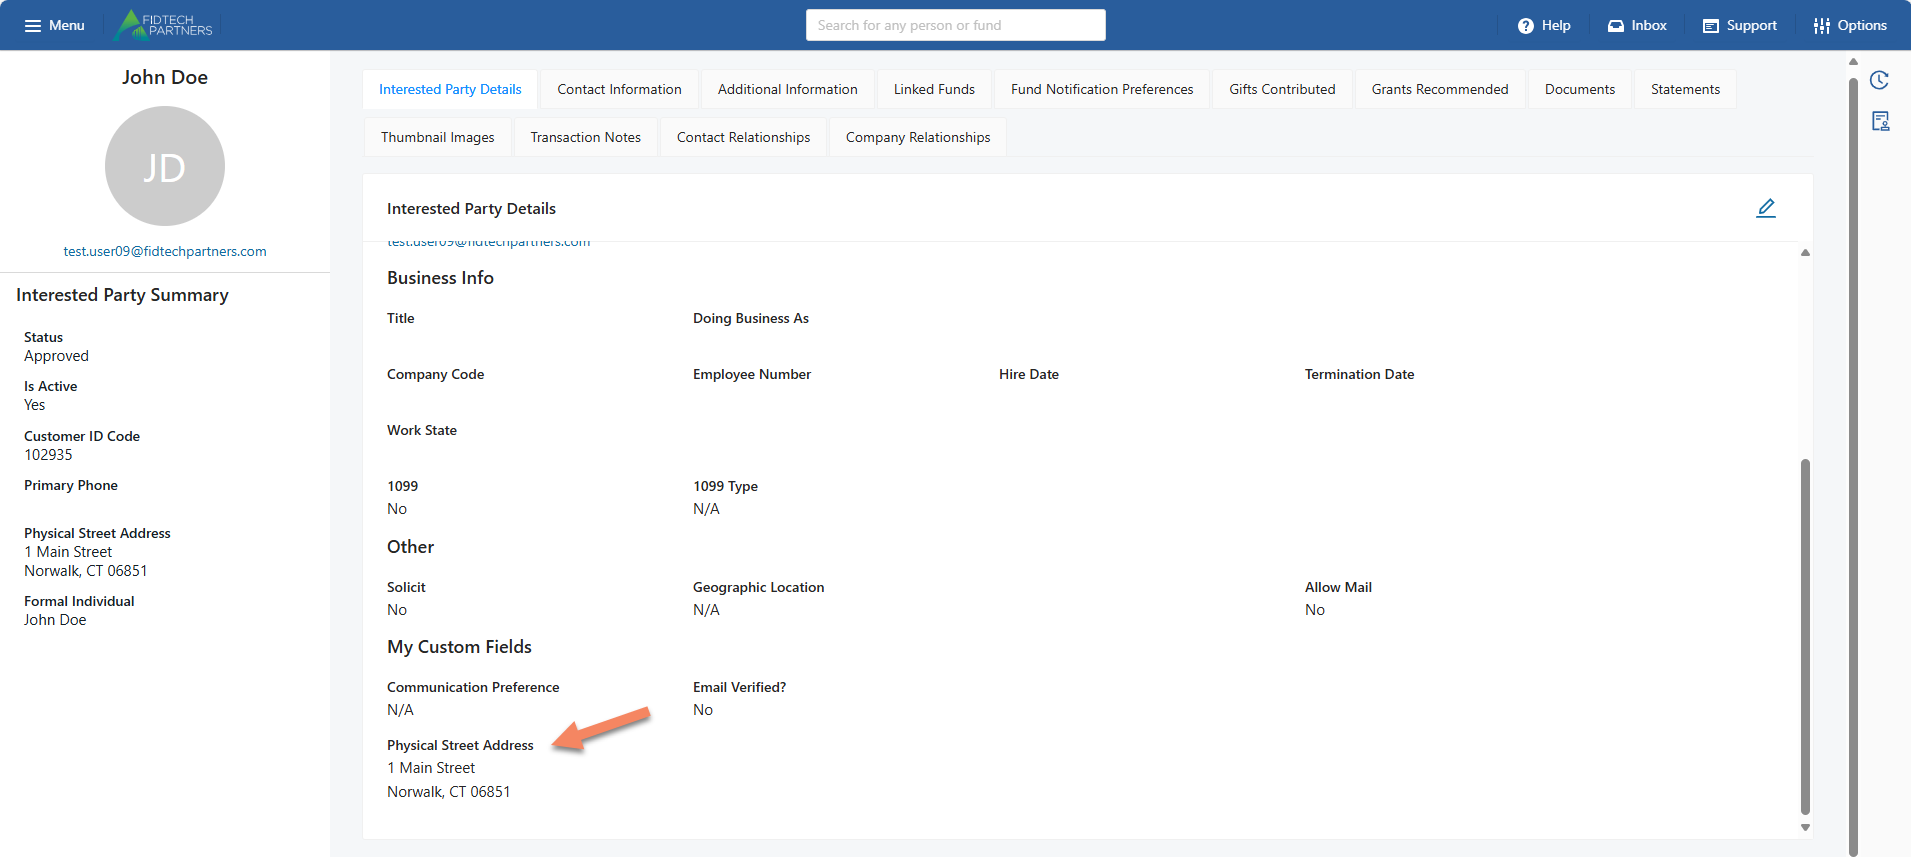
Here are the two new custom fields, ‘Communication Preference’ and ‘Email Verified?’ and ‘My Custom Fields’ header field that were added to the Interested Party Detail section: