An Interested Party’s profile consists of various sections which allow you to access and manage their information.
Note: The![]() icon allow you to edit previously entered information, the
icon allow you to edit previously entered information, the  icon allows you to add more information, and the
 .png) icon allows you to delete the information.
icon allows you to delete the information.
Note: Any changes made in these sections may be subject to an approval process, depending on your institution's specific approval policies.
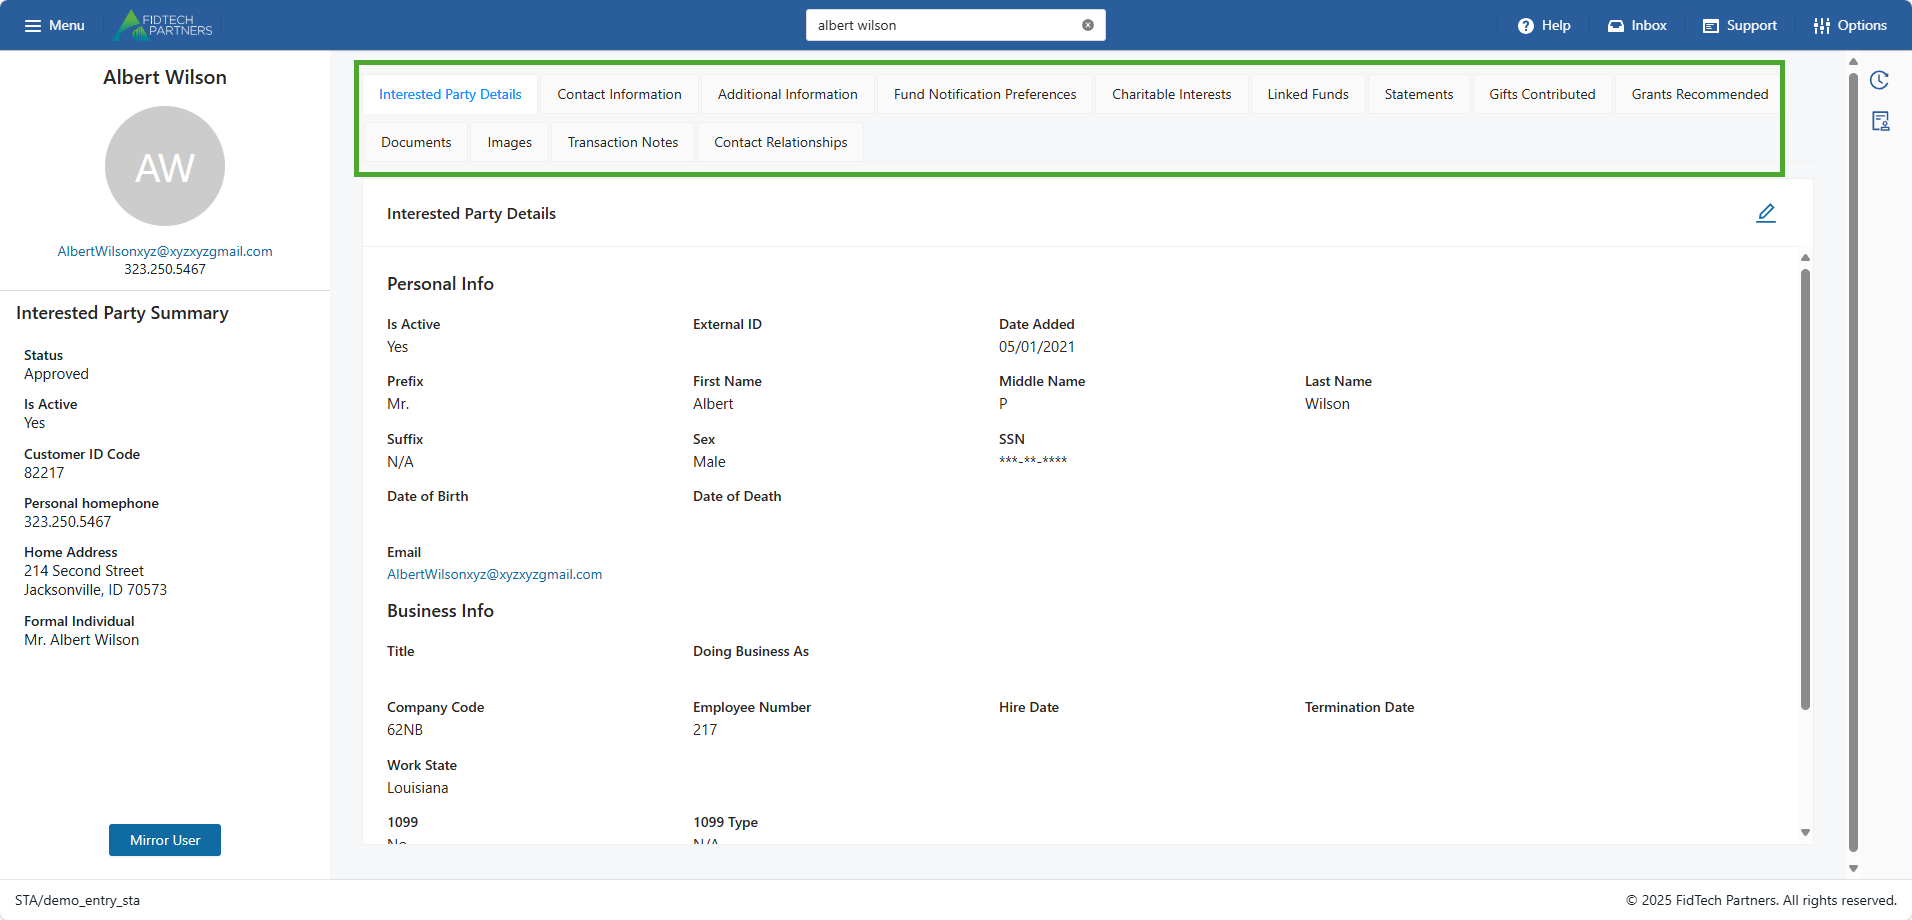
Interested Party Details: Add/Edit their basic personal or business information. Fields such as First Name and Last Name are entered upon profile creation. Clicking the Edit button
 here also gives you access to important details or functionalities such as:
Is Active: Switch the Interested Party’s status as active or inactive in the FoundationHub.
1099: Indicate if the Interested Party is a 1099 holder.
SSN: Input the Social Security Number of an individual. This field is masked and is only viewable based on the user’s permissions. Contact your administrator if you need to unmask this field.
.png)
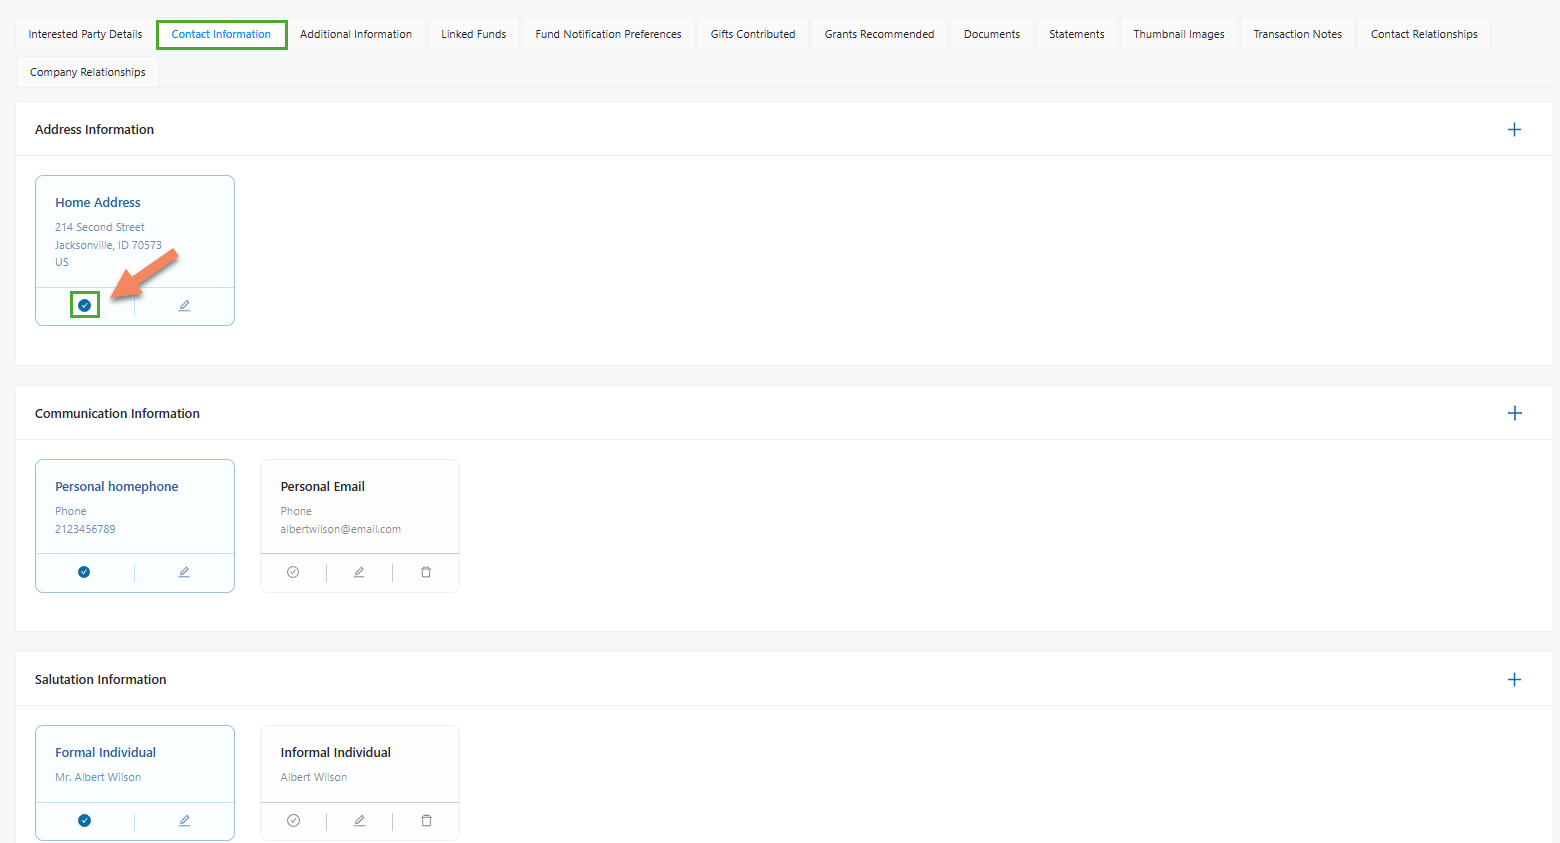
Contact Information: Add/Edit their address, communication and salutation details. A Contact can have more than one Phone or Address of the same type. A Primary contact information is marked with a blue tick. It can be edited but not deleted unless a replacement is added.
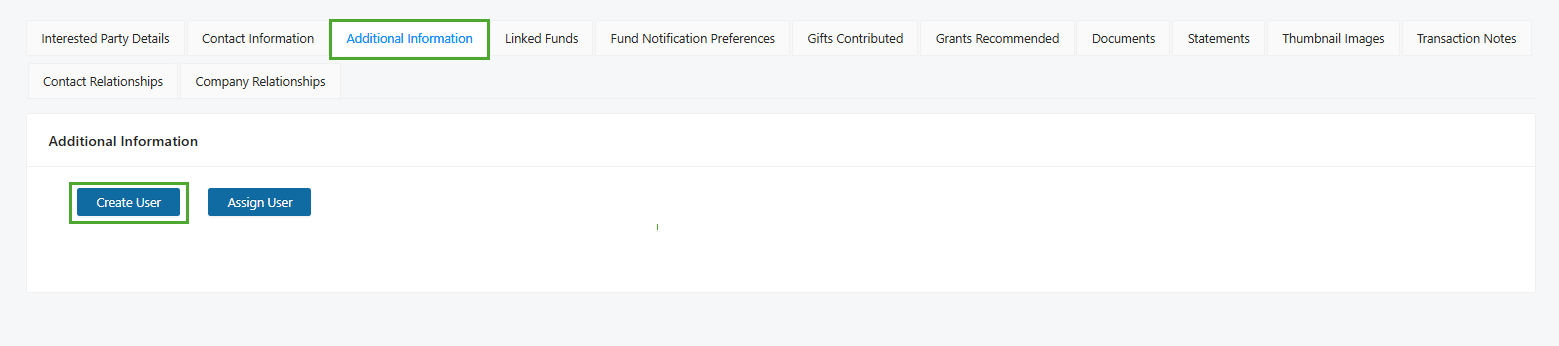
Additional Information: Create or edit a DonorSphere account for the contact profile. The ‘Create User’ button is only visible on DonorSphere eligible profiles - profiles with an email and valid fund link. For contacts with an exisiting DonorSphere account, this section allows an FH user to edit the DonorSphere account details.
.png)
Fund Notification Preference: Edit the notification preferences for their Linked Funds.
.png)
Charitable Interests: Edit their charitable interest details.
.png)
Linked Funds: Add/Edit the Funds that the Interested Party is linked to. To learn how to link a Fund to an Interested Party, click on this article. This section also offers an export as an excel sheet
 and a mass ‘Linked Funds’ update
  buttons. The mass ‘Linked Funds’ update button’s functionality is explained in this article.
.png)
Statements: View the statements for a specific date range. This section will only appear if the contact has a valid fund link.
.png)
Gifts Contributed: View gift contributions to Funds for a specific date range. Clicking on each entry on the listing pops-up its transaction details and the section also offers an export as an excel sheet button
.png) .
.
.png)
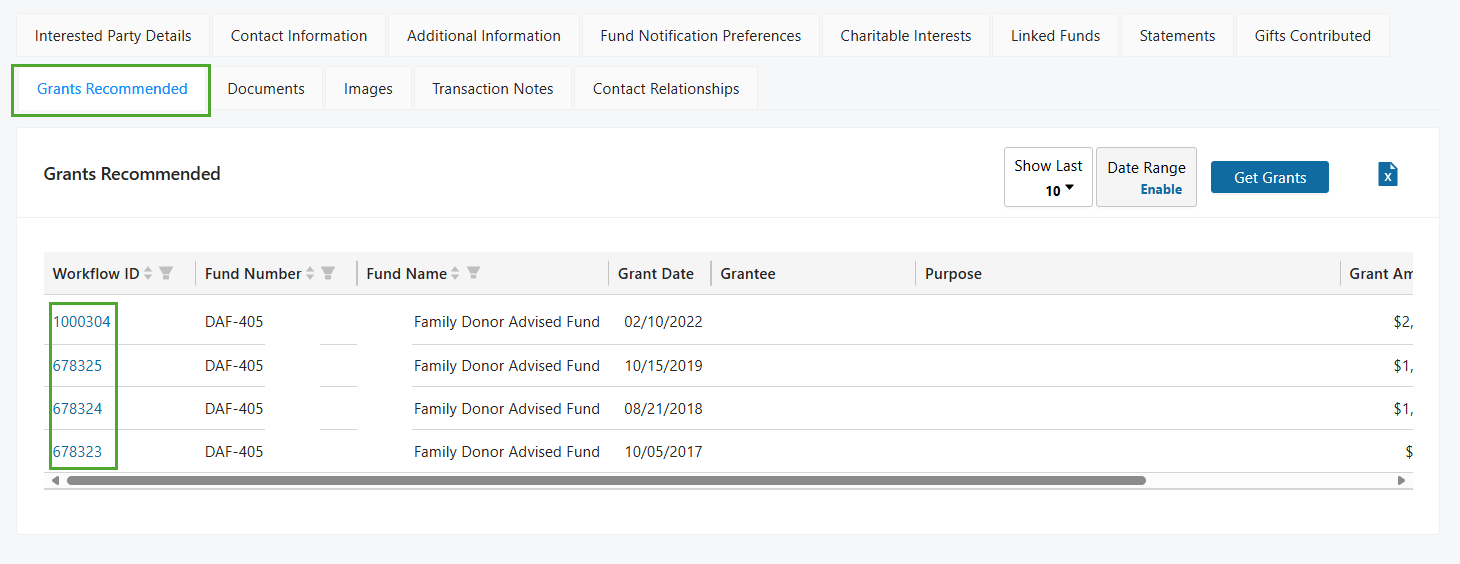
Grants Recommended: View recommended and posted grants to Funds for a specific date range. The listings contain the respective Workflow Id links that pop-up its transaction details, and the section also offers an export as an excel sheet button
.
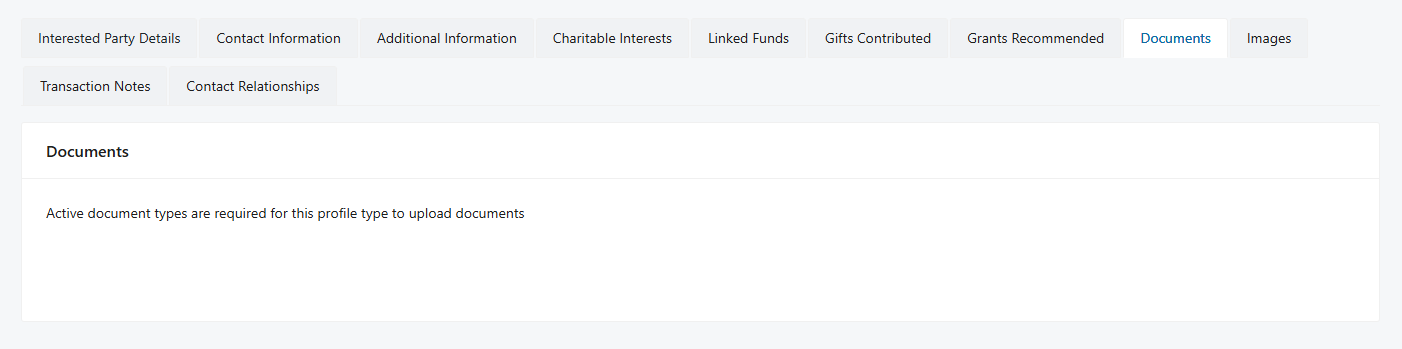
Documents: Add/Remove any associated documents. The accepted file types are DOC, DOCX, XLSX, TXT, PDF and CSV.
.png)
You may receive the below error message. If you receive this message, contact your Institution administrator to add a Document Type in the App Manager or reach out to your FTP support representative for further assistance.
Images: Add/Edit the profile’s Thumbnail image.
.png)
Transaction Notes: Add/Edit any transaction note.
.png)
Contact Relationships: Add/Edit any relationships between the contact and other contacts in FoundationHub. A company (Grantee/Vendor) relation to the contact needs to be added using the company’s profile. To learn more about how this section previously existed in the Old vs. the current New Contact Profiles, click on this article.
.png)
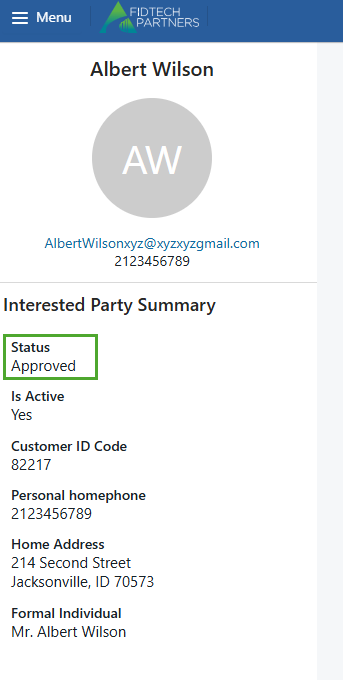
In addition to these sections, there is also a Summary pane that is located on the left of the profile and contains some information related to that profile. Information shown on this pane such as the ‘Status’, ‘Is Active’, ‘Customer ID Code’ information are not editable whereas other information such as contact, address, salutations, etc. are editable using the respective sections where they exist, as discussed above.
If the user has a DonorSphere account, the Summary pane also contains a ‘Mirror User’ button, the functionality of which is explained in this article.
.png)
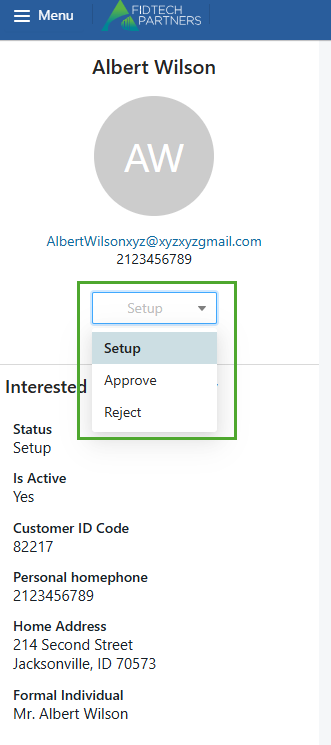
After making any of the above changes, the Interested Party’s profile is initially in ‘Setup’ status. You can see this on the left side of the contact’s profile. The User who edited the Interested Party needs to change their status to ‘Approve’. This forwards the Interested Party’s record to the Approver-Level User’s Inbox.
The Approver-Level User should carefully review each edited section of the new Interested Party’s record. After reviewing, the user then needs to activate the record by changing the status of the record to ‘Approve’.
Note: These approval levels may vary based on your institution.
You can also add, modify, or remove sections and fields in your institution’s Interested Party Profiles. Click here to learn more.