Grantee - Edit Capabilities
- 11 Jul 2025
- 3 Minutes to read
- Print
- DarkLight
Grantee - Edit Capabilities
- Updated on 11 Jul 2025
- 3 Minutes to read
- Print
- DarkLight
Article summary
Did you find this summary helpful?
Thank you for your feedback!
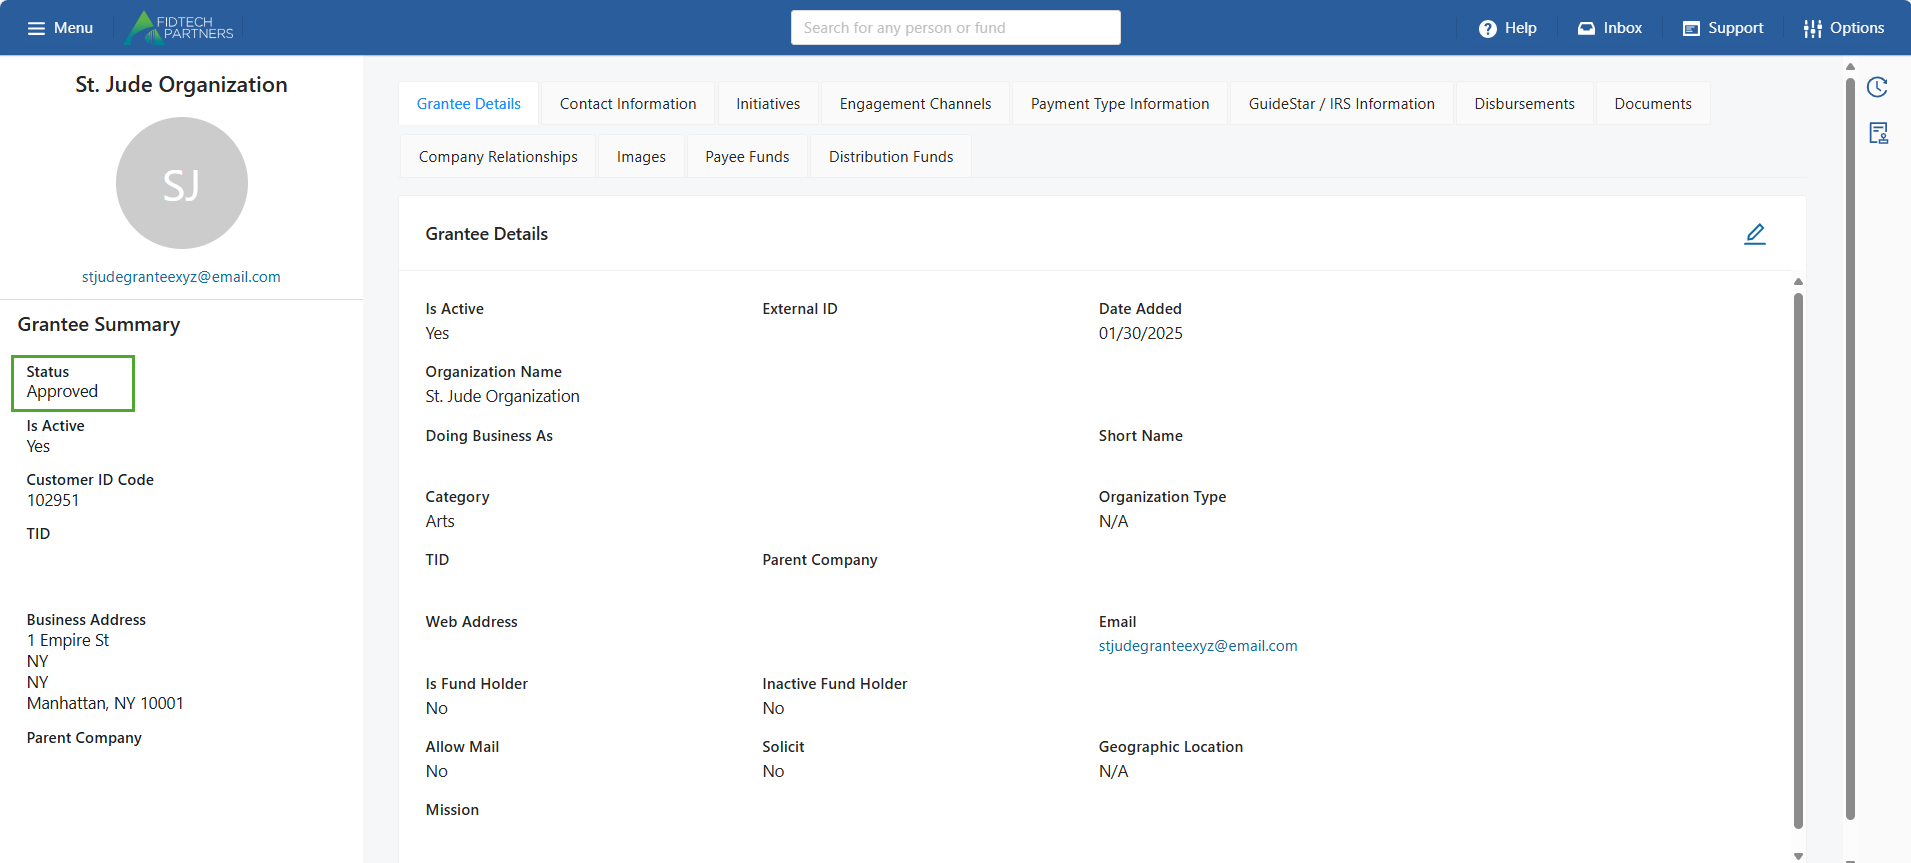
A Grantee’s profile consists of various sections which allow you to access and manage their information. They are as following:
Note: The![]() icon allow you to edit previously entered information, the
icon allow you to edit previously entered information, the  icon allows you to add more information, and the
 .png) icon allows you to delete the information.
icon allows you to delete the information.
Note: Any changes made in these sections may be subject to an approval process, depending on your institution's specific approval policies.
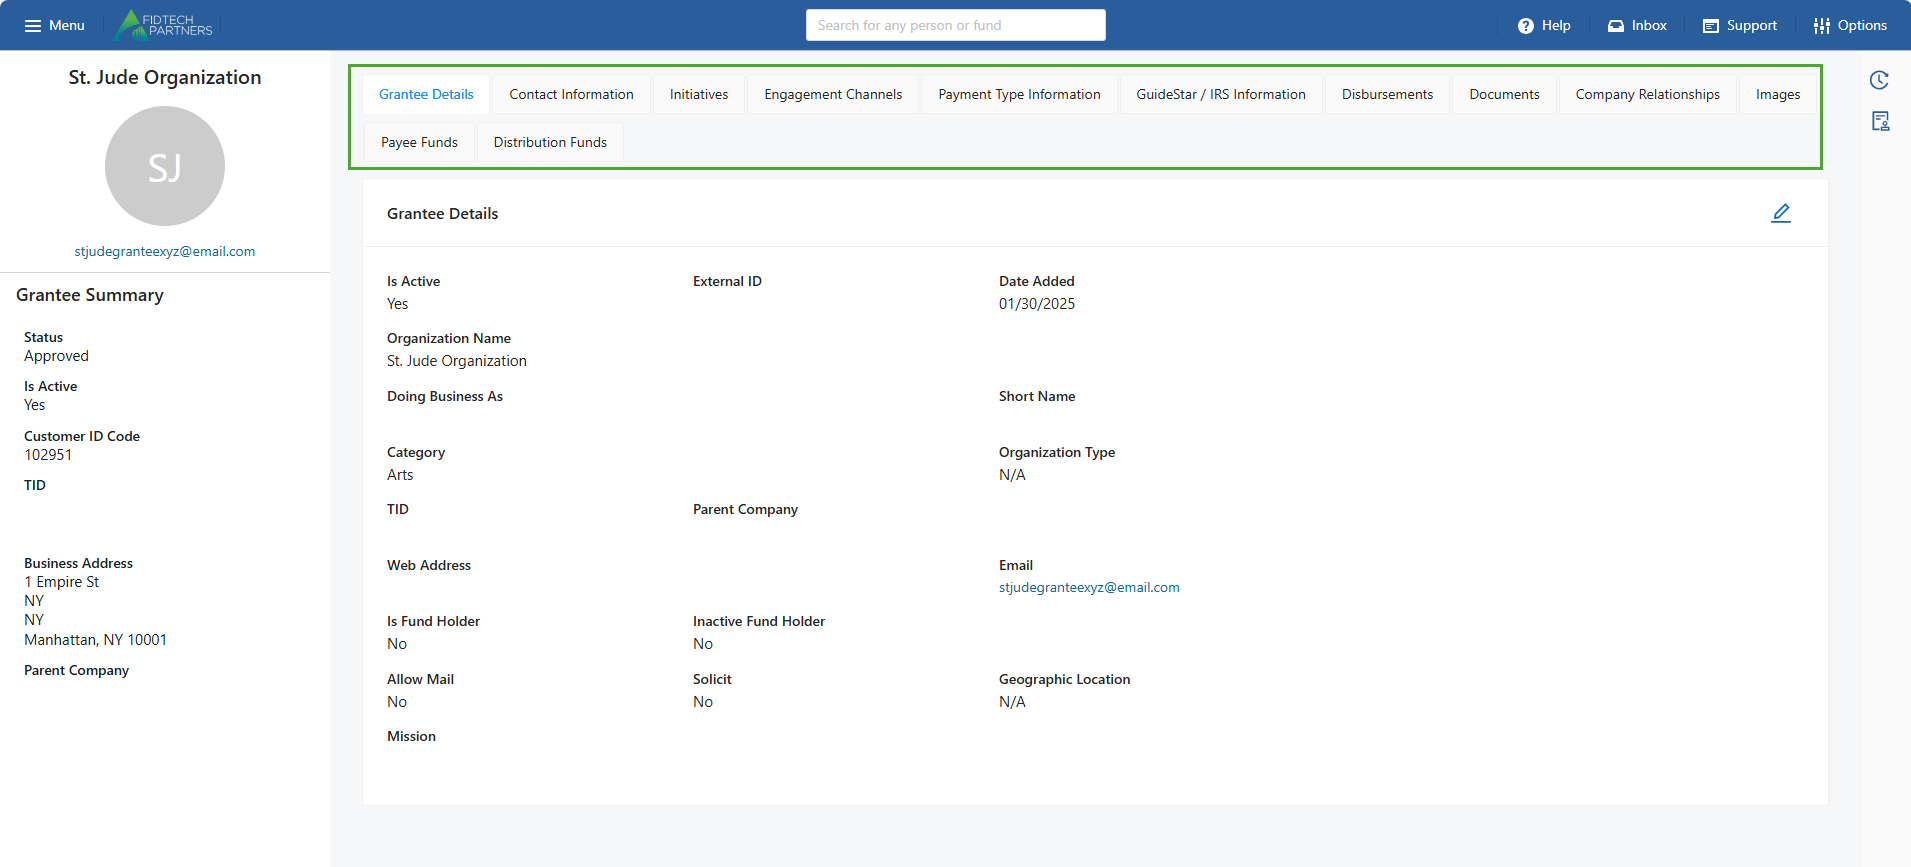
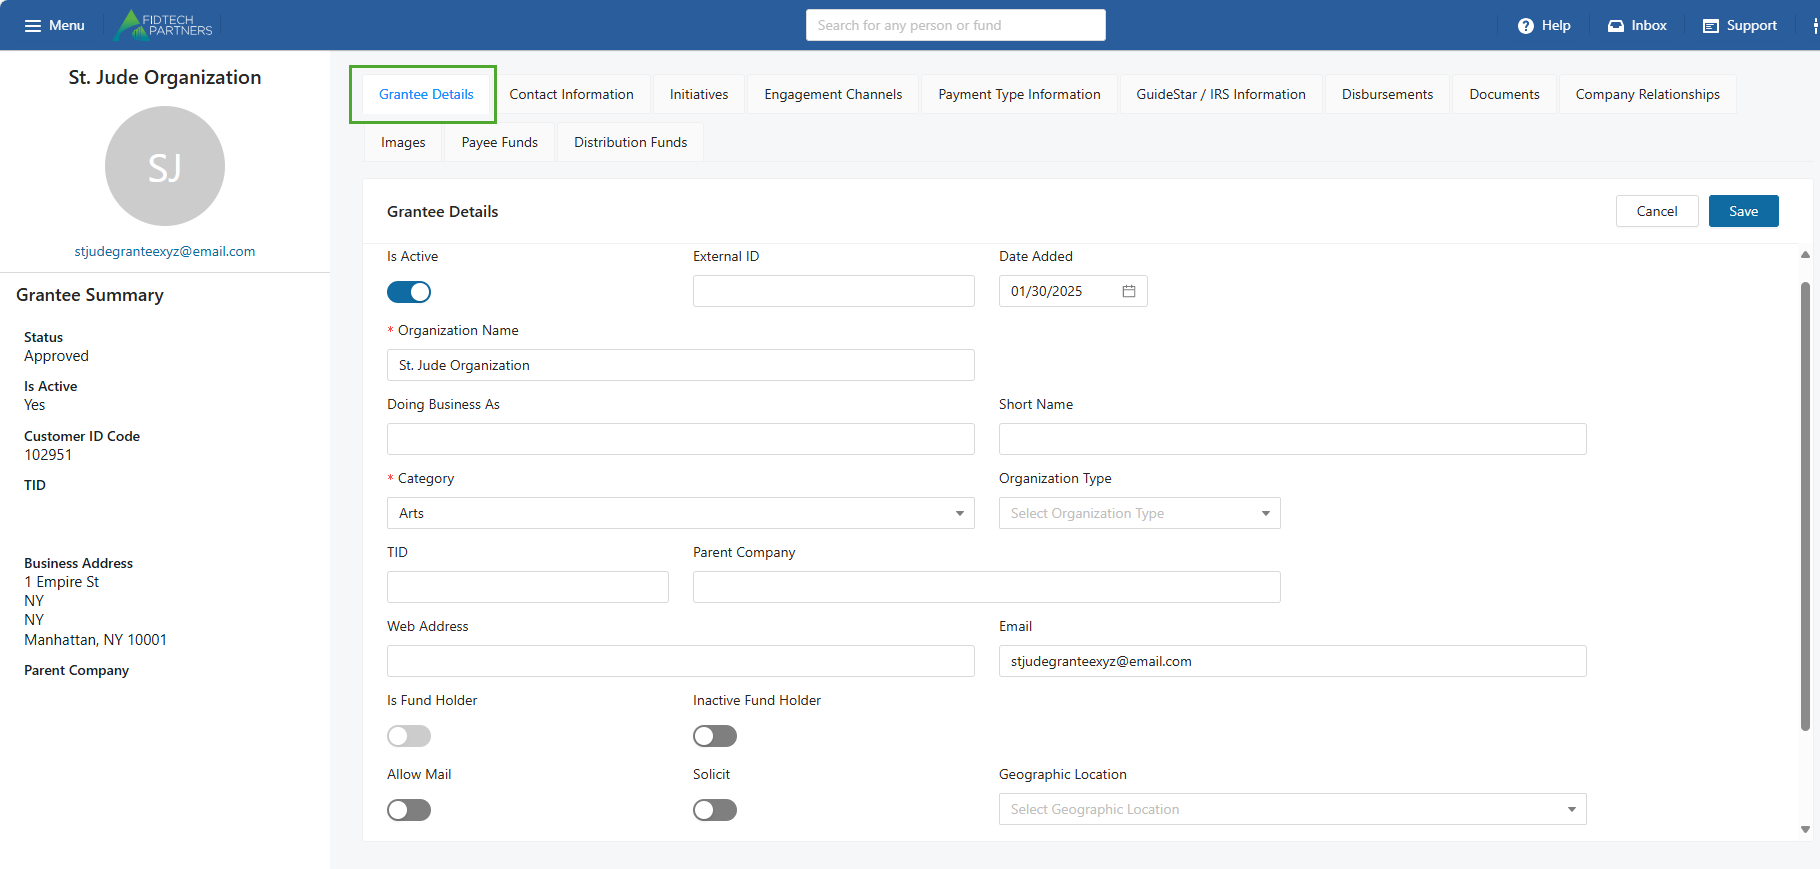
Grantee Details: Add/Edit their basic personal or business information. Clicking the Edit button (highlighted below) here also gives you access to important details or functionalities such as:
Is Active: Switch the Grantee’s status as active or inactive in the FoundationHub.
Is Fund Holder: Indicate if the Grantee is a Fund Holder. Once a Grantee has been designated as a Fund Holder, this cannot be changed.
Inactive Fund Holder: Indicate if the Grantee is just an inactive Fund Holder
Suppress from DonorSphere: Suppress the Grantee’s profile from DonorSphere. If you enable this option, it hides the Grantee’s profile from the DonorSphere, making the Grantee unavailable for receiving Grants through the Donors.
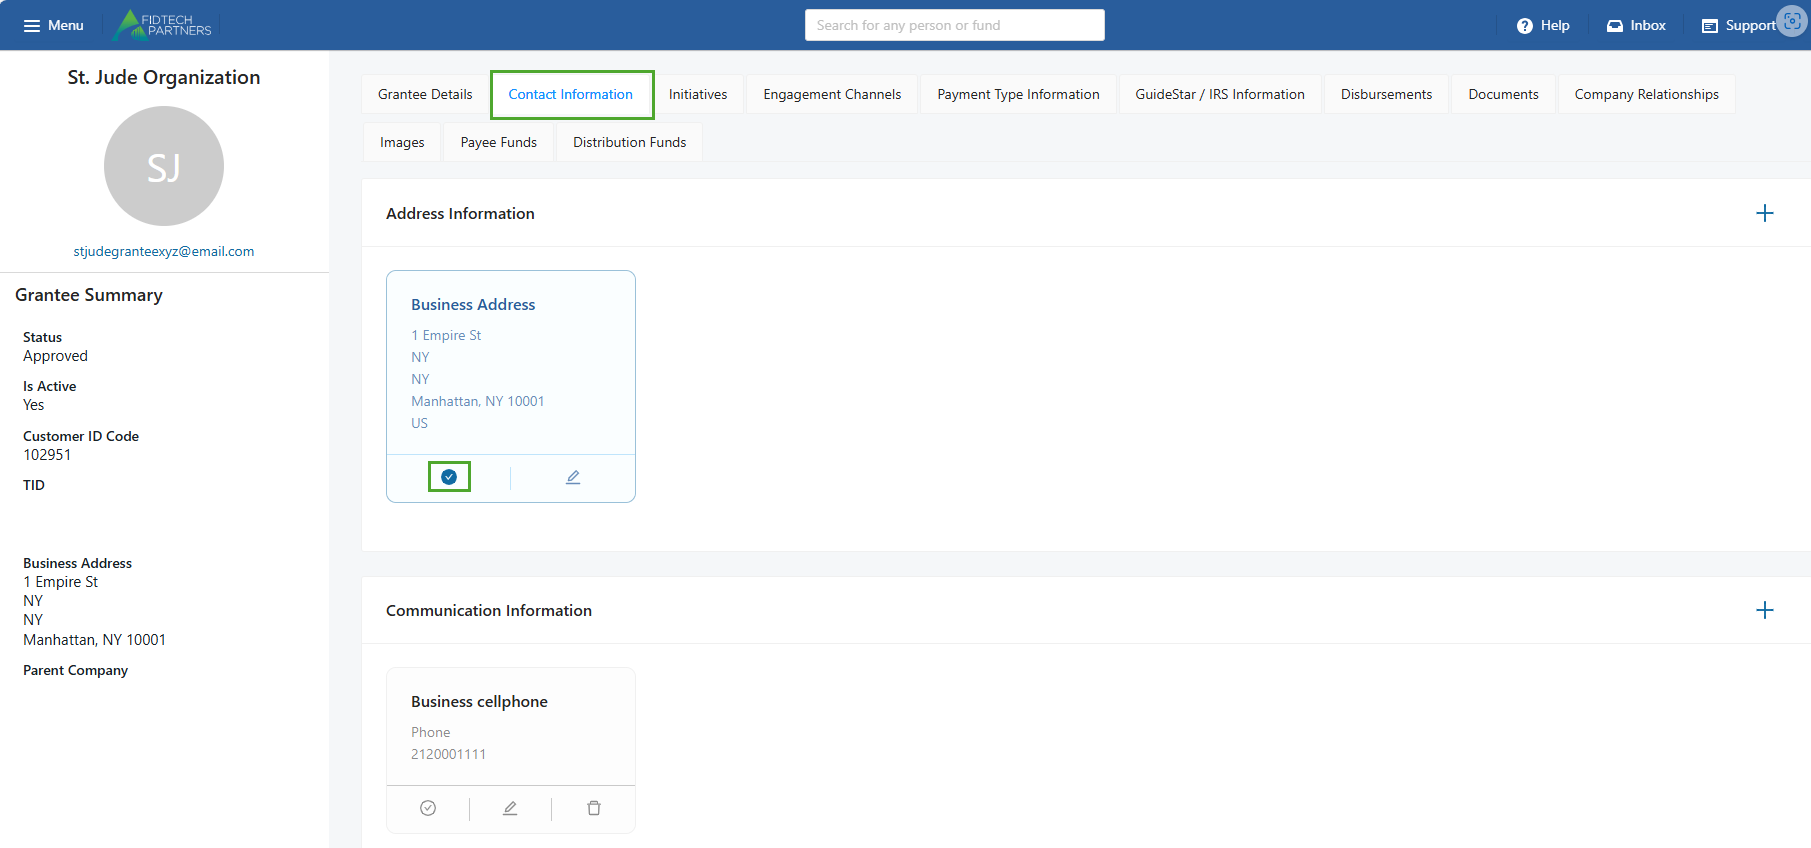
Contact Information: Add/Edit their Address, Communication and Salutation details. A Contact can have more than one Phone or Address of the same type. A Primary contact information is marked with a blue tick. It can be edited but not deleted unless a replacement is added.
Initiatives: View associated Initiatives. Clicking on an Initiative allows you to view its details.
.png)
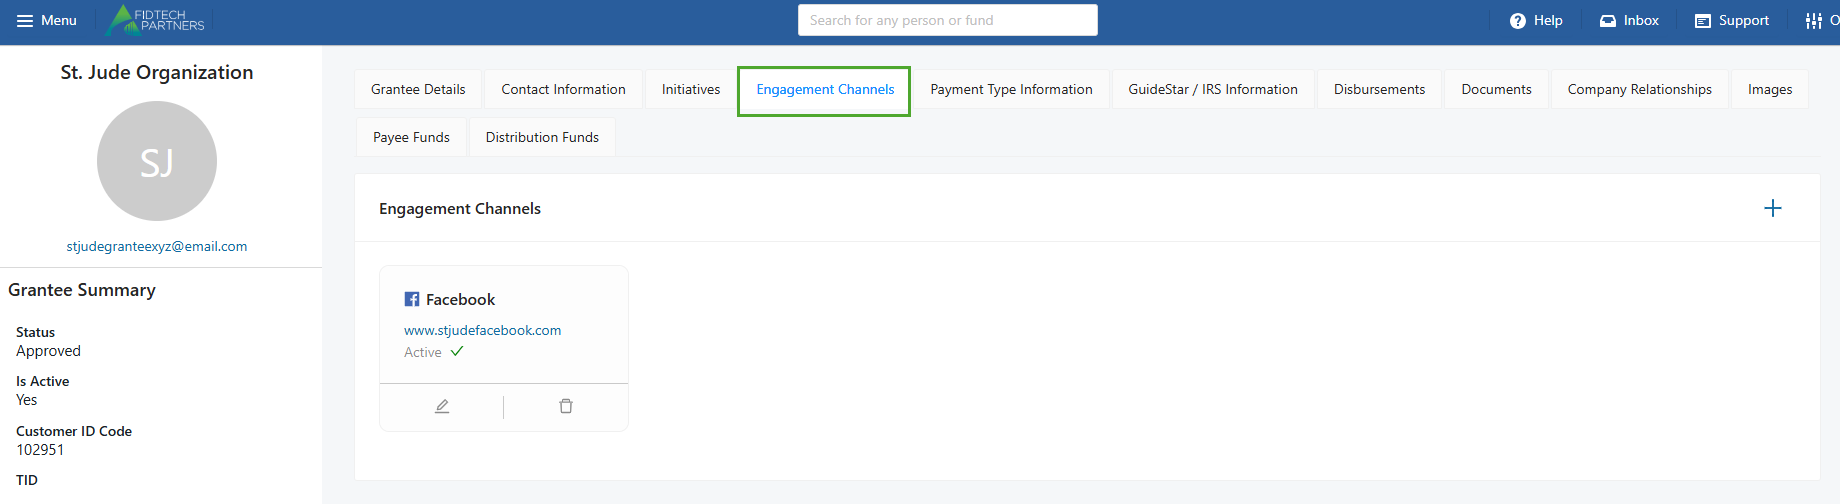
Engagement Channels: Add/Edit their social media details.
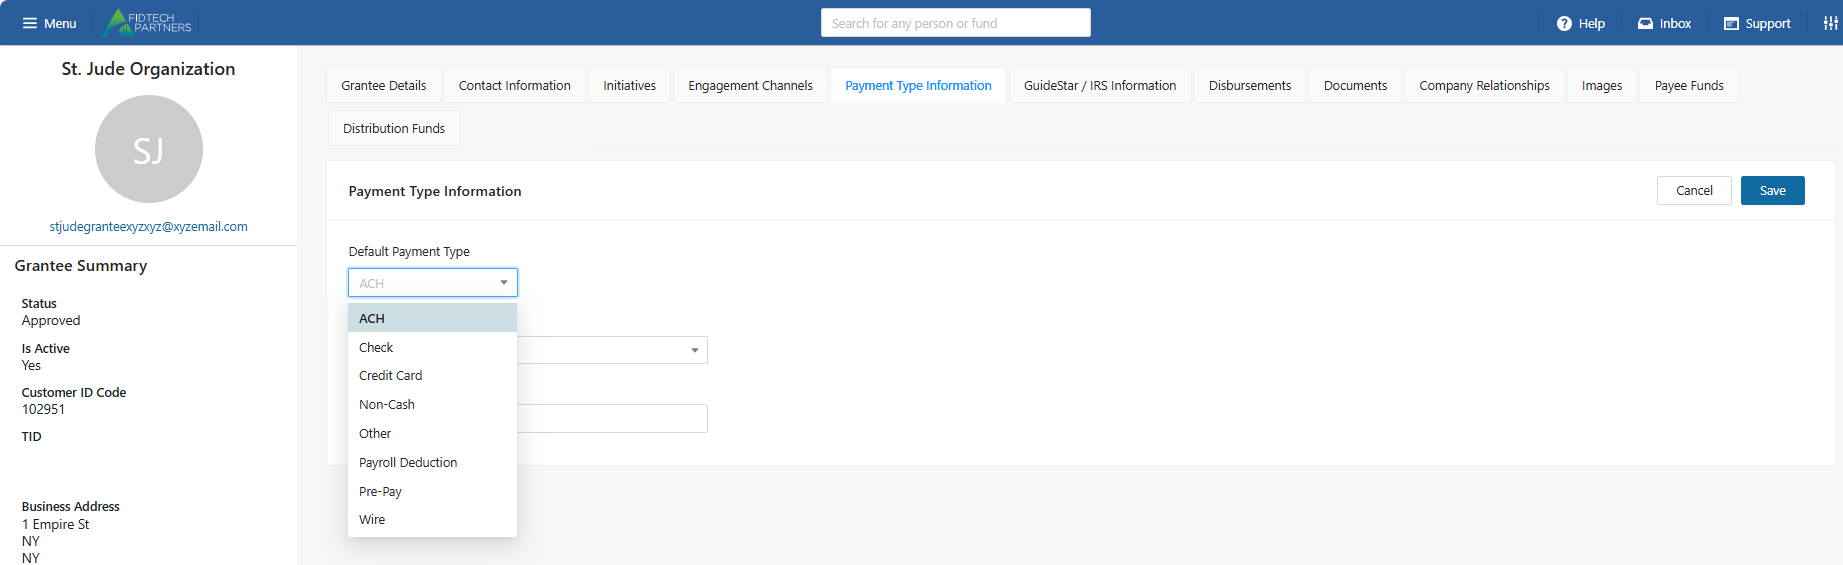
Payment Type Information: Select/Edit their default payment type. Adding an ACH or Wire payment type allows you to link a Bank Account to the contact and add up to 5 associated Email addresses. For more information click on this article
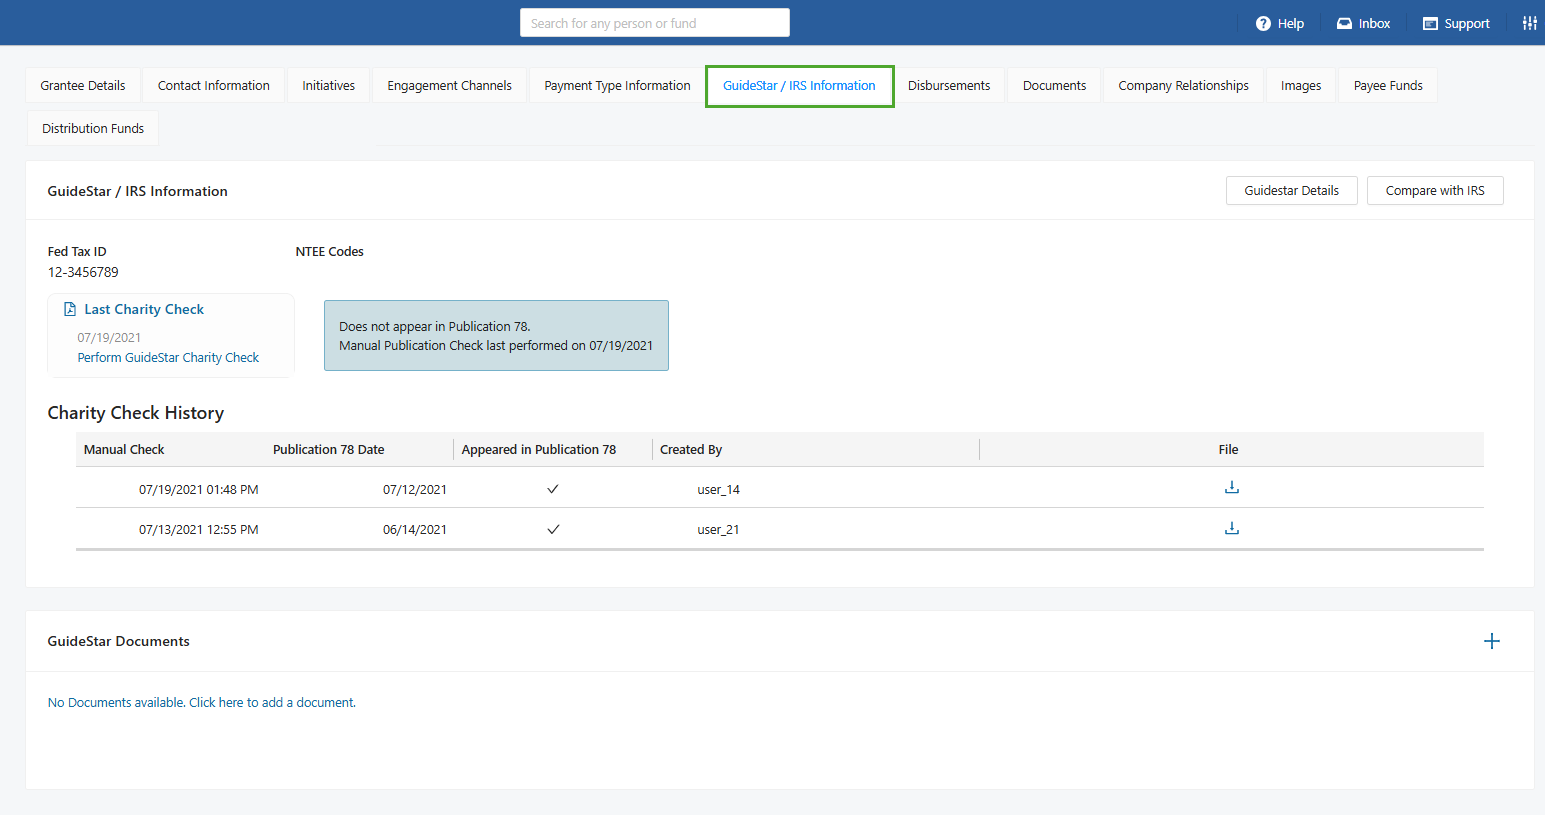
GuideStar / IRS Information: View their previously conducted GuideStar Charity Check history or perform new checks if needed. Once a check has been performed an entry for it is added to the Charity Check History table.
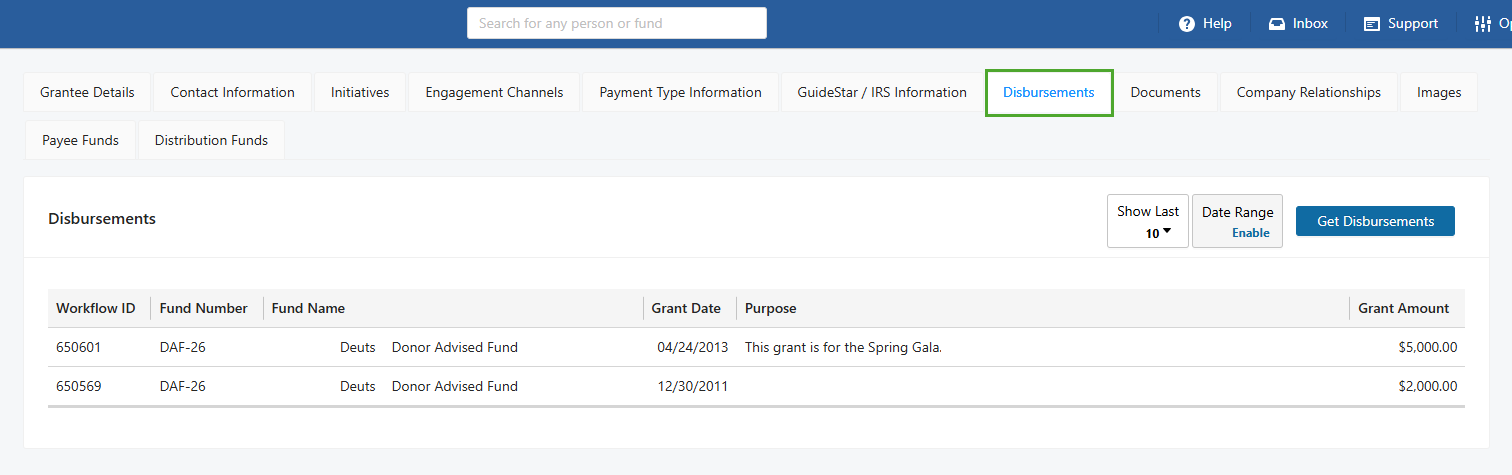
Disbursements: View all of their posted disbursements within a specific date range.
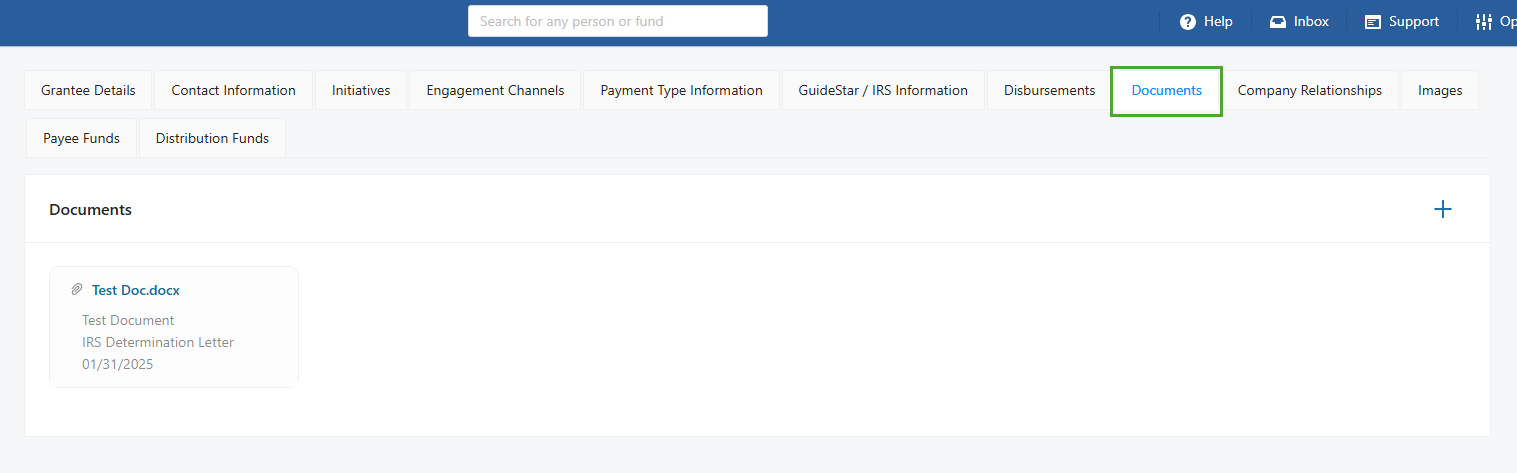
Documents: Add/Edit any associated documents. The accepted document types are DOC, DOCX, XLSX, TXT, PDF and CSV.
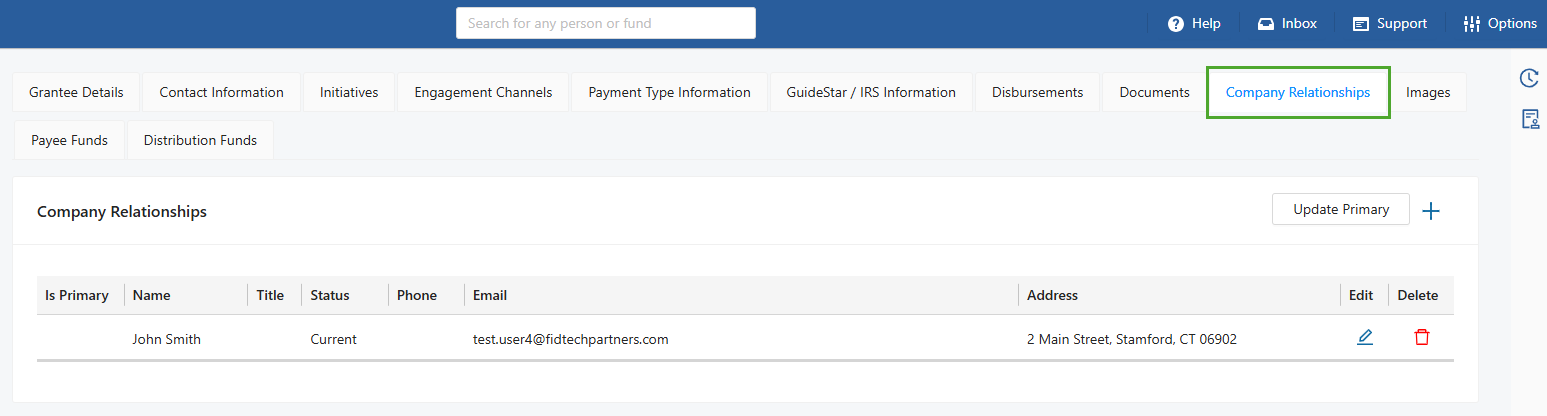
Company Relationships: Add/Edit any relationships between the contact and multiple other contacts in FoundationHub. To learn more about how this section previously existed in the Old vs. the current New Contact Profiles, click on this article.
Images: Add/Edit the profile’s Thumbnail, Banner, Reporting and Signature images.
.png)
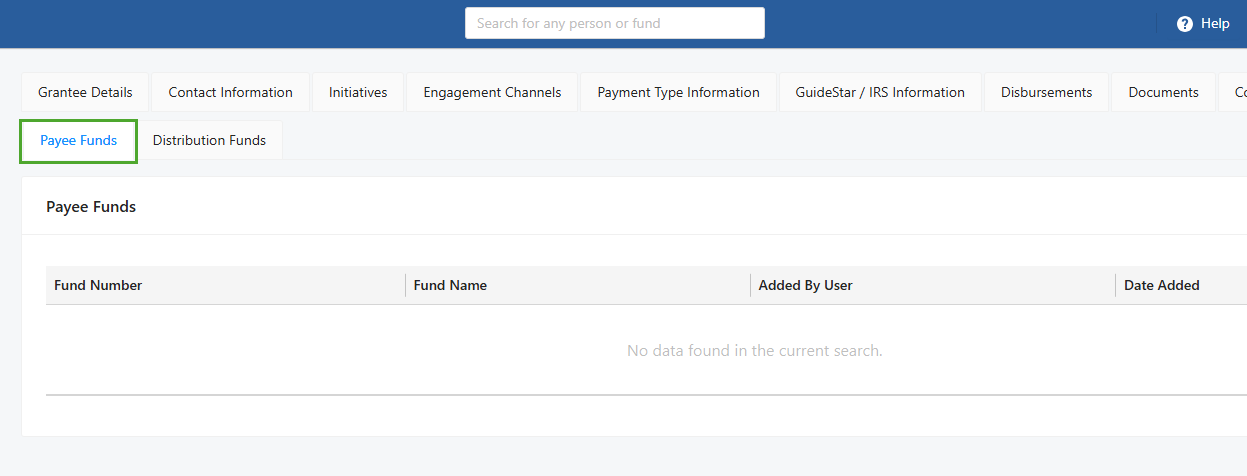
Payee Funds: View associated Payee Funds. It includes all Funds that have the organization set up as a Payee on the Fund profile.
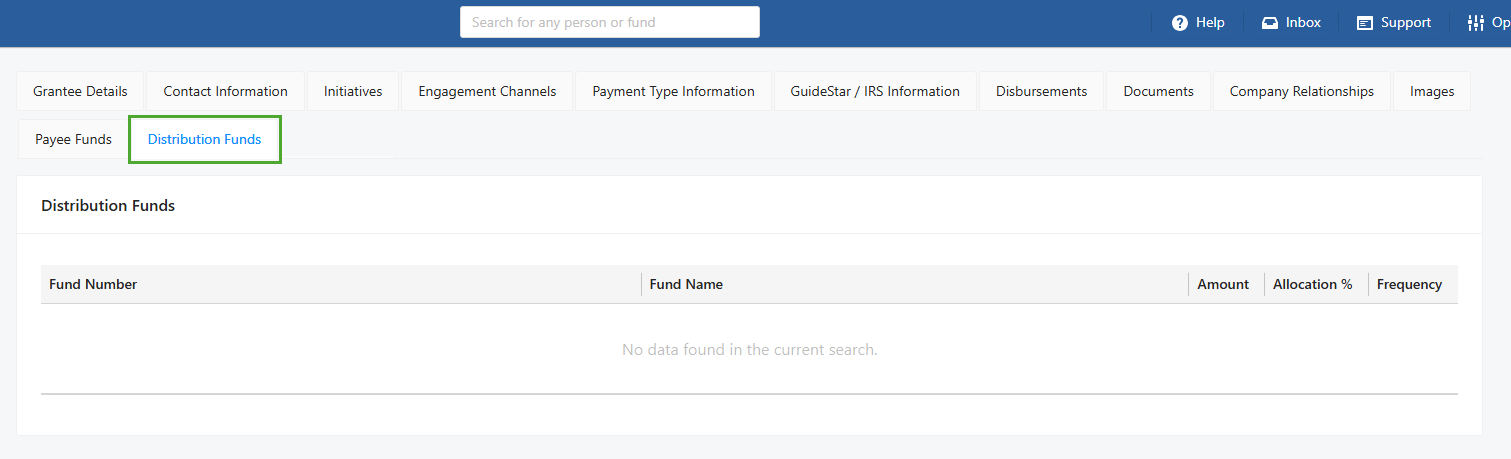
Distribution Funds: View associated Distribution Funds. It includes all Funds that have the Grantee set up for Spending Policy Distributions on the Fund profile.
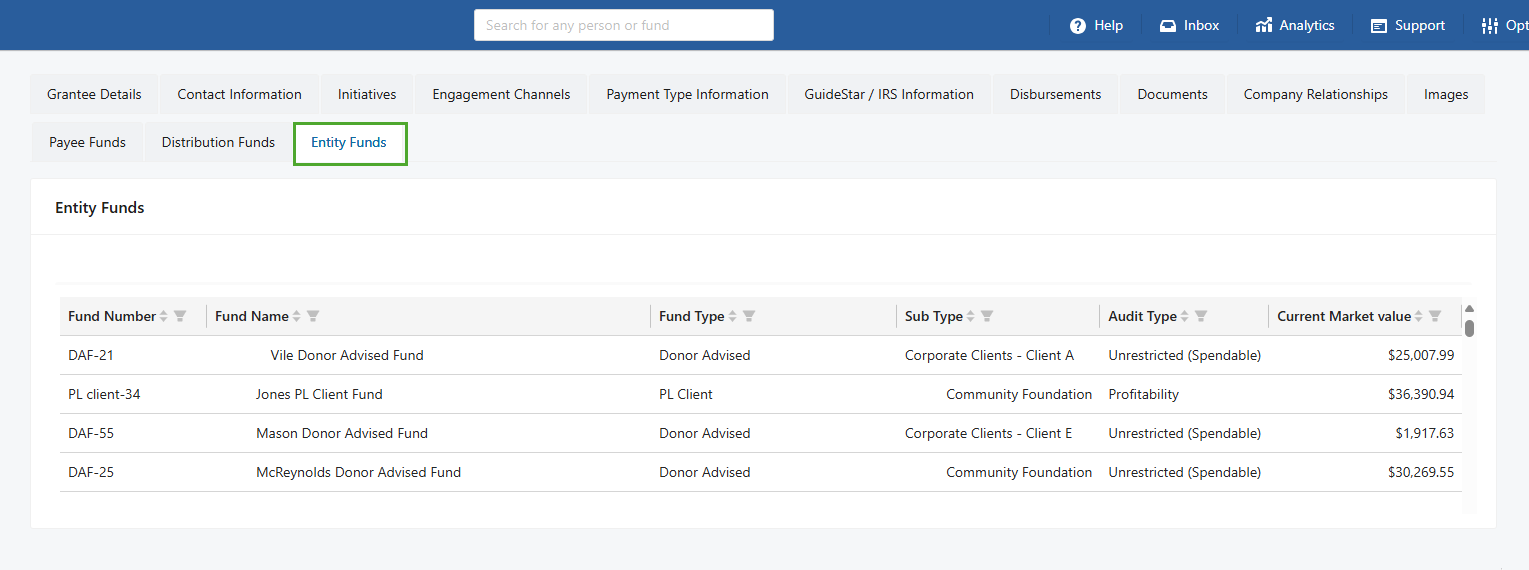
Entity Funds: This section only exists for Grantee organizations that are Fund Holder / Entities and allows you to view all the active Funds linked to it.
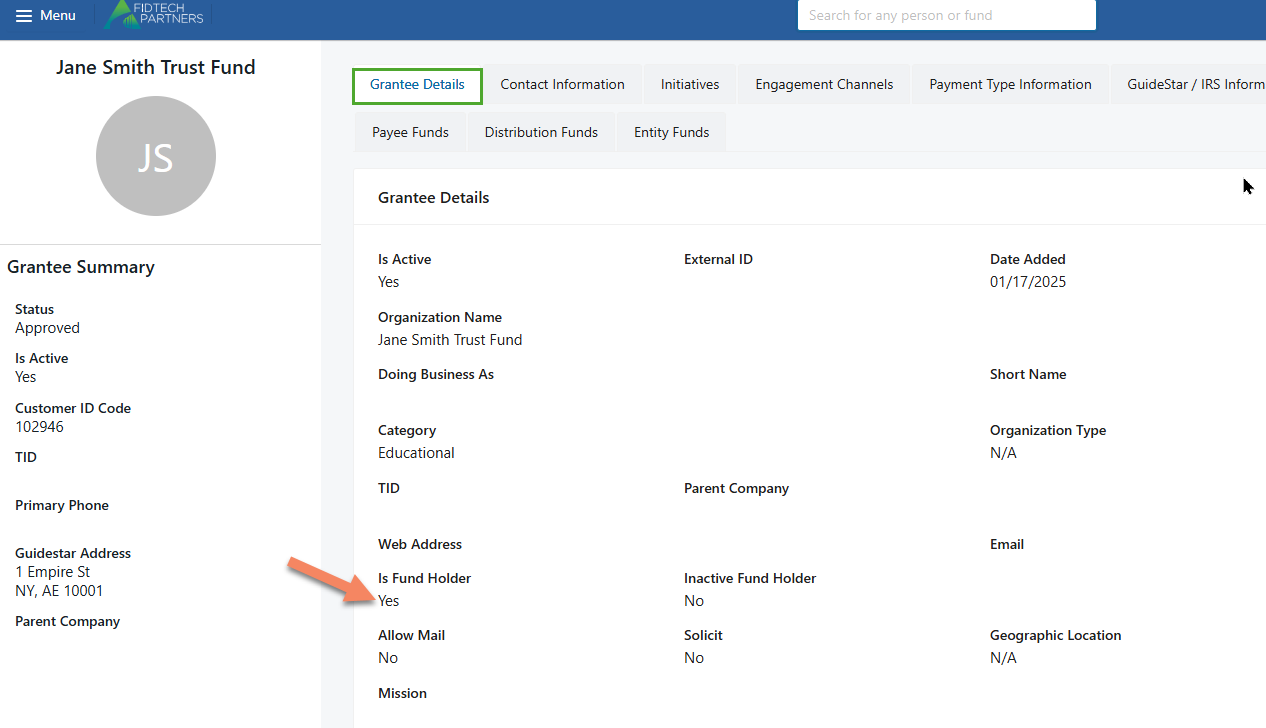
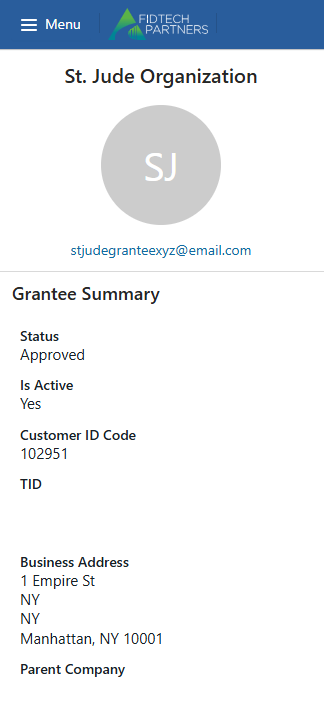
In addition to these sections, there is also a Summary pane that is located on the left of the profile and contains some information related to that profile. Information shown on this pane such as the ‘Status’, ‘Is Active’, ‘Customer ID Code’ information are not editable whereas other information such as contact, address, salutations, etc. are editable using the respective sections where they exist, as discussed above.
After making any of the above changes, the Grantee’s profile is initially in ‘Setup’ status. You can see this on the left side of the contact’s profile. The User who edited the Grantee needs to change their status to ‘Approve’. This forwards the Grantee’s record to the Approver-Level User’s Inbox.
The Approver-Level User should carefully review each edited section of the new Grantee’s record. After reviewing, the user then needs to activate the record by changing the status of the record to ‘Approve’.
Note: These approval levels may vary based on your institution.

You can also add, modify, or remove sections and fields in your institution’s Grantee Profiles. Click here to learn more.
Was this article helpful?