Adding a New Vendor
- 11 Jul 2025
- 2 Minutes to read
- Print
- DarkLight
Adding a New Vendor
- Updated on 11 Jul 2025
- 2 Minutes to read
- Print
- DarkLight
Article summary
Did you find this summary helpful?
Thank you for your feedback!
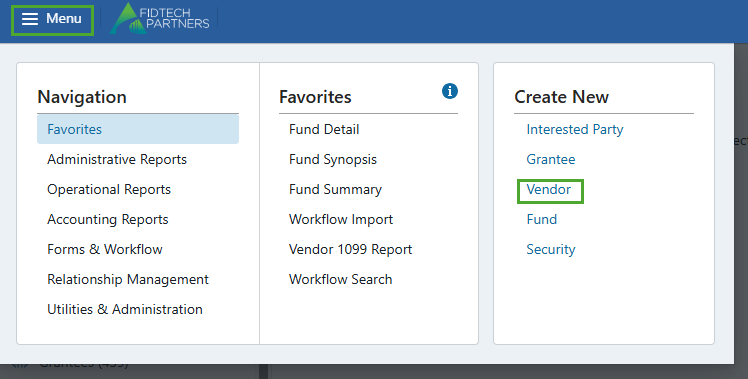
Assuming you have the correct permissions to set up a new Vendor, on the top-left corner, click on Menu > Vendor
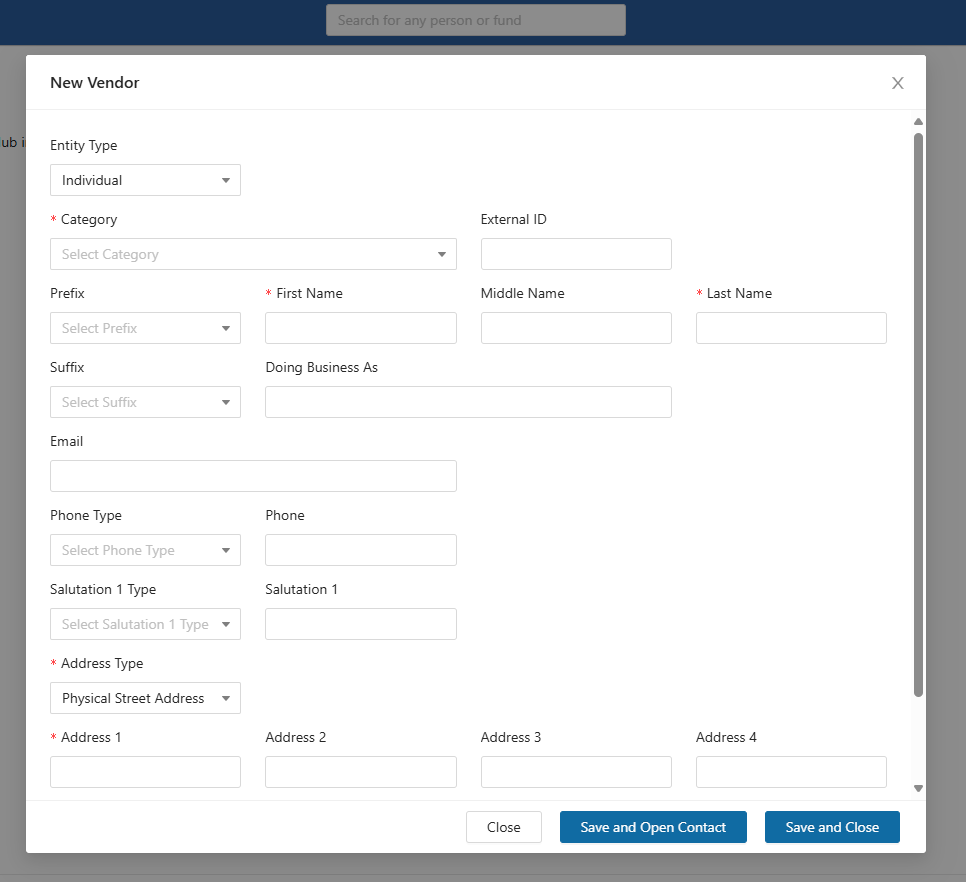
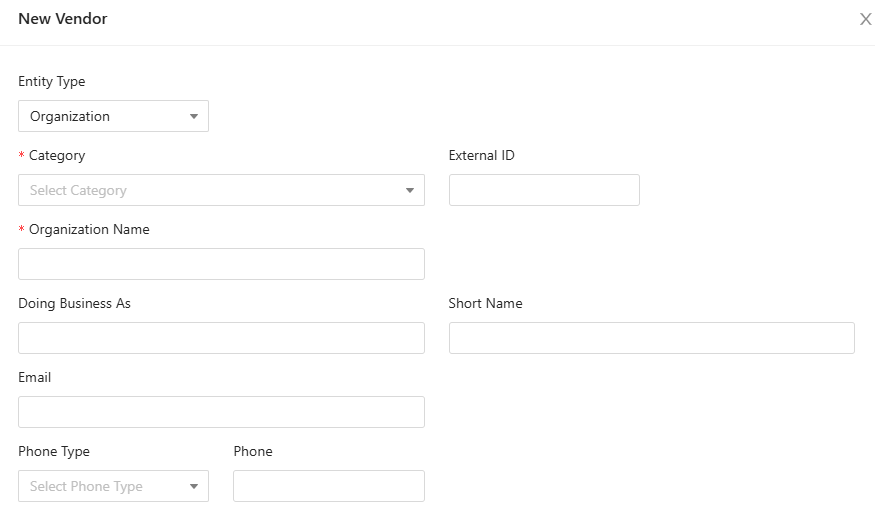
A blank ‘New Vendor’ Form pops up in which the fields marked with a red asterisk (*) are mandatory for the new contact creation.
Note: These fields may vary based on your institution.
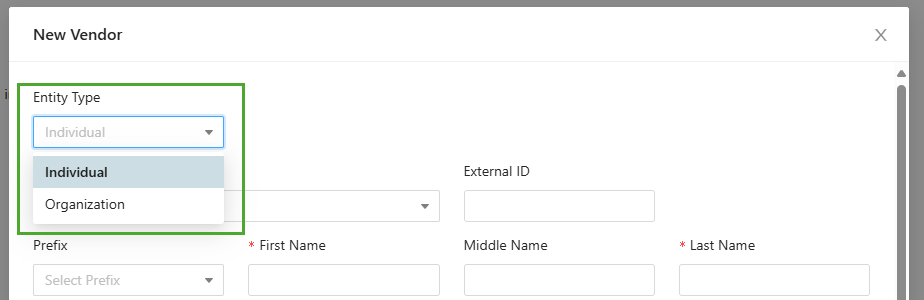
In this Form's Entity Type dropdown, selecting Individual or Organization shows different fields to enter based on your choice.
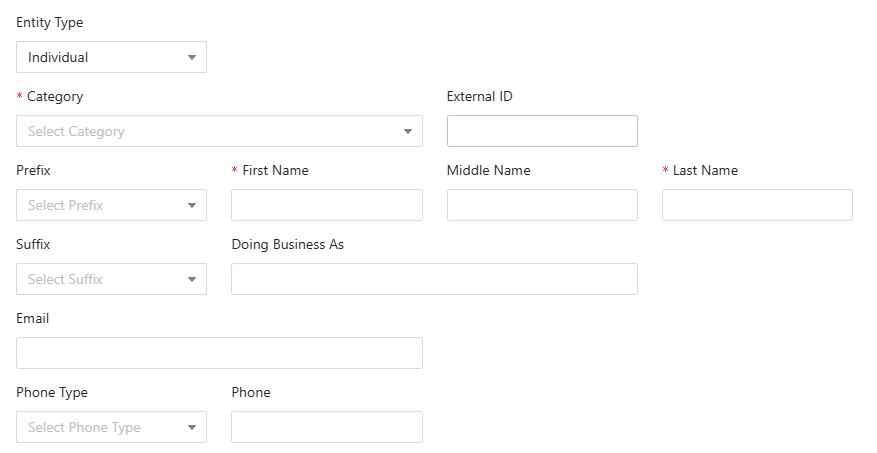
Fields for Vendor: Individual
Entering Contact Info:
External ID field is used to enter a unique identifier assigned to the contact, by an external system or a third party.
For an Entity Type: Individual, you can enter the following details: Prefix, First Name, Middle Name, Last Name, Suffix, Doing Business As, Email, Phone Type and Phone.
Entering Salutation:
Salutation 1 Type and Salutation fields are used to enter the salutation details of the contact that will appear in greetings, letters, statements etc.
E.g. Salutation 1 Type: Formal Individual could have Salutation 1: “Mr. John Doe”

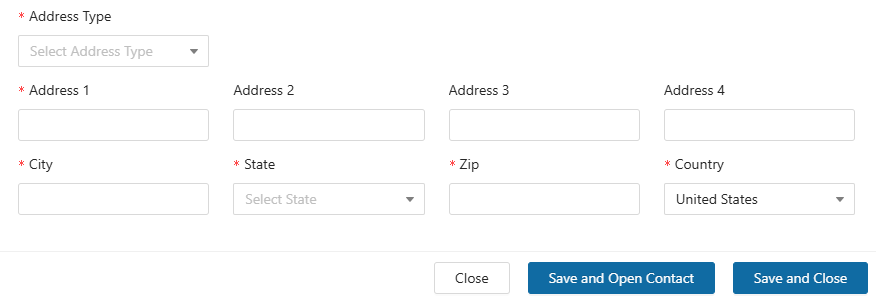
Entering Address Info:
Address Type lets you choose the appropriate type of address.
Address 1 field is used to enter the main address of the contact, whereas the additional Address 2, 3, and 4 fields allow you to enter any text that does not fit in the Address 1 field. City, State, Zip and Country fields are required.

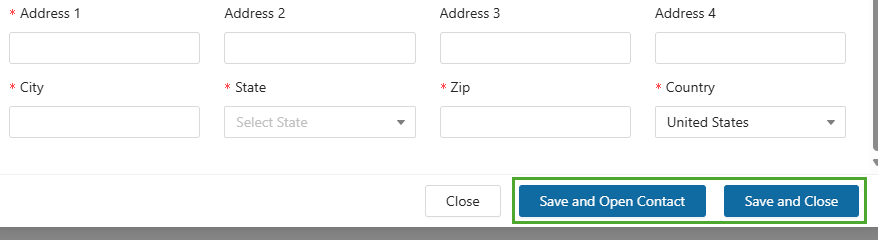
Finalizing the process: After completing all the required fields, proceed as follows:
“Save and Open Contact”: This option saves the Vendor's information and opens their contact profile.
“Save and Close”: This option saves the Vendor’s information and closes the Form.
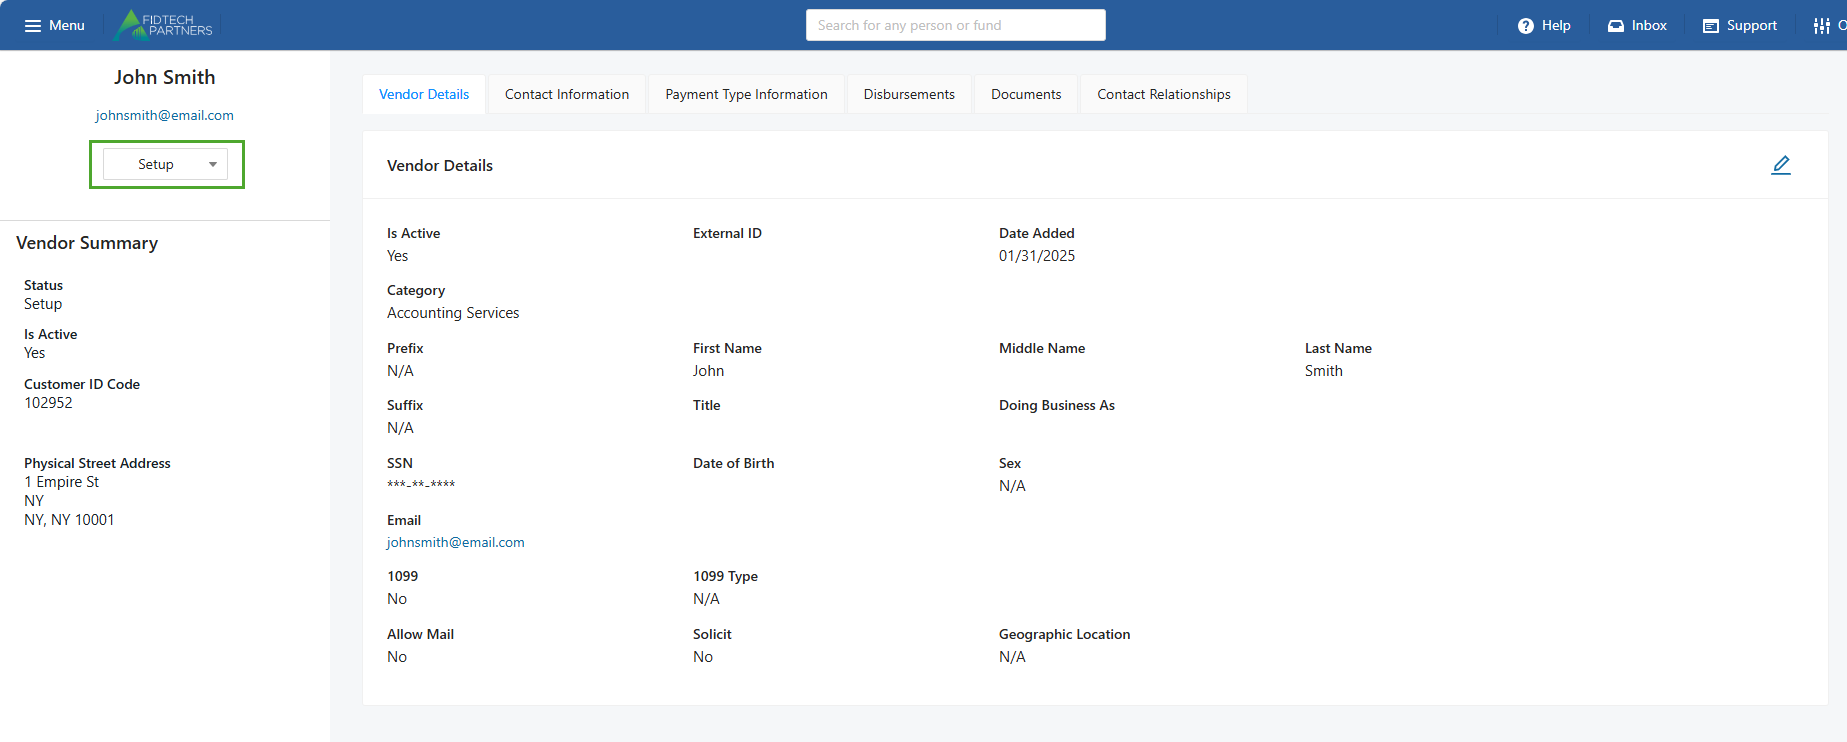
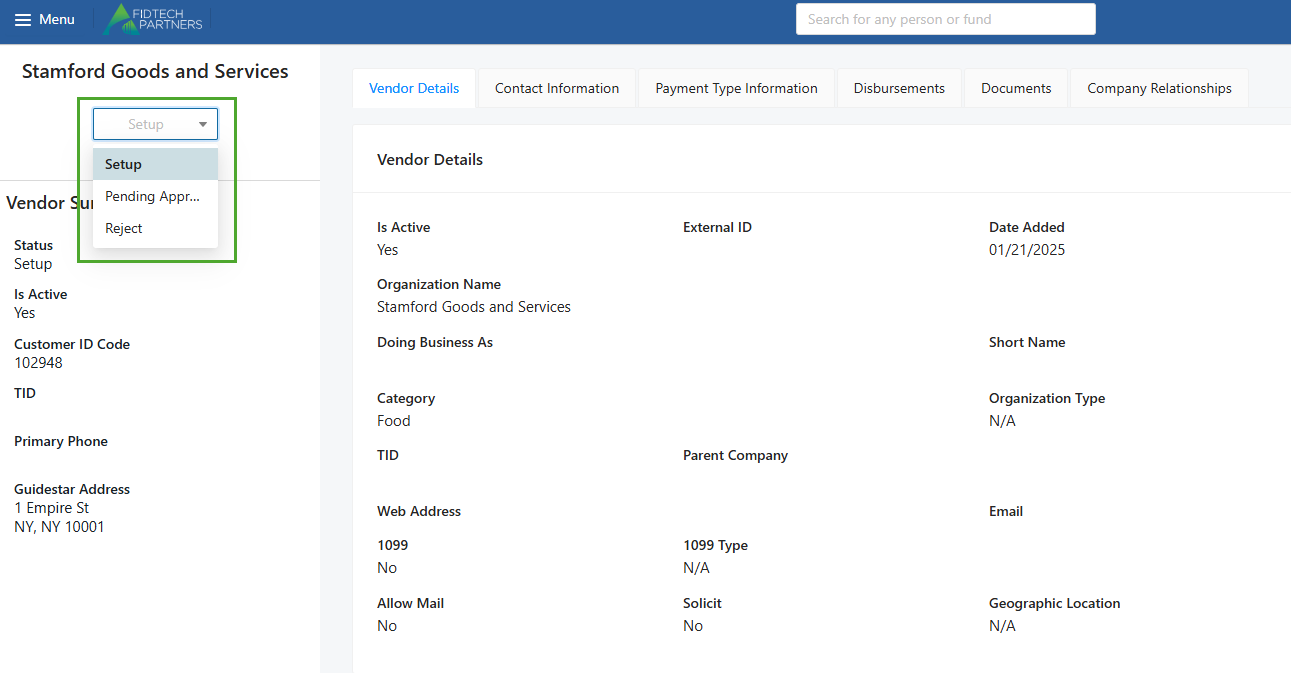
A newly created Vendor’s profile is initially in ‘Setup’ status. You can see this on the left side of the contact’s profile. The Entry-Level User who added the Vendor into FoundationHub needs to change this status to ‘Approve’. You can see this on the left side of the contact’s profile. This forwards the Vendor’s record to the Approver-Level User’s Inbox.
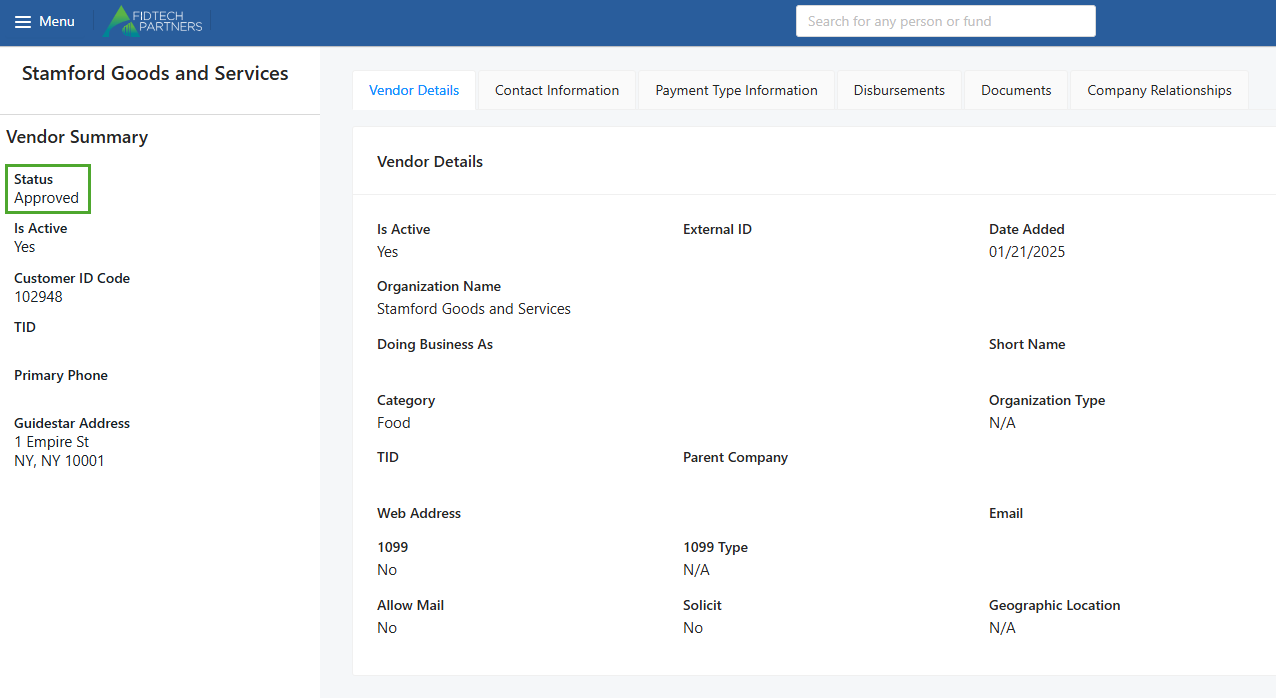
The Approver-Level User should carefully review each section of the new Vendor’s record. After reviewing, the user then needs to activate the record by changing the status of the record to ‘Approve’.
Note: These approval levels may vary based on your institution.

Fields for Vendor: Organization
Entering Contact Info:
External ID field is used to enter a unique identifier assigned to the contact, by an external system or a third party.
For an Entity Type: Organization, you can enter the following details: Organization Name, Doing Business As, Short Name, Email, Phone Type and Phone.
Entering Address Info:
Address Type lets you choose the appropriate type of address.
Address 1 field is used to enter the main address of the contact, whereas the additional Address 2, 3, and 4 fields allow you to enter any text that does not fit in the Address 1 field. City, State, Zip and Country fields are required.
Finalizing the process: After completing all the required fields, proceed as follows:
“Save and Open Contact”: This option saves the Vendor's information and opens their contact profile.
“Save and Close”: This option saves the Vendor’s information and closes the Form.

A newly created Vendor’s profile is initially in ‘Setup’ status. You can see this on the left side of the contact’s profile. The Entry-Level User who added the Vendor into FoundationHub needs to change this status to ‘Pending Approval’. This forwards the Vendor’s record to the Approver-Level User’s Inbox.
The Approver-Level User should carefully review each section of the new Vendor’s record. After reviewing, the user then needs to activate the record by changing the status of the record to ‘Approve’.
Note: These approval levels may vary based on your institution.
Was this article helpful?